
With cloud computing constantly evolving and revolutionizing how organizations deploy and manage their apps, an Azure Container Instance (ACI) has emerged as a powerful solution to enable lightweight and scalable containerized workloads. Azure Container Instance ACI makes it a breeze to execute isolated and serverless containers while ensuring the flexibility of Terraform’s infrastructure as a code approach.
Organizations can effortlessly create and manage ACI instances with public IP addresses, enabling friction-free connectivity and accessibility for containerized applications.
Suppose you are preparing for Microsoft Azure AZ-900 certification, exploring Microsoft Azure, or finding ways to strengthen your understanding of Azure fundamentals and nuances. In that case, creating Azure instances using Terraform is an important concept element. Particularly for the AZ-900 certification course, learning how to create an ACI with a public IP address using Terraform will be valuable.
This blog will guide you through everything you need to know about creating an Azure Container Instance using Terraform with a Public IP Address. We will dive deeper into how you can manage ACI resources and initialize Terraform.
Let’s dig in.
What is an Azure Instance?
Undoubtedly, containers are becoming the favored method to package, deploy, and oversee cutting-edge applications. Azure Container Instance, therefore, are extensively used to provide the quickest and easiest way to run a container without needing to handle virtual machines or adopt a more advanced service.
Moreover, Azure Container Instance is an ideal solution for myriad scenarios like operating within isolated containers offering substantial advantages over VMs regarding startup time. You can launch containers in seconds, eliminating the requirement to set up and manage VMs, making complex processes like deploying applications, task automation, and building jobs a breeze. ACI shows a good amount of scalability and flexibility.
Azure Container Instance pricing varies based on factors such as the container size, region, and usage duration.
Features of Azure Containers Instance
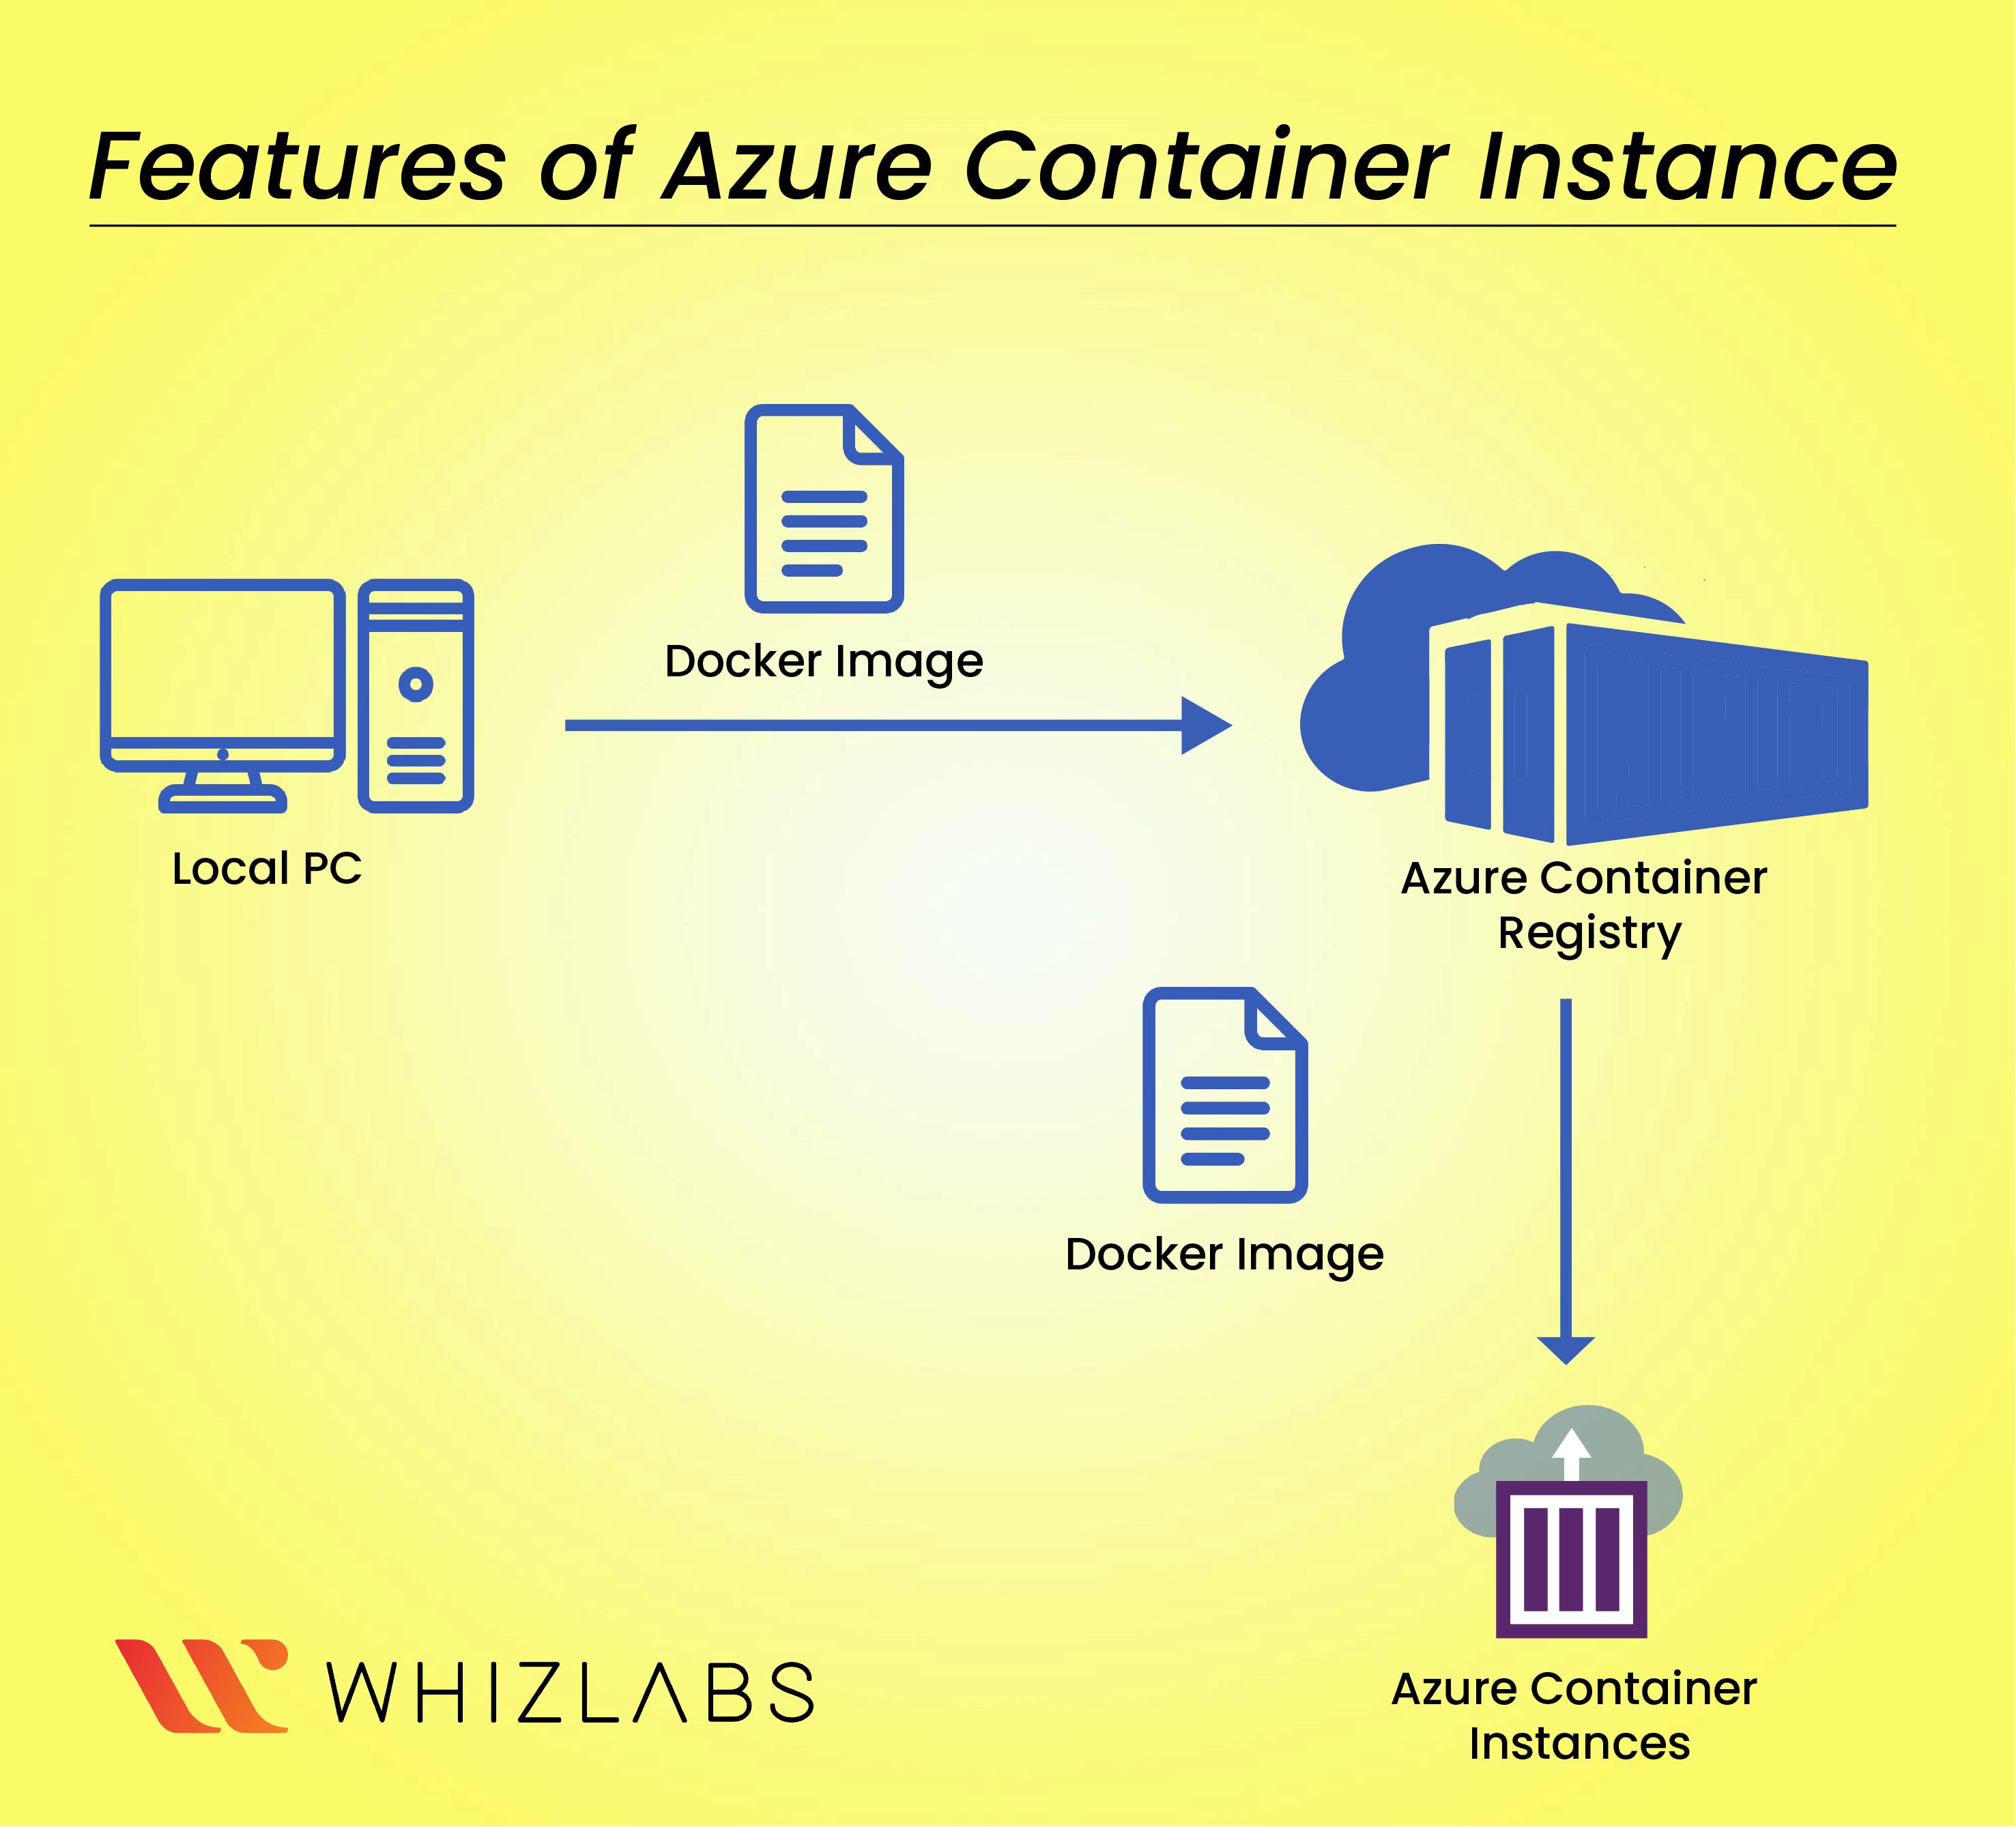
- Support for both Linux and Windows containers.
- Ability to launch new containers through the Azure portal, command line interface (CLI), or preferred automation tools like Terraform, with automatic configuration and scaling of compute resources.
- Support standard Docker images and public container registries like Docker Hub and Azure Container Registry.
- Ability to specify the desired CPU cores and memory for container instances
- Configurable networking features, including assigning a public IP address, adding a domain name prefix, and selecting exposed ports.
- Linux containers have faster startup times due to smaller image sizes than Windows containers. However, Windows containers have some limitations and do not support all the same features as Linux containers.
- Restart policy available for an Azure container instance to define container behavior upon stopping.
- Support mounting volumes, including Azure file share, secret volumes, and git repositories.
- Option to specify command line parameters during container instance creation to override the initial default command.
- Ability to define environment variables for containers
- Access to logs emitted by an Azure container instance.
- Grouping capability to organize multiple containers sharing the same host, storage, and networking resources, similar to pods in Kubernetes
Know More : Tips & Tricks to Pass AZ : 900 Certification Exam
Deploying Azure Instances with Public IP using Terraform
Deploying Azure instances with public IP addresses using Terraform offers a streamlined and automated approach to provisioning infrastructure in the Azure cloud. By harnessing the power of infrastructure as code, you can define and manage your Azure resources consistently and efficiently. This enables you to deploy virtual machines with public IP addresses effortlessly, facilitating seamless connectivity and accessibility. Here’s an overview of the entire process of creating ACI using a public IP address.
- Download and install Terraform on your local machine. Ensure it’s properly configured to interact with Azure.
- Set up an Azure service principal, a security identity Terraform uses to authenticate and interact with Azure resources.
- Define the Azure provider block in your Terraform configuration file (usually named main.tf). Configure it with your Azure subscription details and service principal authentication information.
- Create a resource group in Azure where you’ll deploy your instances. Specify the resource group name and location in your Terraform configuration.
- Specify a virtual network (VNet) for deploying your instances. Define the VNet name, address space, and subnet details in your Terraform configuration.
- Add a resource block to define the public IP address associated with your instance. Specify the public IP name, allocation method, and additional configuration options.
- Create a network interface resource block that connects the public IP with the VNet and subnet. Specify the network interface name, subnet ID, and public IP ID.
- Create a virtual machine (VM) resource block that utilizes the network interface. Specify the VM name, size, OS image, authentication details, and additional configuration.
- Save your Terraform configuration file, initialize the Terraform working directory with Terraform init, preview changes with Terraform plan, and deploy resources with Terraform apply. Confirm the deployment by entering “yes” when prompted.
- After deployment, verify the creation of Azure instances and associated public IP addresses in the Azure portal or by using Azure CLI commands.
Also Read : Microsoft Azure Fundamentals: AZ-900 Preparation Guide
Prerequisites of Deploying an Azure Container Instance with Terraform
Before deploying an Azure container instance (ACI) using Terraform, there are several prerequisites that you need to have in place:
- Azure Subscription: You must have an active Azure subscription to provision resources in Azure. You can create a free Azure account if you don’t have one.
- Install Terraform: Make sure you have Terraform installed on your local machine. You can download the latest version from the official website and follow the installation instructions for your operating system.
- Azure CLI: Install the Azure CLI on your machine, as it provides the command-line interface for interacting with Azure resources. You’ll need it for authentication and resource management. Also, this can also be used as Azure CLI for ACI deployment.
- Azure Container Registry (ACR): If you plan to deploy container images from a private registry, set up an Azure Container Registry (ACR) in advance. ACR allows secure storage and management of container images. Ensure you have the necessary permissions to access the ACR.
- Terraform Configuration: Create a Terraform configuration file (usually named main.tf) where you define your infrastructure as code. This file specifies the Azure provider, resource definitions, and other necessary configurations for deploying ACI.
- Azure Authentication: Configure your authentication method for Terraform to interact with Azure. This can be done using Azure CLI or setting environment variables for Azure credentials.
- Azure Resource Group: Choose or create an Azure resource group where your ACI resources will be deployed. The resource group serves as a logical container for grouping related resources.
- Container Image: Ensure you have the container image you want to deploy to ACI stored in a registry, such as Azure Container Registry or Docker Hub. In your Terraform configuration, provide the required information about the image, such as the registry URL, image name, and tag.
Implementing Terraform code
To implement Terraform, define the Azure provider and create a resource group. Next, we define an Azure Container Instance Group resource called “example-container-group.” We provide the container details inside the container group, such as the image to be used, CPU and memory limits, and the ports to expose. Terraform infrastructure as code allows you to manage infrastructure with configuration files rather than a graphical user interface.
The crucial step to enable the public IP address is to set the ip_address_type attribute as “public” and specify a dns_name_label. The dns_name_label creates a publicly resolvable DNS name for accessing the container instance.
To proceed, ensure you have the Azure CLI and Terraform installed on your machine. Before running Terraform commands, it’s essential to authenticate with Azure using the CLI (az login).
Please note that these instructions assume familiarity with the Azure CLI and Terraform, and it’s recommended to refer to the official documentation for detailed guidance.
Initialize Terraform Code
Define the Azure provider and the resource group where you must deploy the container group. Next, describe the parameter name of the container group and ensure that the location specifies the container group’s name. The resource_group_name parameter refers to the previously created resource group.
Next, to assign a public IP address to the container group, set the ip_address_type to “public.” The dns_name_label determines the DNS name label used to access the container group.
Within the azurerm_container_group resource block, we define a single container using the container block. To create the Azure Container Instance with a public IP, save this code in a .tf file, initialize the Terraform environment, and execute Terraform application.
Create a Terraform Execution Plan
In this code, first, define the Azure provider and enable all features. Then, we create an Azure resource group mentioning the location.
Next, create an Azure Container Group within the resource group. It should have a public IP address and a DNS name label for easy access. To generate the Terraform execution plan, follow these steps:
- Open a terminal or command prompt and navigate to the directory where the main.tf file is saved.
- Initialize the Terraform configuration by running the command
- Verify the configuration by running the command
- Generate the execution plan by running the command
Terraform applies and execution plan that outlines the actions it will take to create the Azure Container Instance with a public IP. Review the program to ensure it aligns with your expectations.
However, before applying the plan using Terraform apply, ensure you have configured Azure credentials and the necessary permissions to create resources in the specified Azure subscription.
Verifying the results
To verify the results of your Terraform execution for launching an Azure container instance (ACI) with a public IP, follow these steps:
- After running terraform plan and reviewing the execution plan, apply the changes by running the command: terraform use.
- When prompted to confirm the changes, type “yes” and press Enter to proceed.
- Terraform will execute the plan and create the necessary Azure resources, including the ACI with a public IP.
- Once the provisioning is complete, Terraform will display the applied changes and provide the output values specified in your configuration.
- Check for any error messages during the execution. If there are errors, Terraform will roll back the changes and provide relevant error details for troubleshooting.
- To verify the creation of the ACI with a public IP, you can log in to the Azure portal or use Azure CLI/PowerShell commands. For example, run the following Azure CLI command to list the container instances in the resource group:
- shellCopy code
- az container list –resource-group aci-example-rg
- Replace “aci-example-rg” with the actual name of your resource group.
- Ensure that the ACI is running and has a public IP assigned. Check the container group’s properties, specifically the IP address and DNS name label you specified.
Clean up resources
To clean up the resources created by Terraform for launching an Azure container instance (ACI) with a public IP, follow these steps:
- Open a terminal or command prompt.
- Navigate to the directory where your Terraform configuration files are located.
- Run the following command to destroy the infrastructure created by Terraform.
- Terraform will ask for confirmation to destroy the resources. Type “yes” and press Enter to proceed.
- Wait for Terraform to complete the destruction process. It will delete the ACI, public IP, and other associated resources.
- Once the resources are successfully deleted, Terraform will display a message indicating the completion of the destruction process.
- Verify the deletion of the resources by logging in to the Azure portal or using Azure CLI/PowerShell commands. Check the resource group to ensure that the ACI and public IP have been removed.
Conclusion
Hope this blog helps you take a deep dive into creating an Azure container instance with a public IP address using a public IP. If you are kick-starting your career in Azure Certification Path infrastructure or preparing for Azure fundamentals for AZ-900 certification, note that this concept is a critical skill to gain.
However, Azure Container Instance benefits fast, isolated computing to meet traffic that comes in spikes, without the need to manage servers. However, you need authentic resources, guides, and practice labs to launch ACI using Terraform codes for comprehensive upskilling. ACI cost optimization in Azure will manage your cloud spending and focus on what matters most to your business.
With this in mind, Whizlabs brings all the materials you need to understand Terraform code and deploy an Azure container instance. You will find video lectures by domain experts, round-the-clock support from the Whizlabs teams, dedicated hands-on labs, and Azure sandbox to understand the scope and challenges of implementing ACI using Terraform. Does this pique your interest? Reach out to us today!
- AWS Security Specialists: Essential in Modern Cybersecurity - August 16, 2024
- Cloud Developer Tools Showdown: AWS vs Azure vs GCP - August 14, 2024
- Master AWS Lambda and API Gateway for Application Development - August 6, 2024
- Benefits of AWS Developer Associate Certification which Can Boost Your Career - July 24, 2024
- Preparation Guide on Datadog Fundamentals Certification - July 17, 2024
- What is DLP in Power Automate? - June 5, 2024
- Top Data Engineering Certifications in 2024 - May 30, 2024
- How Difficult is Google Cloud DevOps Engineer Certification? - May 29, 2024