

The global pandemic of 2020 has ushered us all into an era of Cloud Computing and virtual machine setup. Businesses and organizations across the world are finding cloud computing to be the ideal business and work operation alternative. As companies and individuals move to the cloud space, virtual machines become significant. Microsoft Azure is one of the most popular and significant cloud service providers, who have consistently delivered a great performance. This has fuelled the usage of Azure Virtual Machine as well.
Read more on How to Configure and Manage Virtual Networks? (A Step-by-Step Guide) Now!
Before we get started with setting up our own Azure Virtual Machine, let’s get a brief overview of Azure Virtual Machines.

Understanding Azure Virtual Machines
Azure offers several highly scalable computing resources on-demand, and Azure Virtual Machine is one of them. If you require more control over the computing environment than the other computing resources offer, then you should opt for an Azure Virtual Machine. Hold on till the end to understand if you should consider creating an Azure Virtual Machine and how to create it.
With Azure Virtual Machine, you get the flexibility of accessing a virtual platform without buying and maintaining the physical hardware that can run the operation. But you will also need a proper maintenance plan for your Azure Virtual Machine while performing tasks like configuring, patching, parsing, and installing the softwares to run on the virtual machines.
There are wide use cases of Azure Virtual Machine, but some examples include:
-
Cloud Applications
Your requirement of running applications will constantly change based on your business. Using Azure Virtual Machine is a cost-effective solution that can allow you to pay for extra virtual machines whenever you need them. When out of use, you can shut down these virtual machines.
-
Extended Data Center
You can easily connect your organization’s network to an Azure Virtual Machine available in the network.
-
Development
If you need a computer with a definite configuration to write a code or test any application, then Azure Virtual Machine can be a feasible way to go about the process.
Whatever be the extent of your requirement, you can scale up using Azure Virtual Machine and streamline your workflows.
Considerations before creating an Azure Virtual Machine
Whenever you set out to build an application infrastructure using Azure, there are several design considerations to note. Before deciding upon creating an Azure Virtual Machine, there are a few things that you must think about, like:
- The names of the application resources that you use on Azure Virtual Machine
- The storage location of the resources
- Size required for the Azure Virtual Machine
- Maximum number of virtual machines that you may require to create
- The operating system of the Azure Virtual Machine
- The configuration of the virtual machine after starting up
- All kinds of related resources and extensions that the Azure Virtual Machine requires
Now that you are equipped with the basic information about Azure Virtual Machine, it is time to get started with creating the virtual machine.
Read more on Top 10 Cost Optimization Tips for Azure!
Steps to create Azure Virtual Machine
First things first, you can create an Azure Virtual Machine through the Azure portal. A simple browser-based user interface can help you create virtual machines along with all the additional resources. With this quick step-by-step guide, you can deploy your own Azure Virtual Machine.
Before getting started, make sure that you have an active Azure subscription. If not, then don’t worry! You can create a free account and then go about the following steps.
Step 1: Starting the Process of Setting up Azure Virtual Machine
- Now that you have an active Azure subscription, open the Azure management portal through www.portal.azure.com and log in.
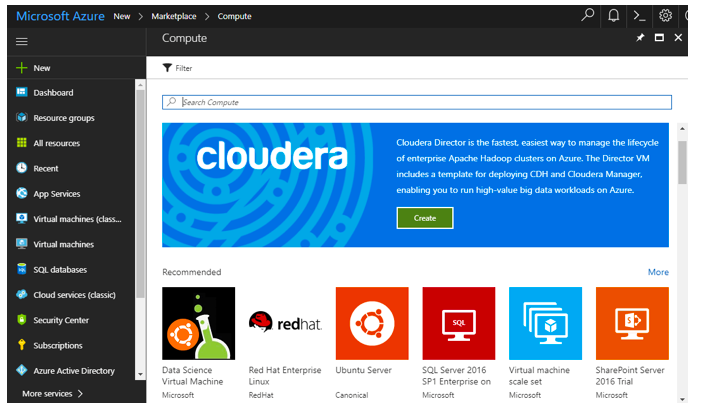
- Once you have logged in, head to the ‘Navigation’ section and click on ‘New.’ Click on ‘Marketplace’ and hit ‘Commute.’
Step 2: Selecting A Server Image for the Azure Virtual Machine
In the “Virtual Machines Marketplace” tab, you can find several virtual machine configurations and pre-configured images. Here you can also find official images from Microsoft, its partners, and ISVs. For a Windows-based Azure Virtual Machine deployment, these images are best suited. You can also load up images from reliable partners like Red Hat or Canonical.
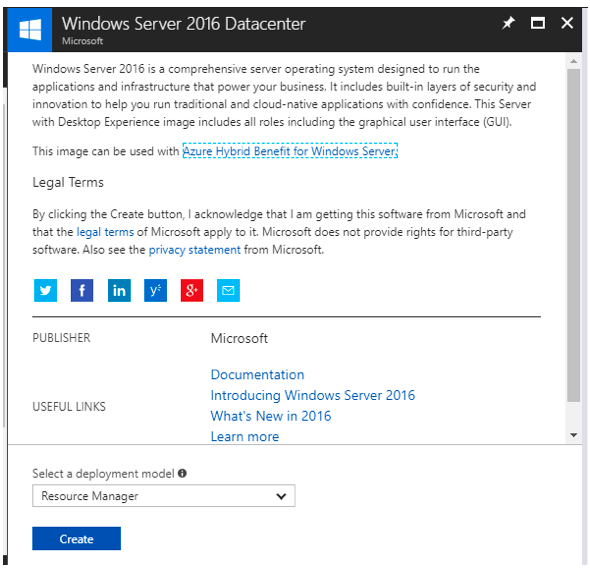
- You can select any of the images from the various available options. By selecting the image, you can also preview all the information associated with it.
- After this, you have to select the kind of deployment model that you require for the chosen image. “Resource Manager” is mostly the recommended deployment model.
- Once you have chosen the deployment model and clicked on “Create”, you have initiated the process of creating your Azure Virtual Machine.
Read more on Azure Virtual Private Cloud – Guide now!
As we move on from the basics, we will now focus on the actual creation of the Azure Virtual Machine. The following steps will deal with configuring the basic settings for your Azure Virtual Machine.
Step 3: Creating the Azure Virtual Machine
- On the Azure portal, select Virtual machines.
- Open the Create a virtual machine screen with the help of Select + Add.
- In the Create a virtual machine panel, you can get distinct tabs like Basics, Disks, Networking, Advanced, Tags, and Review + create.
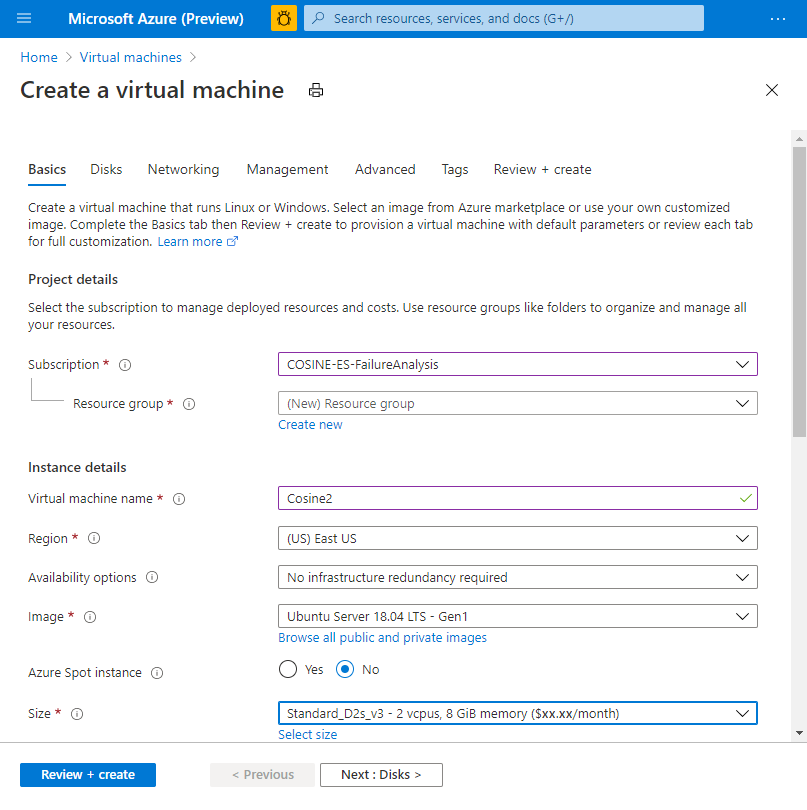
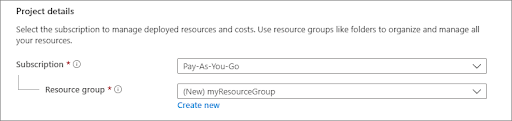
- Enter all your project details with information about the subscription, resource group, virtual machine name, region, availability options, image, and Azure Spot instance.
- If you have not chosen an image before, you can choose the right image from the dropdown list. You can also browse all available images for creating virtual machines, including both public and private images. It’s better to go for Windows Server 2019 Data Centre for the image.
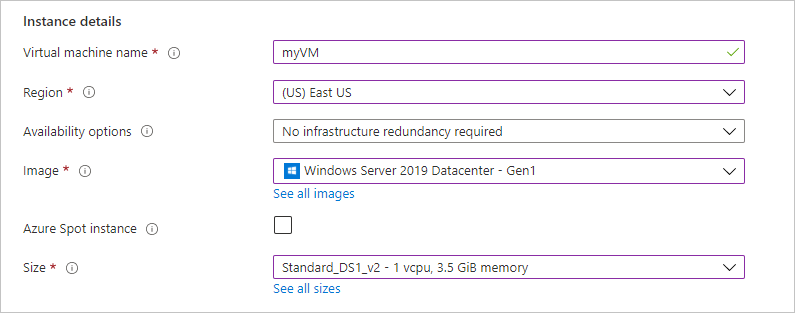
- Carefully select the size of the virtual machine to be deployed. Here you will find different virtual machine size options in accordance with your basic configuration. Note that you cannot find all virtual machine sizes in all the Azure regions. But a safe choice can be Standard_DS1_v2.
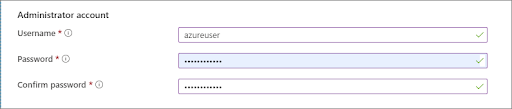
- Fill in your username and password under the Administrator account. Make sure that your password is at least 12 characters long and also meets the specified complexity requirement.
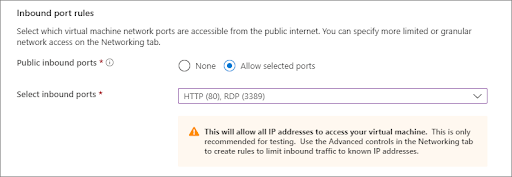
- In the Inbound port rules section, choose to Allow selected ports and then choose HTTP (80) and RDP (3389) from the drop-down menu.
- In the ‘Networking’ section, you can choose the ‘Virtual Network’ type, ‘Subnet’, ‘Public IP Address’, and ‘Network Security Group.’ In the ‘virtual network’ section, you can either use an existing VNET or create a new one.
- After this, select the subnet for your Azure Virtual Machine. The subnet refers to a range of IP addresses from the VNET.
- While choosing the ‘Public IP Address’, you can again create a new public IP address or choose to obtain a publicly accessible IP address for this virtual machine.
Want to know How to Migrate your On-Prem Web App to Azure Cloud?
- Do not forget to select the ‘Networking Security Group’ option. From here, you can configure the firewall rules (inbound and outbound) to control the traffic. Note that the default Network Security Group for Linux is SSH and Remote Desktop Protocol (RDP) in Windows.
- In the ‘Management’ section, you will get three options for monitoring the configurations. In the ‘Boot Diagnostics’ option, you can have a look at the console output and capture the screen from the Azure Virtual Machine.
- With the help of ‘Guest OS Diagnostics’, you can enable or disable the Guest OS Diagnostic metrics for virtual machines.
- Lastly, in the ‘Diagnostics Storage Account’, you can either create a new Azure storage account or choose an existing one to write the diagnostic metrics.
- Leave everything else on the default settings.
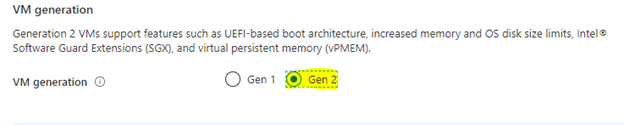
- Now go to the Advanced tab and choose Gen 2 to create a Gen 2 virtual machine.
- Finally, select the Review + create button at the bottom of the webpage. Here you can get a basic impression of the virtual machine that you are going to create. Further details of licensing are also highlighted in this section.
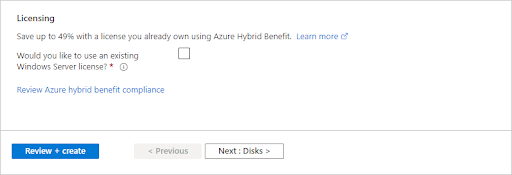
- If you are sure that you want to create your Azure Virtual Machine, then accept the Terms and Conditions.
Step 4: Final Deployment
- After validation runs, the Create button at the bottom of the page will become active so select that.
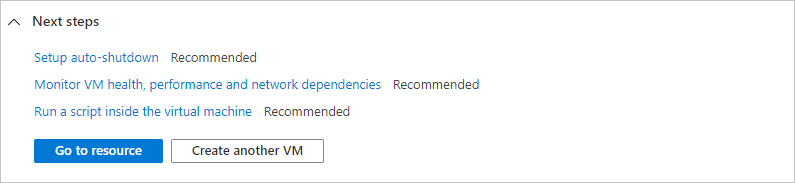
- Once the deployment is complete, you can Go to resources. You must keep in mind that the process of creating an Azure Virtual Machine will take several minutes, so stay patient throughout the process and your virtual machine will be fully provisioned and ready to use.
- If you want to create another Azure Virtual Machine, you can get started right away.
Summing Up
Now you have understood the process of creating and maintaining Azure virtual machines. We have tried to formulate a comprehensive step-by-step guide so that you can understand the various phases of establishing an Azure virtual machine. Once you have gotten your basics of Azure virtual machine clear, you can grasp the process better too.
What’s the point in learning and reading without practicing them on labs! Try Whizlabs Azure Labs today!
If you need help in configuring and managing virtual networks, make sure to connect with us. By knowing more about creating Azure virtual machines, you can also get an upper edge in the Azure certification exams. Are you looking for a detailed teaching guide? Then you can further check out the Microsoft Azure certification training courses to prepare better for your Azure examination. Kick start your shining Azure career with better insights into the industry from well-known stalwarts of the field.
- Top 20 Questions To Prepare For Certified Kubernetes Administrator Exam - August 16, 2024
- 10 AWS Services to Master for the AWS Developer Associate Exam - August 14, 2024
- Exam Tips for AWS Machine Learning Specialty Certification - August 7, 2024
- Best 15+ AWS Developer Associate hands-on labs in 2024 - July 24, 2024
- Containers vs Virtual Machines: Differences You Should Know - June 24, 2024
- Databricks Launched World’s Most Capable Large Language Model (LLM) - April 26, 2024
- What are the storage options available in Microsoft Azure? - March 14, 2024
- User’s Guide to Getting Started with Google Kubernetes Engine - March 1, 2024