
In this article, you will learn exactly how to move your on-premises web application to the Azure Cloud Platform. Azure is a great tool for anyone looking to become a cloud computing professional, as it offers a simple, affordable platform for the deployment of applications. Migrating onto Azure follows four simple steps: Creating Application infrastructure, Creating a virtual machine & connecting it to internet services, copying the website to the virtual machine, and configuring the ports. Let us look at each of these areas in detail:
A Step-by-step Guide for Azure Cloud Migration
Creating a Foundation for your Azure Infrastructure
Your application’s infrastructure foundation includes a network to facilitate additional services, a storage container for your application’s services, and a cloud service to provide your application with an IP Address.
1. Creating a Virtual Network for Your Objects
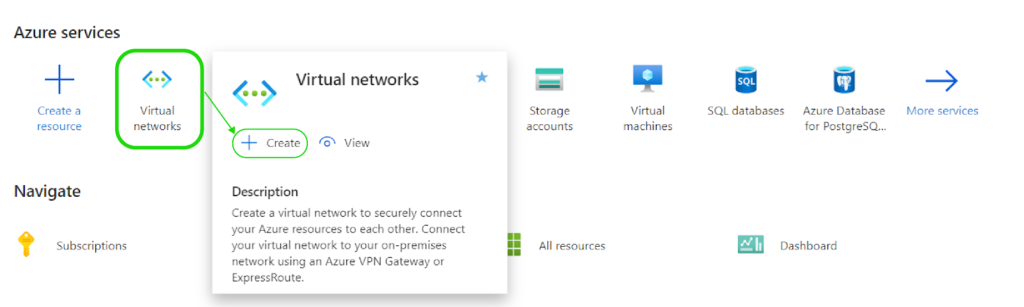
- Log in to the Azure Management Portal.
- On the portal’s home page, scroll to Virtual Networks and click on (+) Create.

- In the Create Virtual Network pop-up window, select an appropriate Name for your network, and select your nearest location. I named my network ITC_VirtualNet and chose (Africa) South Africa North as the location.
 Quick Tip: Remember your choice of network name and location, these will remain the same for all the steps.
 - Leave the settings for the IP Address, Security, and Tags tabs to be the default options provided by Azure. Once you reach the Review and Create tab, verify your options, and click Create. You’ll be directed to a deployment page, indicating the deployment status, and you’ll be notified when the deployment is complete.


 Quick Tip: Remember your choice of network name and location, these will remain the same for all the steps.
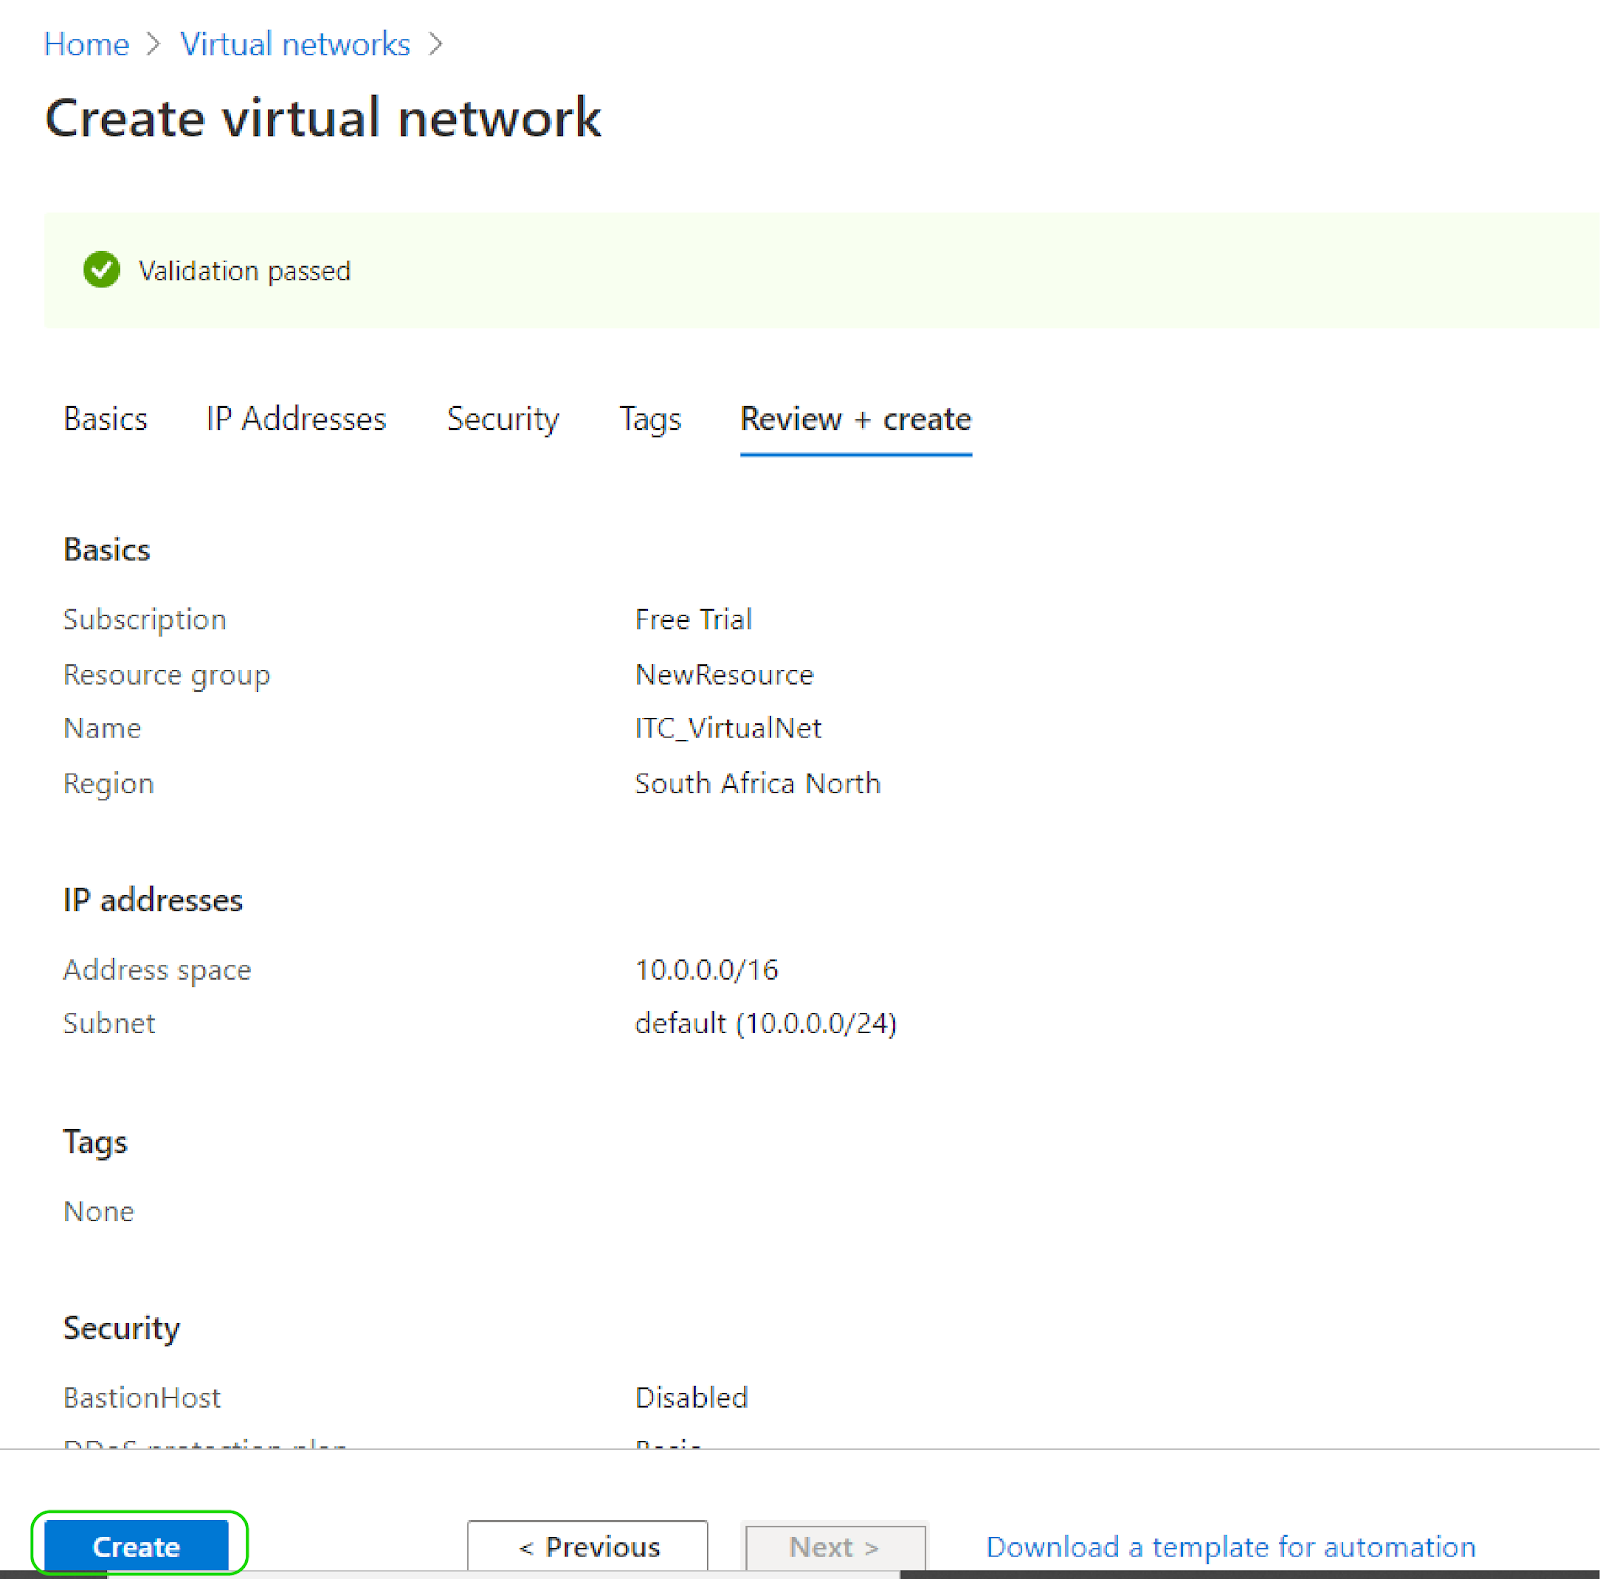

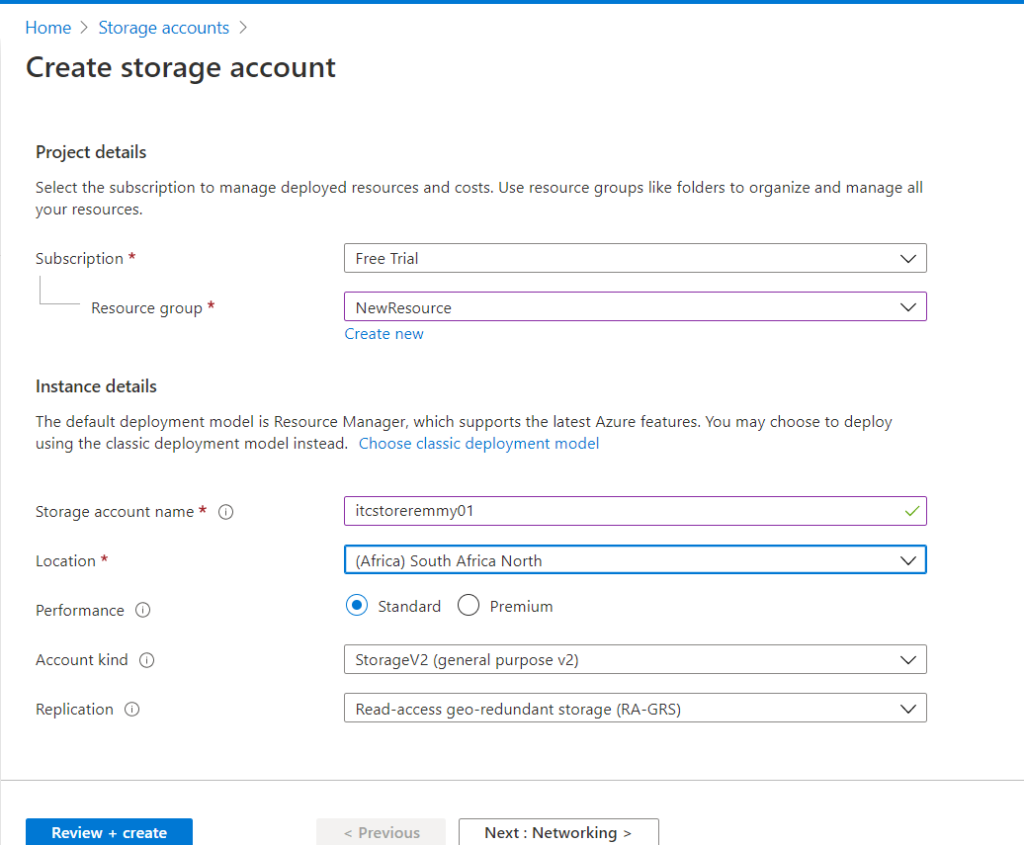
2. Creating a Storage Account
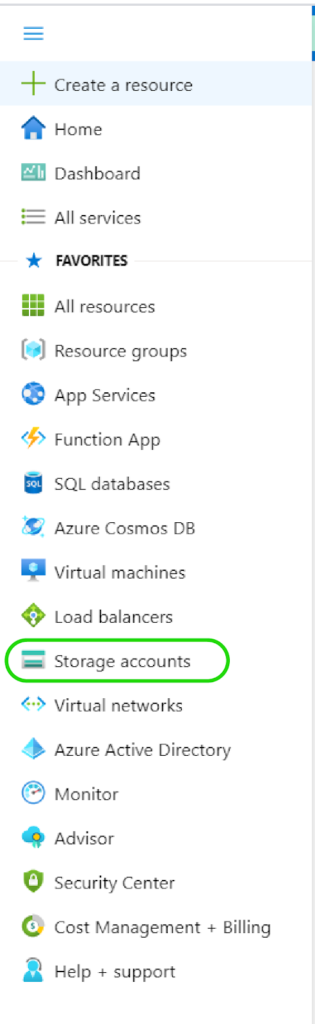
- On the leftmost panel in the Azure Management Portal, scroll down and click Storage Accounts.

- On the Storage Accounts page, click on + Add.

- Provide the Name for your storage account, and pick your previously selected Location, in the Create Storage Account page.

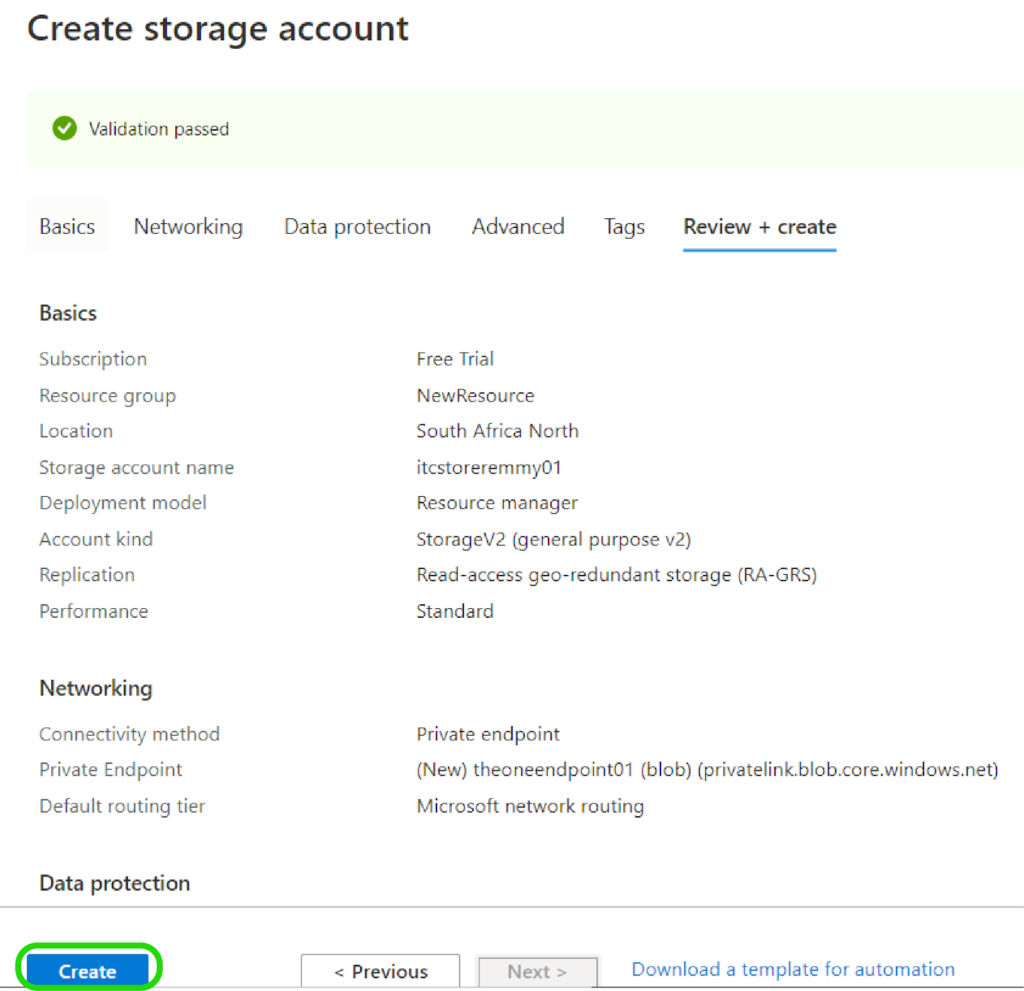
- Leave the Default settings for Networking, Data Protection, and Advanced. On the Review + Create page, click Create to complete deployment once all the details are verified.


3. Creating a Cloud Service for Your Application
With the cloud service, you can assign an IP address to your application and keep related services in a cluster. To deploy a cloud service for your application, follow these steps:
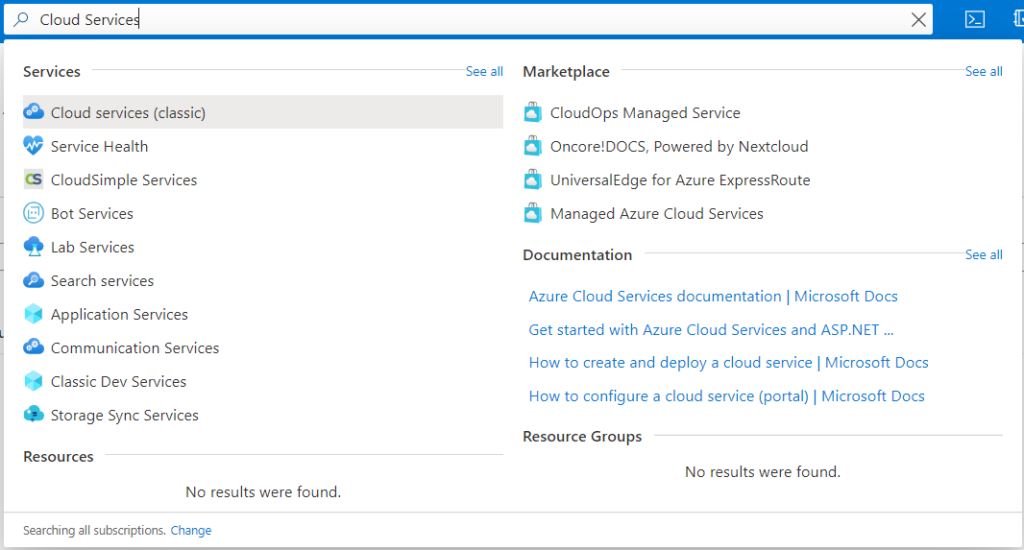
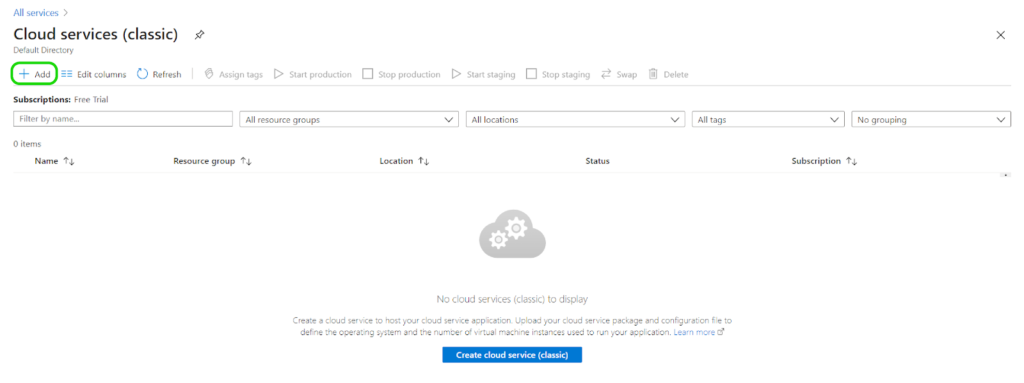
- On the Azure Portal’s Search Bar, type Cloud Services, then on Cloud Services (Classic).

- On the Cloud Services (Classic) page, click + Add to start creating your new service.

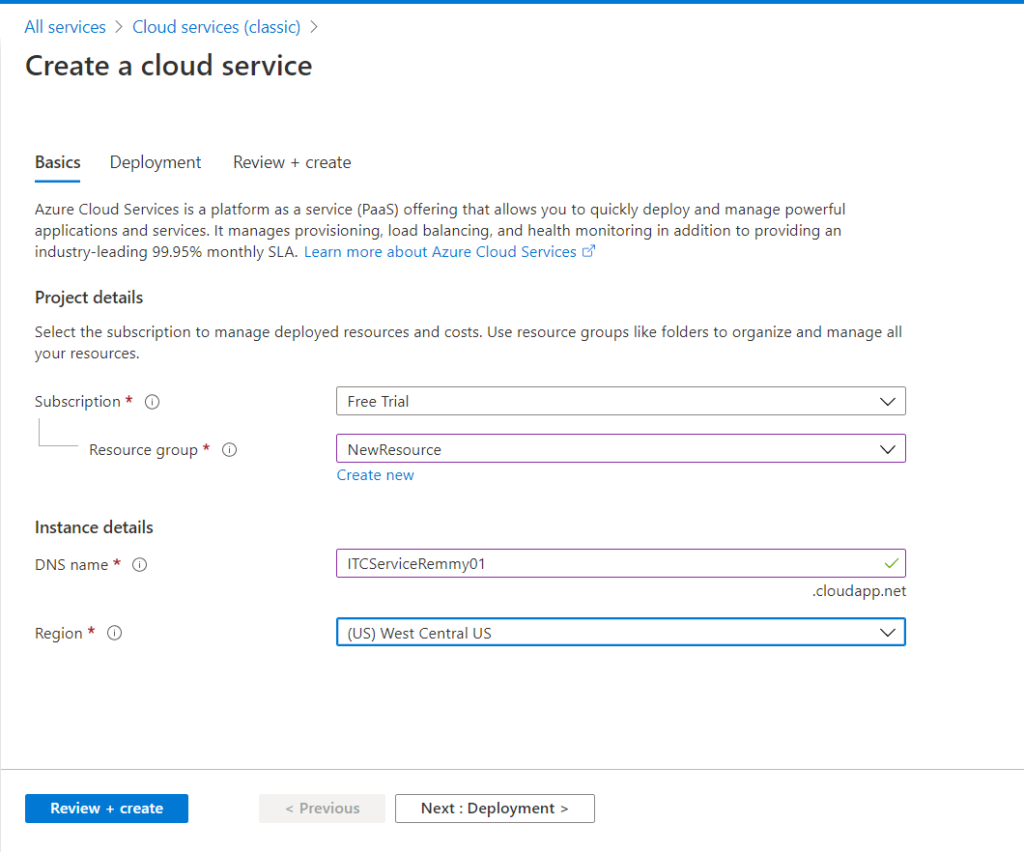
- Give your service a Name and Location region accordingly.
 Quick Tip: The cloud service region doesn’t have to be in line with your other services’ locations since cloud services are not provided in all locations.
 - Leave the Default settings for the Deployment page and on the Review + Create page, click on Create once it has passed the validation.

 Quick Tip: The cloud service region doesn’t have to be in line with your other services’ locations since cloud services are not provided in all locations.
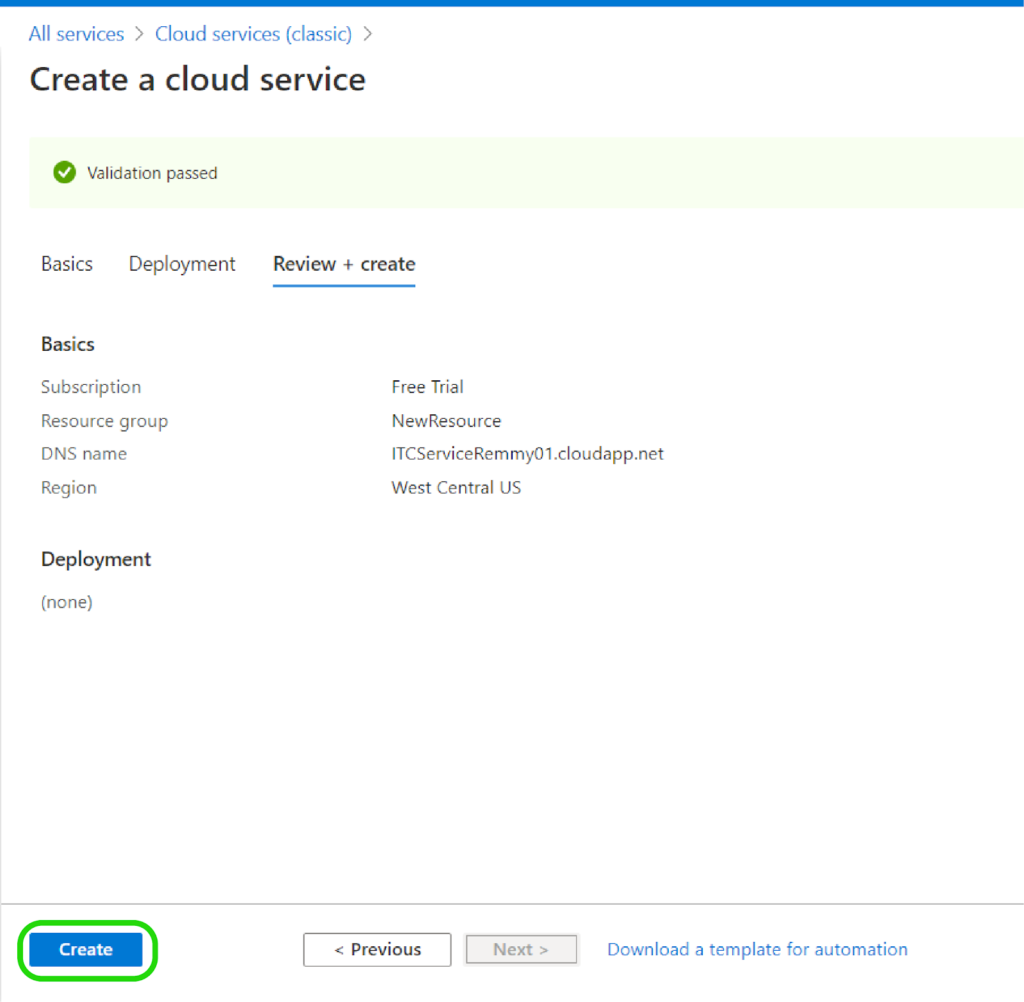
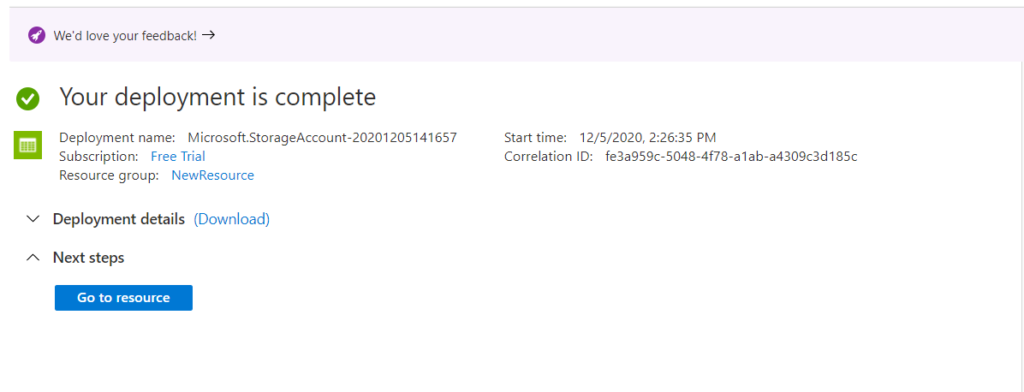
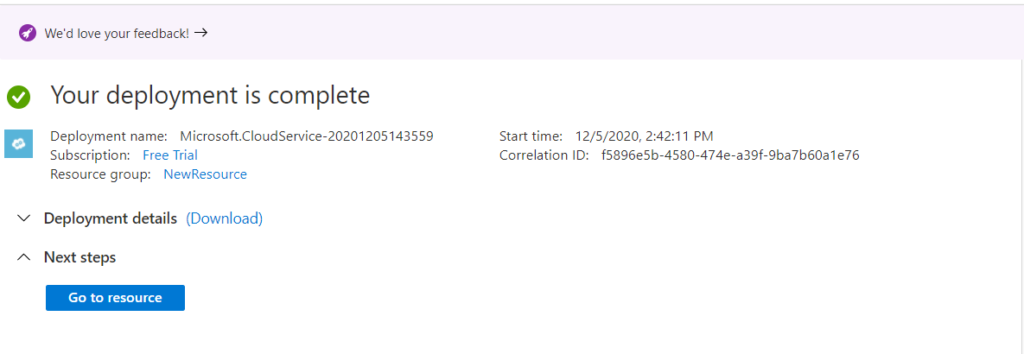
You will get a notification informing you of a successful cloud service deployment.
Creating an Azure Virtual Machine
A virtual machine helps you to run your application. Azure makes the process of creating virtual machines quick and easy, and the VM will help you connect to your application’s storage and services. To create an Azure virtual machine:
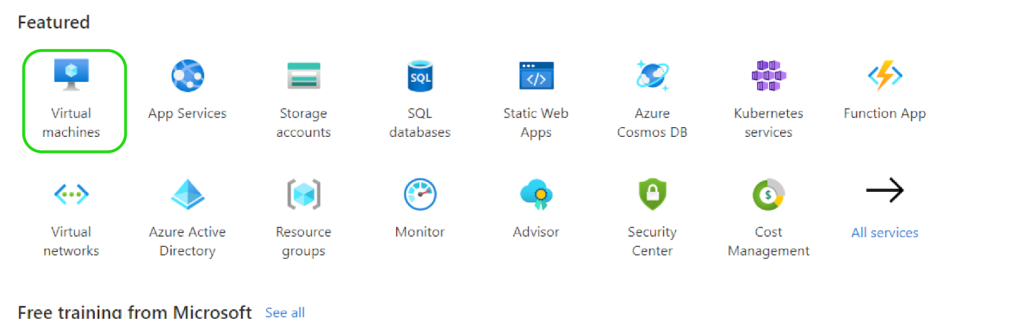
- On the Azure Management Portal, click on Virtual Machines.

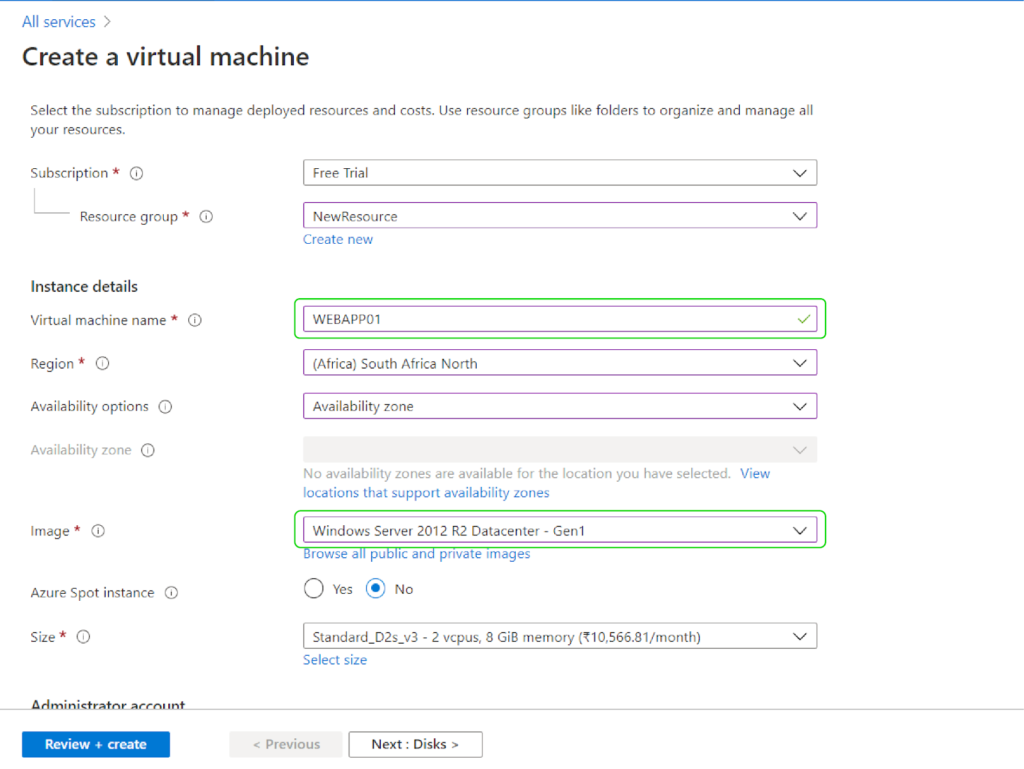
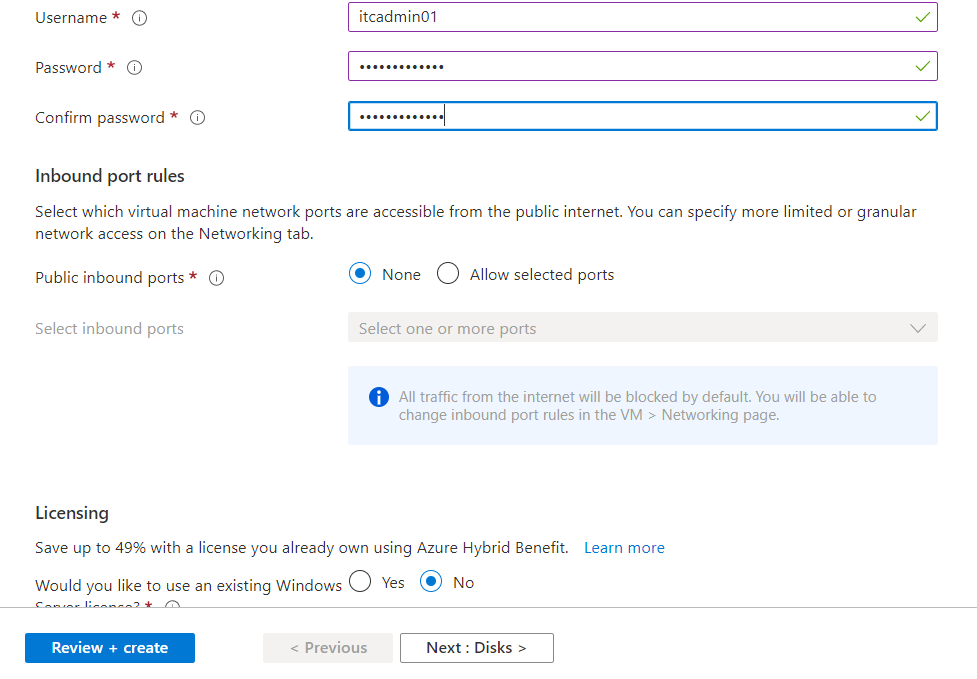
- You will be redirected to the Create a Virtual Machine page. On this page, choose WEBAPP01 as the machine name, and choose your application’s preferred location selected earlier. For the image, choose Windows Server 2012 R2 Datacenter- Gen1. Select a suitable Username and Password that you will use to access this machine then click Next: Disks. Leave the settings on the Disks, Networking, Management, Advanced, and tags tabs then click Next: Review and Create.


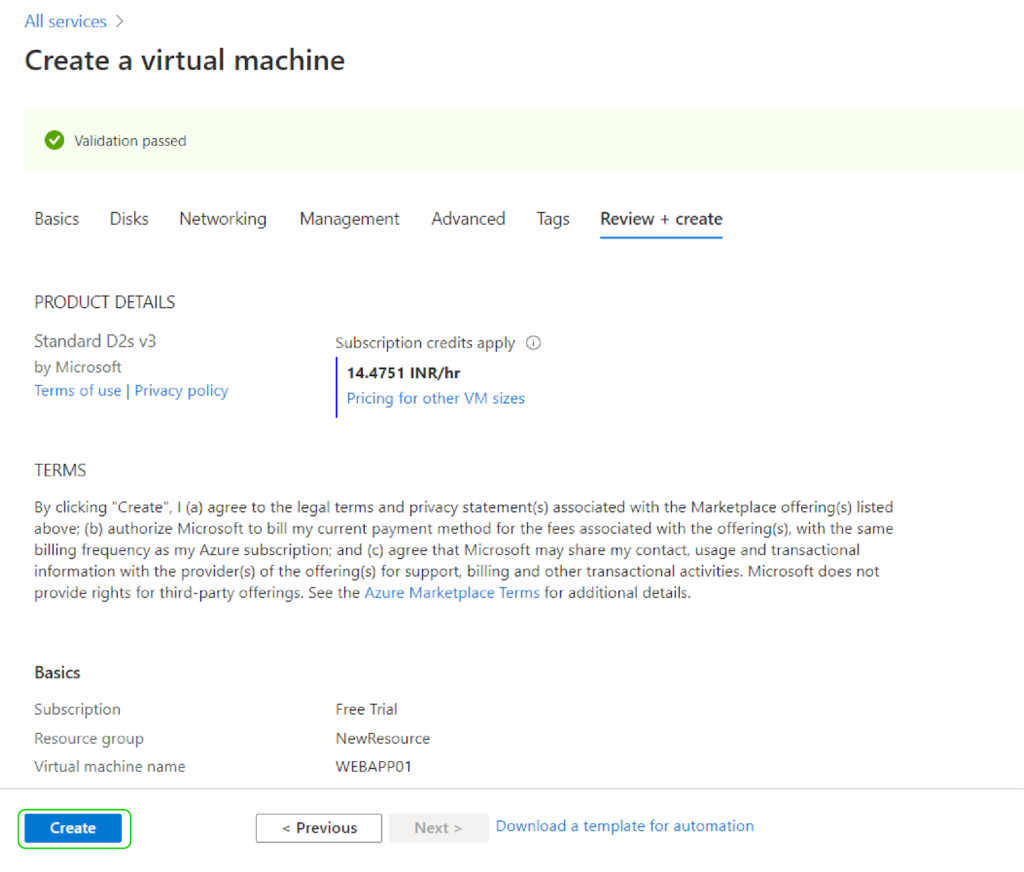
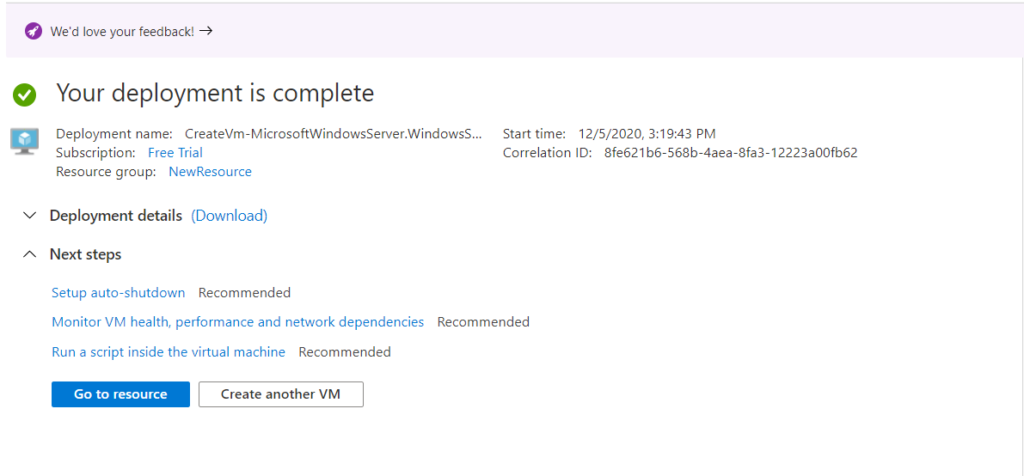
- On the Create a Virtual Machine page, check that your VM has passed validation then click Create.

You will get an alert when your deployment is ready.
Migrating the Web Application to the Azure App Service
In this section, you will store your application’s files locally, then configure its endpoints on our virtual machine, WEBAPP01. To save your files locally, follow these steps:
- Click on the File Explorer icon on your taskbar to open the explorer. Navigate to your main installation directory; Data (C:). Click on the Home tab, create a New Folder and name it AzureManagement.
- Add the site hosting your web application to trusted sites on your computer. To do this, open the Control Panel, navigate to Internet Options. On the Internet Properties window, click on the Security tab. Click on the Trusted Sites icon then click on the Sites button. Type your website’s URL into the Add this website to the zone: tab then click Add. Click OK if you get any security warnings.
- Download your web application’s files from the trusted site and save them to the folder created earlier, C:AzureManagement. Extract these files and save them to the AzureManagement folder.
To configure the endpoints of WEBAPP01, follow the steps outlined below:
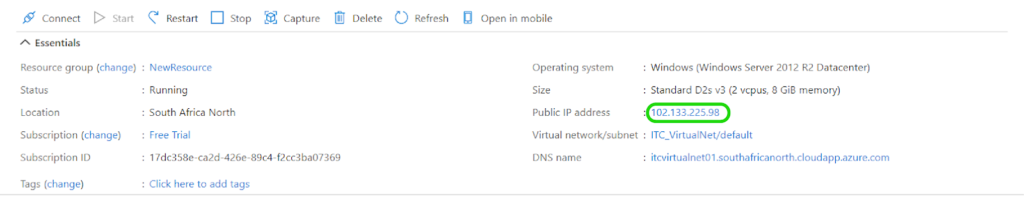
- On the Azure portal, click on Virtual Machines.
- Click on your VM, WEBAPP01, then click on the IP Address parameter to be directed to the machine’s network interface.

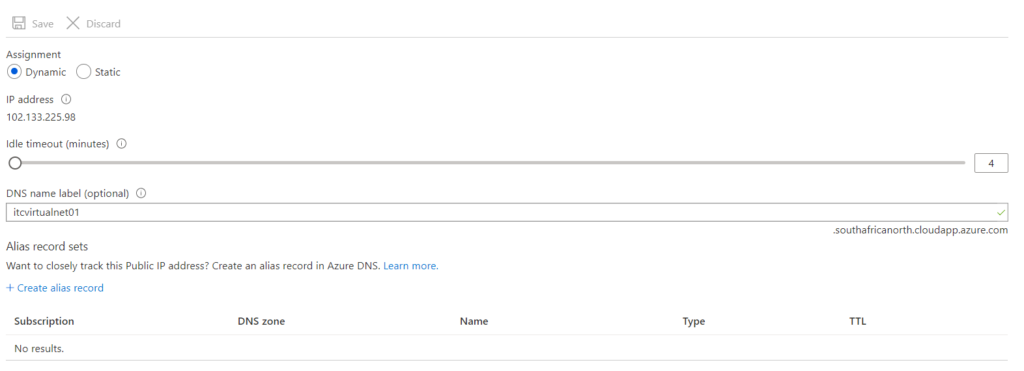
- On the next page, click on the Configuration tab on the leftmost panel, and give your machine a DNS Name Label. If your name is available, you will get a green go ahead, while an error message will alert you of an unavailable name.

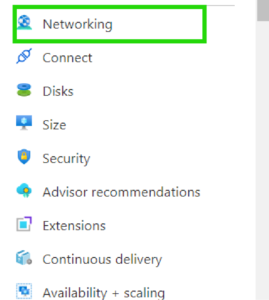
- Once you have set up a DNS name, navigate to Virtual Machines in Grid View and click on Networking on the left-most panel. Click on Add Inbound Port Rule.

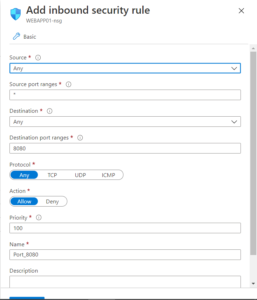
- On the Add Inbound Security Rule pop-up, select the following values:
Source: Any
Source Port Ranges: *
Destination: Any
Destination Port Ranges: 3389
Protocol: TCP
Action: Allow
Priority: 100
Name: (Pick a Suitable Name)With these settings, you can connect to the Remote Desktop Client, allowing you to configure and open up ports to your application.
- Once you have input the settings, click Save to create your rule.
Opening Ports and Configuring Azure App Service
We will use a Remote Desktop Connection to open ports to the app and configure the IIS App service to our web application. To create a remote desktop connection:
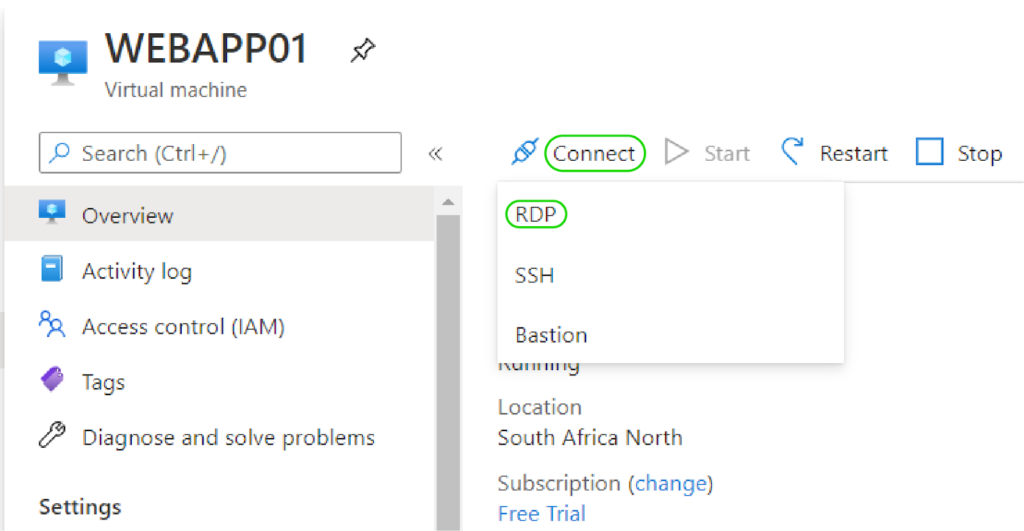
- On the Virtual Machines page, click on WEBAPP01.
- On the WEBAPP01 toolbar, click on Connect. Choose RDP from the pop-up menu.

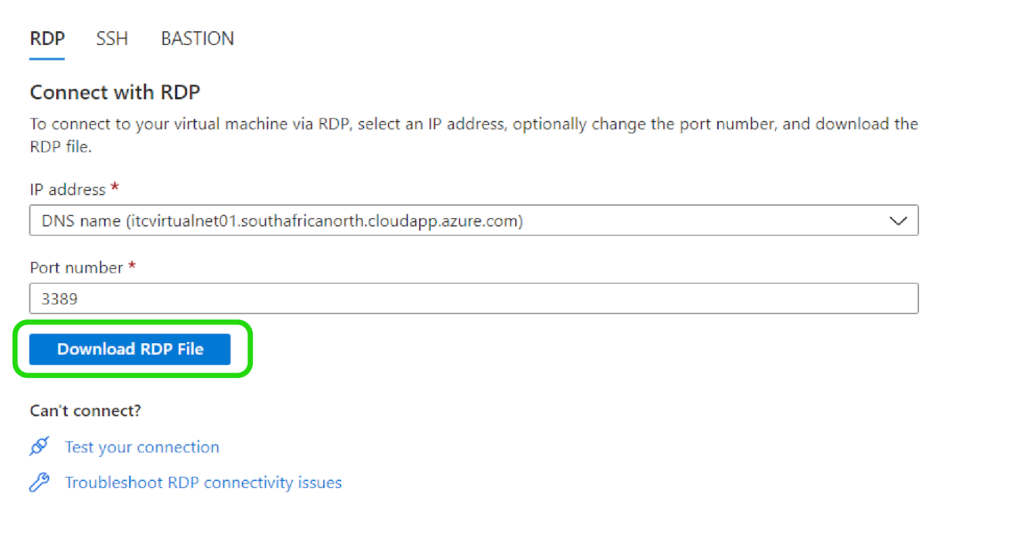
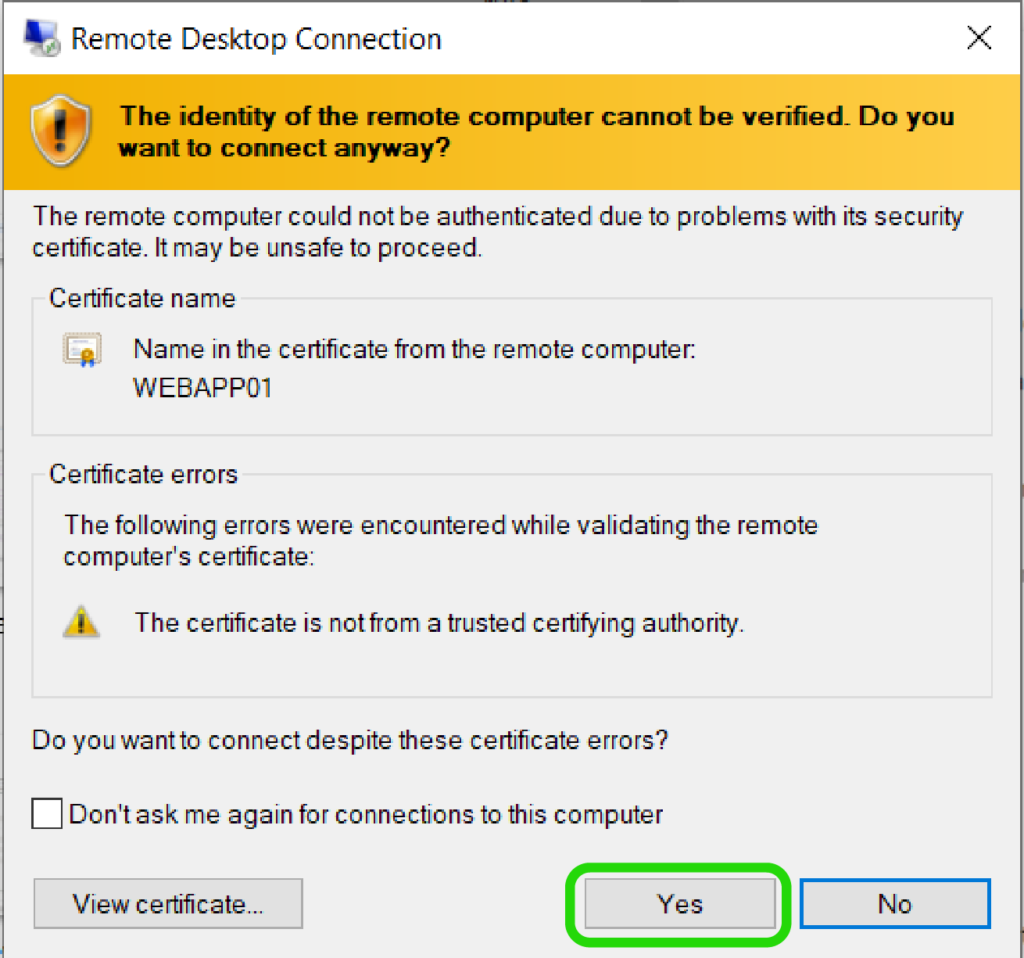
- On the Connect with RDP page, click Download RDP File after verifying that the DNS Name and Port listed are correct. Your browser will automatically download a file that will establish a connection with your virtual machine.

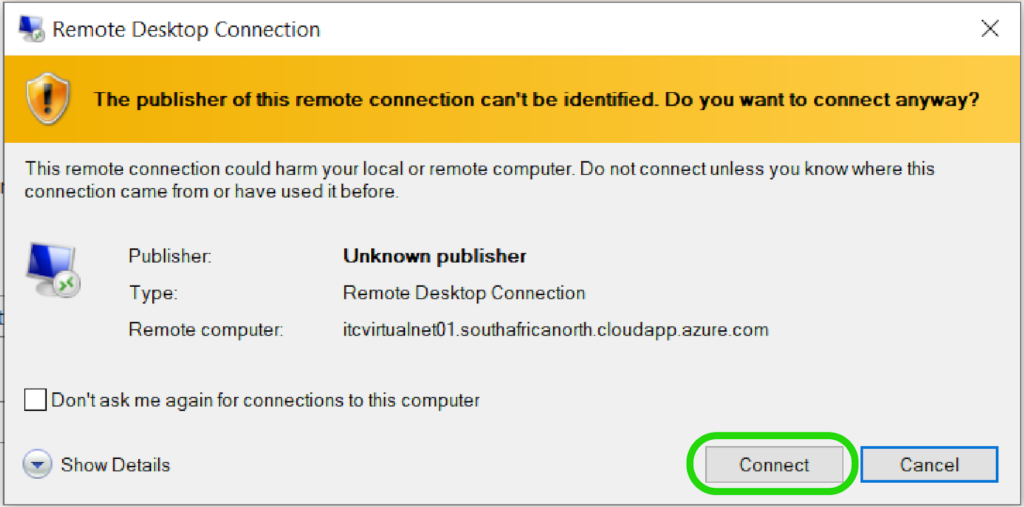
- Open the RDP File you downloaded earlier. A window pops up, click Connect to establish a connection with your virtual machine.
To configure the app service, follow these steps:
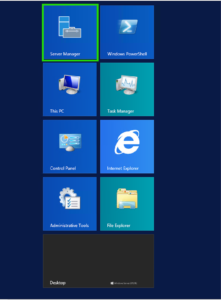
- In the remote session, open Server Manager, then click on Local Server.


- On the main screen, click Public: on. Navigate to Windows Firewall, then select Advanced Settings.
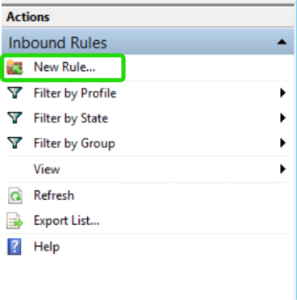
- In the Windows Firewall with Advanced Security window, select Inbound Rules>> New Rule.

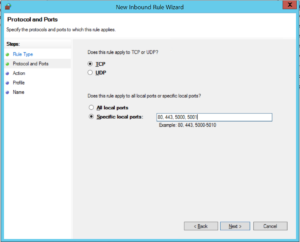
- Select Port for Rule Type, then click Next.
- Type 80, 443,5000-5001 into the Specific local ports slot, then click Next.

- Click Next on the Action and Profile pages.
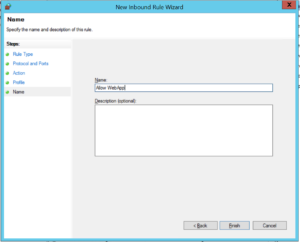
- Name the rule Allow WebApp then click Finish.
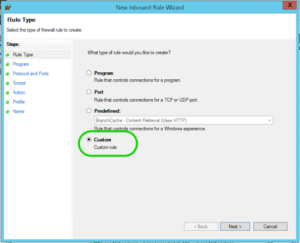
- Click on Inbound Rules then New Rule in the Windows Firewall with Security Page.
- Select Custom for the Rule Type then hit the Next button.

- Make sure the All Programs option is selected in the Program page then click next.
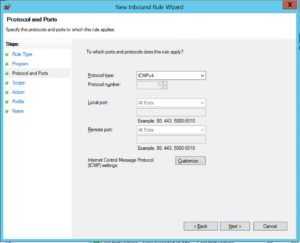
- Select ICMPv4 in the Protocol and Ports page, then click Next.
- Click Next on the Scope, Action and Profile page then click Next.
- Name this rule Allow PING then click Finish.

Changing Your Application’s Configuration Information
We will use Windows PowerShell on the remote desktop connection to deploy our own site to the virtual machine. We shall create an IIS Server to create a local link to our web application files, then replace these with the application in the AzureManagement folder.
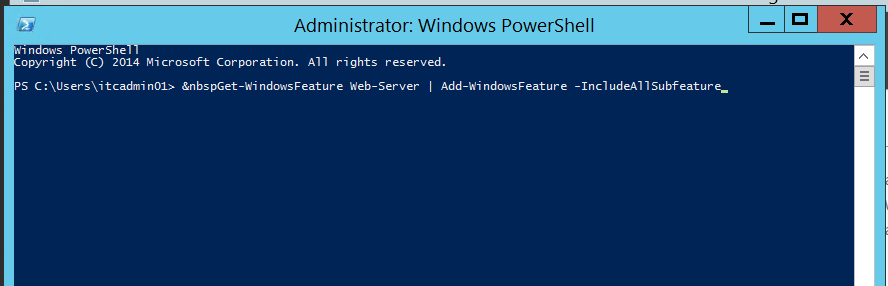
- Click on the Windows Button on your remote desktop connection, then select Windows PowerShell.
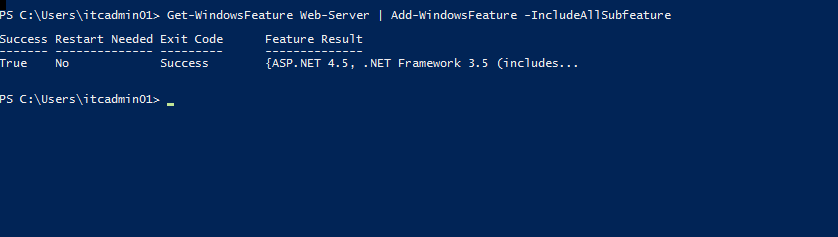
- Onto Windows Powershell, type the following command:
Get-WindowsFeature Web-Server | Add-WindowsFeature -IncludeAllSubfeature
This command will take a while to complete. Give it time.

 This command installs the IIS web app server, creating a folder in file explorer, c:inetpub\wwwroot.
 - Restart IIS in Windows Powershell using the following command:
Iisreset

 This command installs the IIS web app server, creating a folder in file explorer, c:inetpub\wwwroot.
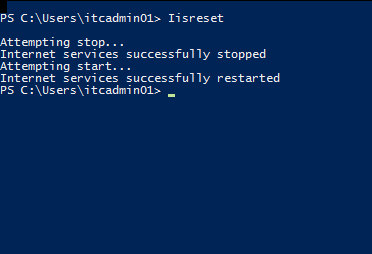
To migrate your web application onto the webserver:
- Using your file explorer, navigate to the root folder: C:inetpub\wwwroot. Delete all the subfolders and files in this folder.
- Navigate to the folder C:AzureManagement, copy and paste all files and folders from this folder into the C:inetpub\wwwroot
- If you had a locally installed SQL database, you should replace the connection string in the Web.config file accordingly to facilitate a connection with the server, you can achieve this by editing in notepad.
You have connected your application to the running web server and can hand off the application to users.
Check out our microsoft azure certification courses here
Conclusion
We have seen that deploying your web application to Azure is a simple and straightforward process. To sharpen your cloud development and deployment skills, it is important to practise using different applications developed in various platforms and languages for different virtual machines. Always be wary of service charges, especially for storage and virtual machines, as these could lead to unwarranted deductions on your card.
- Cloud DNS – A Complete Guide - December 15, 2021
- Google Compute Engine: Features and Advantages - December 14, 2021
- What is Cloud Run? - December 13, 2021
- What is Cloud Load Balancing? A Complete Guide - December 9, 2021
- What is a BigTable? - December 8, 2021
- Docker Image creation – Everything You Should Know! - November 25, 2021
- What is BigQuery? - November 19, 2021
- Docker Architecture in Detail - October 6, 2021