Migrating your web-app from on-premises data centers to the cloud allows you to scale it on-demand to handle high traffic loads. AWS provides an affordable, public cloud platform that offers comprehensive migration solutions for faster time to business results. The platform is built with automation and data-driven decision-making, which makes migration fast and simple. AWS also comes with a broad set of features that make it perfect for deployment, Continuous Integration, and Continuous Delivery. This is a detailed and technical blog, if you are beginner in cloud, I would suggest you start with our AWS cloud practitioner practice exam to check your understanding of cloud.
While the process of migrating your app and data to the AWS cloud is relatively simple, it takes various phases to justify cloud adoption. The first phase involves evaluating whether the app can be migrated to the cloud. Once you decide that an app should move to the cloud, you will need to choose between several migration options provided by AWS. These include: AWS CloudEndure, AWS Direct Connect, AWS Snowmobile, and AWS Snowball among others. You will also need to know the resources you’ll need to keep your app running.
The third step involves Proof of Concept (PoC), where you test your workload against the AWS storage service. This phase gives you an idea of the security controls, and whether migrating to the AWS cloud will minimize expenses. Once you have all the prerequisites, created a backup, and synchronized with on-premises repositories, you can now migrate the application to the cloud.
For this exercise, we shall be using Amazon’s CloudEndure to migrate our web app to the AWS cloud platform.
Migrating your Web App to AWS Cloud: A Step-by-Step Guide
Step 1: Creating Access Policies for Your Project
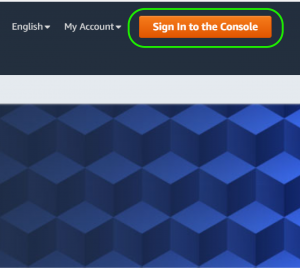
- Using your AWS Account, sign in to the Amazon Web Services Console

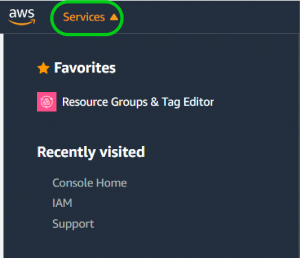
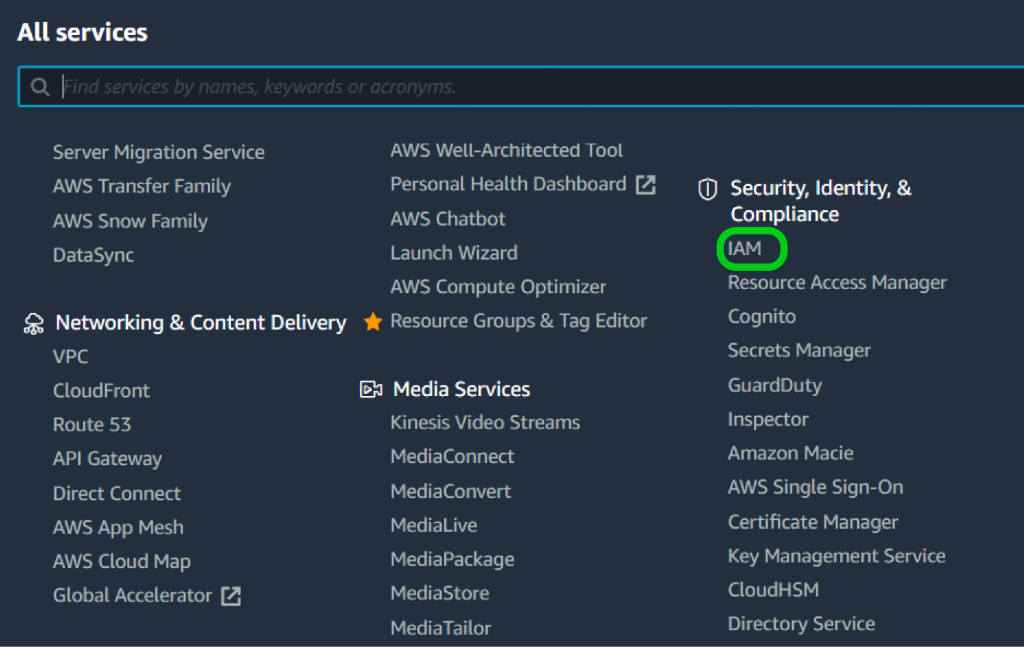
- Once you’re on the AWS Console, click on Services. On the pop-up, scroll to Security, Identity and Management, then click IAM.


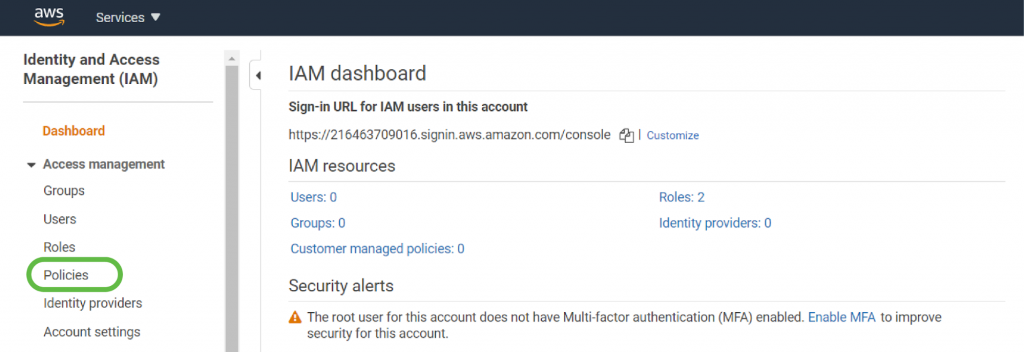
- You’ll be redirected to the Identity and Access Management page. From the left-side navigation pane select Policies.

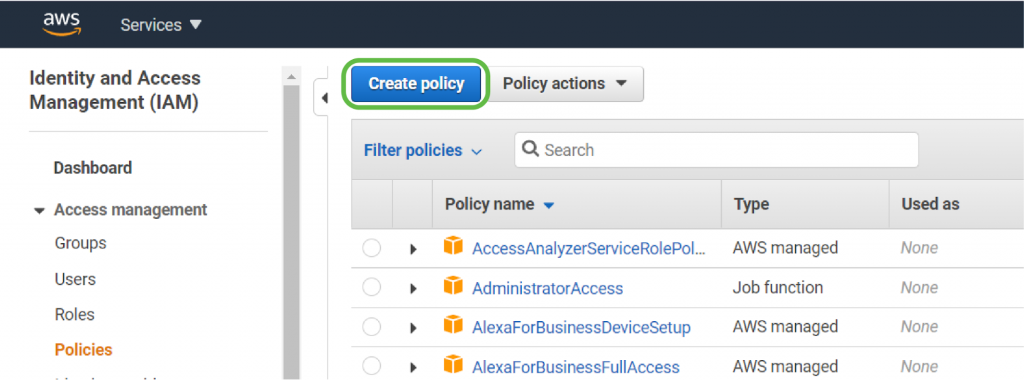
- Click on Create Policy on the Policies page.

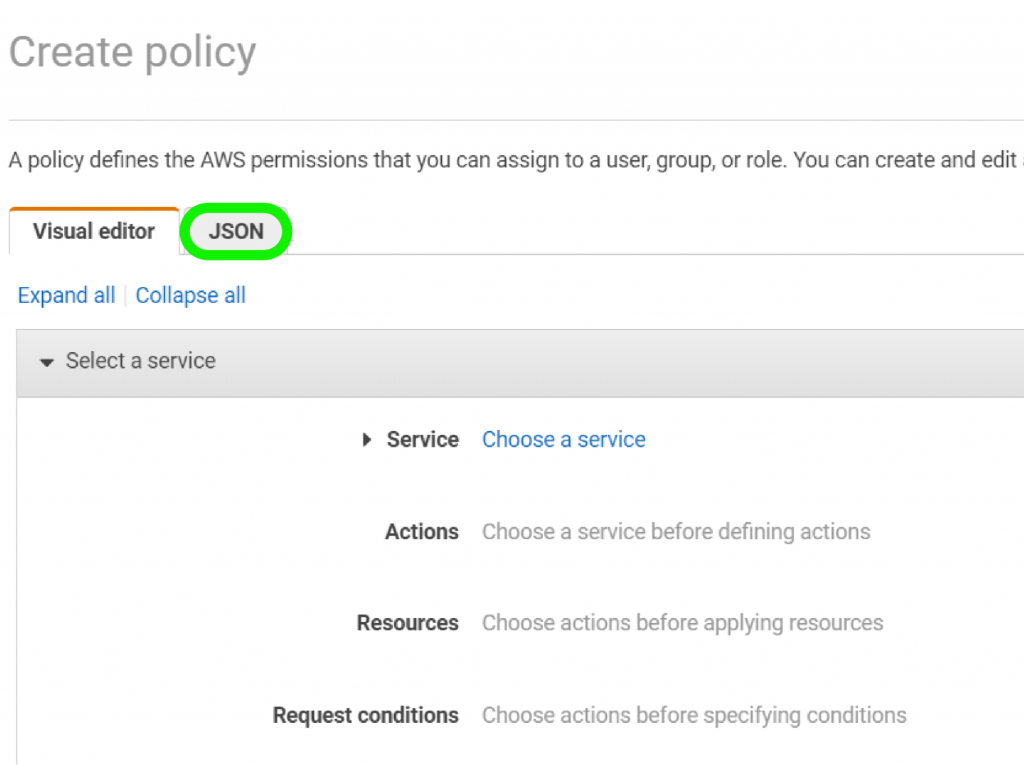
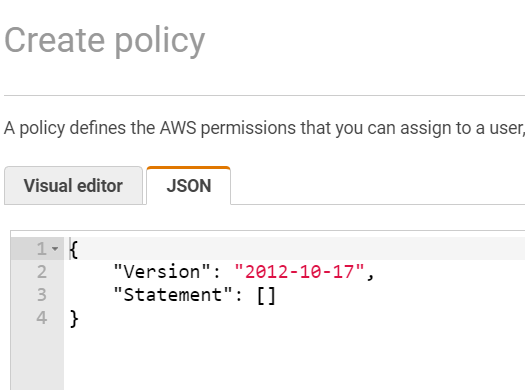
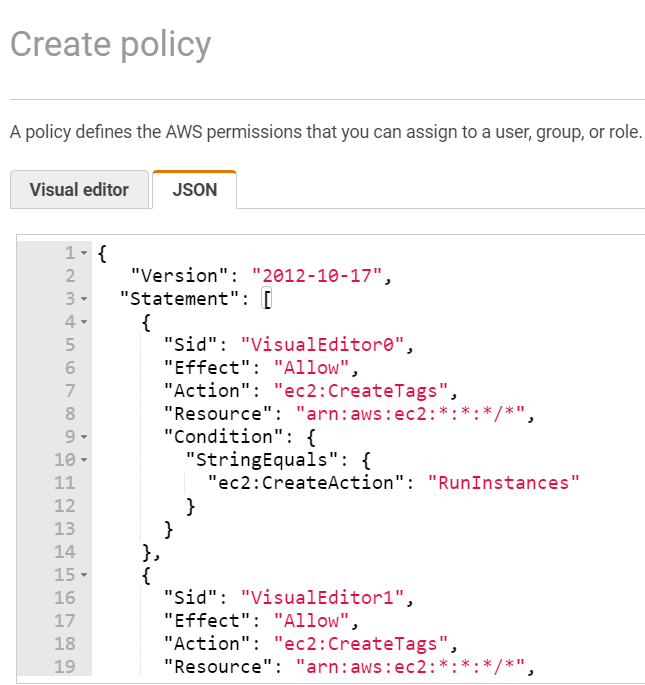
- Once on the Create Policy page, open the tab named JSON.


- On a separate tab, go to the CloudEndure IAM Policy, and copy this code. Paste this code over any text that exists in the text field of the JSON editor.

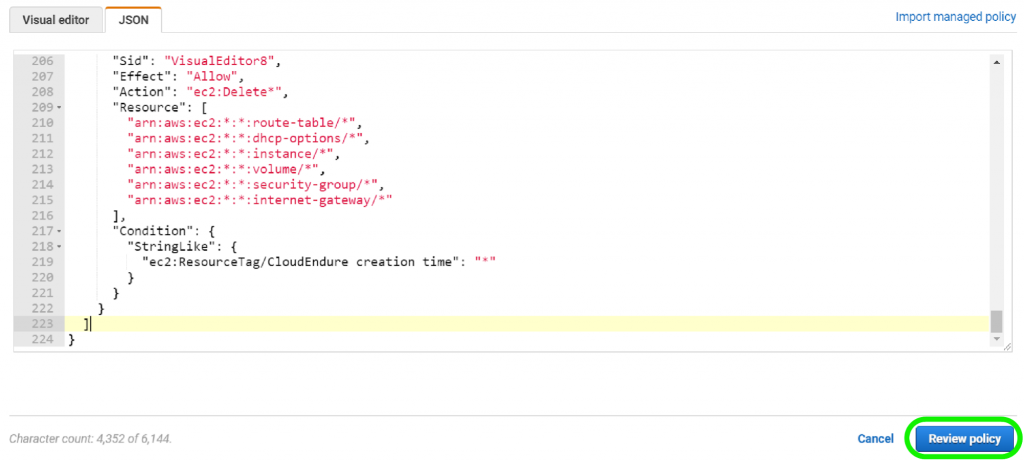
Quick Tip: If you are trying to launch a target machine with specific identity management roles, you should add the iam:PassRole permission manually since CloudEndure does not have this permission. - Click on Review Policy to proceed.

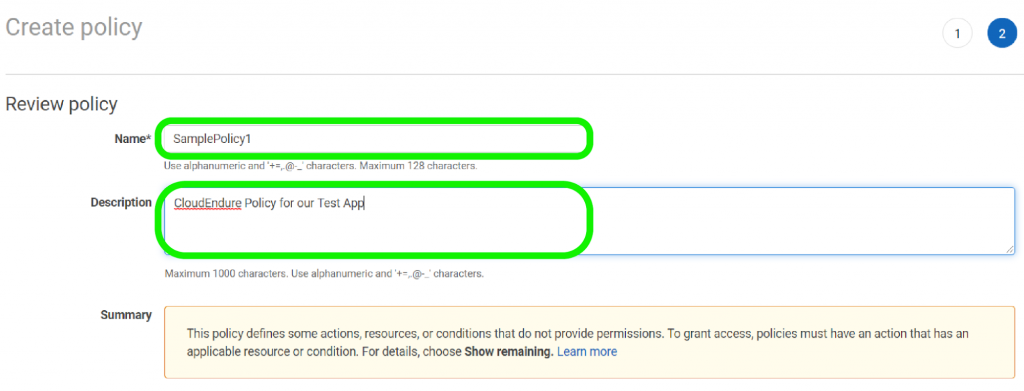
- You’ll be redirected to the Review Policy page, where you will give your policy a Name and Description (optional).

- At the bottom right of the Review Policy page, click on Create Policy.
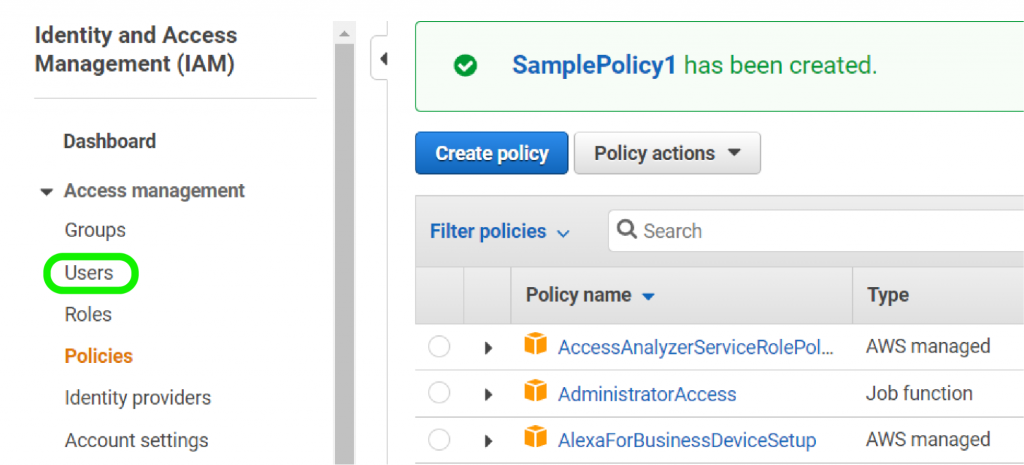
 You will get a notification letting you know that your policy has been created.


Step 2: Creating an IAM user and generating credentials
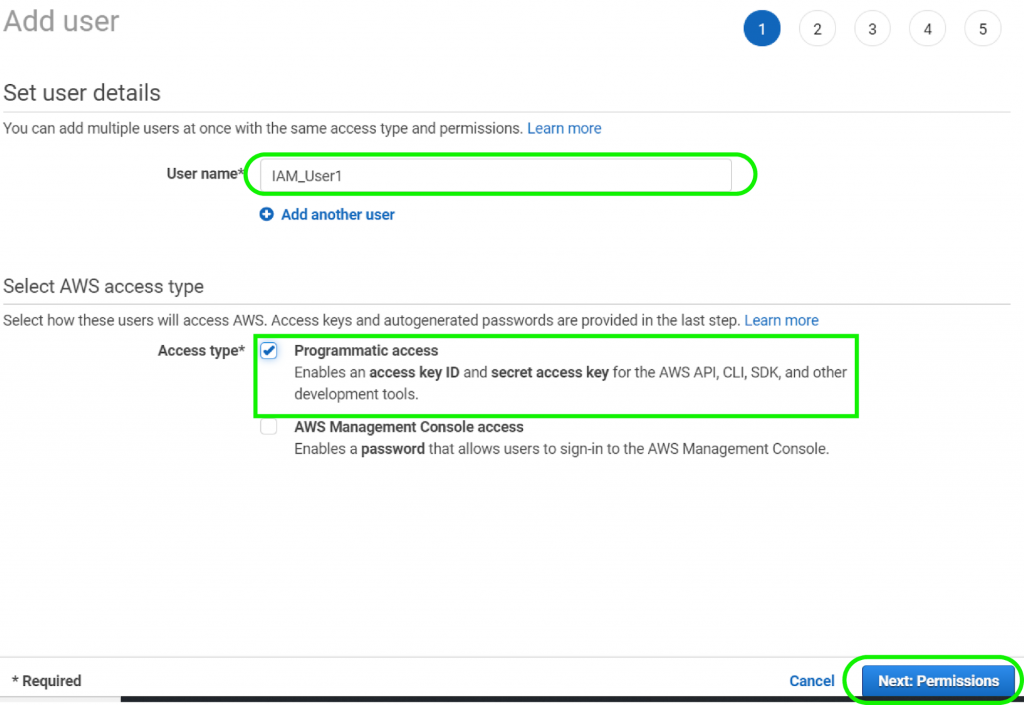
To use the new policy you just made, you will need to create a new IAM user and provide them with Programmatic access. After completing this step, you’ll be provided with a Security Access Key and Access Key ID that are required to run CloudEndure.
- On the navigation menu to the left of IAM, find Users.

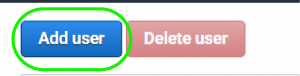
- Next, click on Add User.

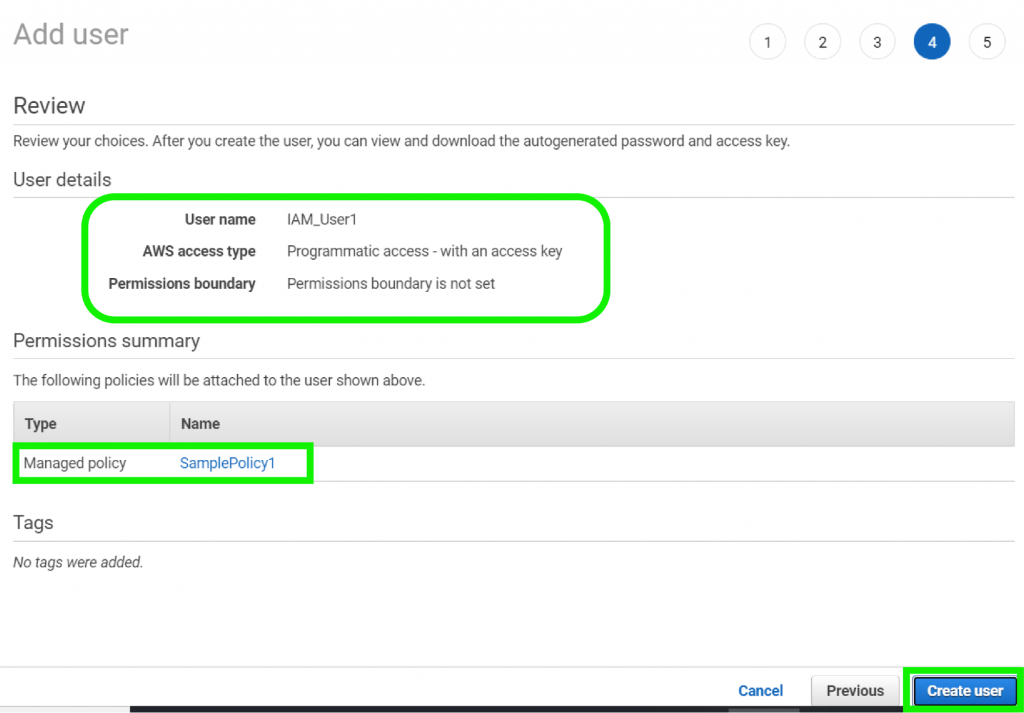
- On the next page, fill out an appropriate User Name, and select Programmatic for the Access Type option. When you’re done, select Next Permissions.

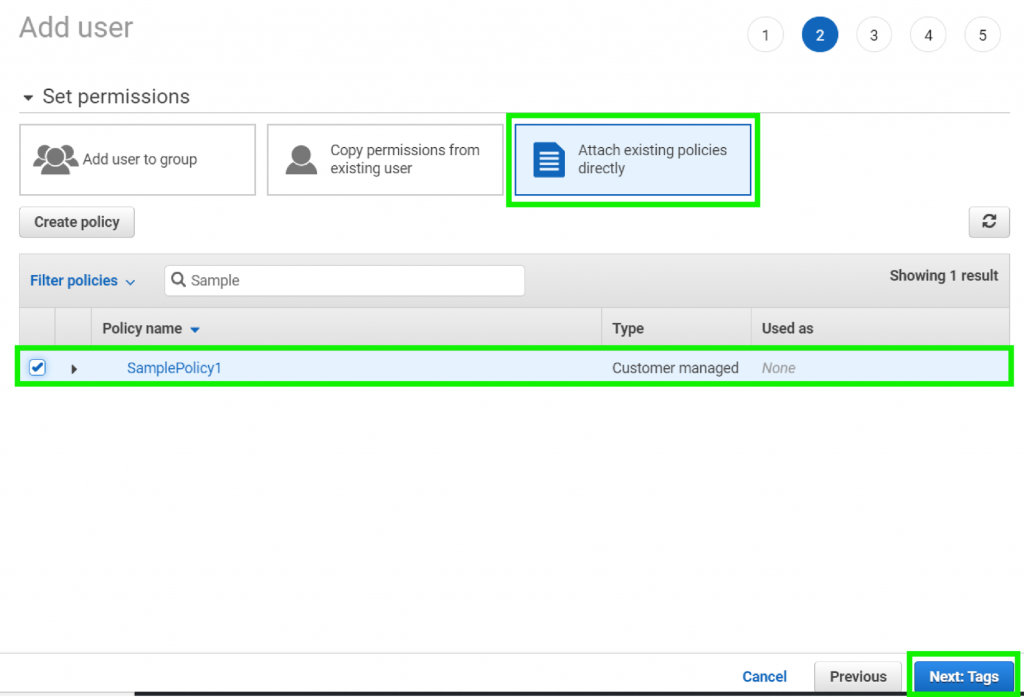
- You’ll be redirected to the Set Permissions page, with three options. For this task, we’ll select Attach Existing Policies Directly.

Locate the policy created in the previous step (Creating Policies for Your Project). Select the checkbox next to it and click Next: Tags at the bottom of the page. - Since tags aren’t necessary, we’ll skip and press Next: Review.
- Review your options and press Create User at the bottom of the page when you are done.

- The Next page acknowledges the creation of a new user. On this page, you can also view and download your User Security Credentials.
Quick Tip: Your credentials are only available for a one-time download. Save this .csv file as you’ll need these credentials to log in to the CloudEndure console.Once you have saved your access keys, press Close to finish.
You’ll be redirected to the Users page, where you’ll access the details of your newly created user.
Step 3: Define your Application’s Replication Settings in the CloudEndure Staging Area
After getting login credentials, you’ll need to set up the replication process.
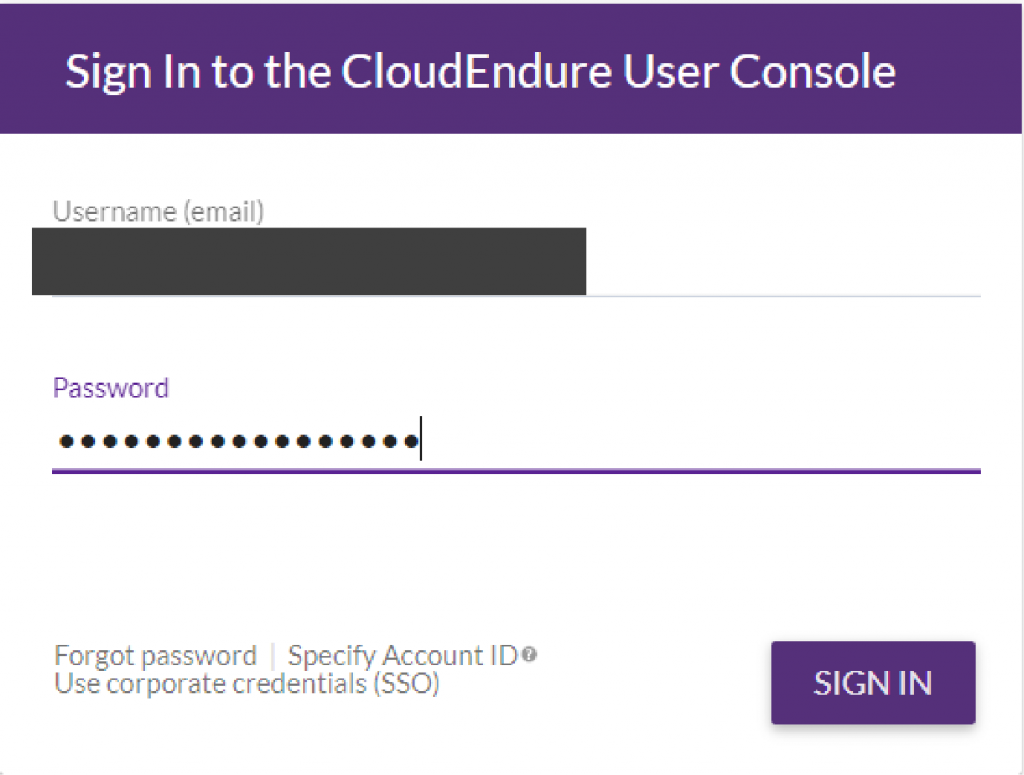
- Sign in to the CloudEndure Console.

- Enter the user credentials you generated on AWS, click Save. Once you are logged in, move to the REPLICATION SETTINGS tab.
From the Migration/Disaster Recovery Resource drop-down list under Disaster Recovery Source, select your application’s source environment. Our sample application is located on vCenter, the appliance that holds VMware’s virtual environment platform.On the Migration/Disaster Recovery Resource drop-down list under Disaster Recovery Target, select the AWS region onto which you’ll want to replicate your data. - Once you’ve selected your application’s source and target, you should define the application’s Replication Servers. The default settings will do.
- For this project, we’ll also select the Default instance type. This is the t3. Instance, one that will incur the least costs.
- For our Instance Converter Type, we’ll select the default type. For our availability zone, this is m5.large.
- For the Data Disks, choose the low cost, standard disks option.
- For the Replication Server Subnet option, we’ll pick the default subnet allocated by AWS.
- We’ll also use the Default CloudEndure security group for this project.We’ll skip defining the VPN Usage, Volume Encryption, Staging Area Tags, and Software Download.
- At the bottom of the Replication Settings page, click SAVE REPLICATION SETTINGS. CloudEndure issues you with tokens you will use to install an agent on the source server. The agent will create a connection between the replication server in AWS and the CloudEndure User Console.
Step 4: Configuring the Blueprint for Your Target Machine
- From the right-hand top navigation panel, select the BLUEPRINT tab. Use the default settings provided by CloudEndure for this project.
- Use the default settings for Best-match target machine launch, Copy Source, Copy Instance, Private IP, and Existing Instance ID categories.
- Once you are done, click SAVE BLUEPRINT to make these changes valid.
Step 5: Testing the Migration Solution
In Test Mode, you can launch and run your target machine on the target infrastructure you set for the source. This way, you can check to see whether the migration is effective.
- Open the machines page. Navigate to User Console>Machines.
Ensure that the source machine you want to test is set to the following statuses.
DATA REPLICATION PROGRESS- Continuous Data Replication
STATUS- Target Machine Can Be Launched
MIGRATION LIFECYCLE- Ready for Testing/Recently Tested /Cutover - Select the checkbox to the left of the Source Machine hosting our app.
- Click the LAUNCH X TARGET MACHINES and click on the Test Mode button.
- To start the test, click Continue.
A message appears at the top right corner of the user console, showing you the status of the test, and that a target machine is being launched. Your selected source machine will have a green edge showing it’s active. If you click on the source machine, you’ll be redirected to the Machine Dashboard, showing additional information on the test and machine. Here, you can also reset the machine’s Blueprint.
Step 6: Migration
Performing Cutover Mode action tells CloudEndure to delete the previous machine and create an updated new machine.
- Open the Machines page, and verify that the machine hosting our app is set to the following configurations.
ETA/LAG- none | n/a
DATA REPLICATION PROGRESS- Continuous Data Replication
STATUS- Target Machine Can Be Launched
MIGRATION LIFECYCLE- Ready for Testing/Recently Tested /Cutover - Check the box on the left of the Source Machine that hosts our app to activate it.
- Click LAUNCH X TARGET MACHINE then select Cutover Mode.
- Click Continue on the confirmation message that pops up.A Message appears at the top right of the User Console, indicating that a target machine is being launched for your source machine. After the cutover is complete, several indications appear on the Machines page, showing the status of your chosen machine.
- Once you are sure the replication is complete, you can remove the source machines from the User Console. Click on the checkbox to the left of the machine name, open the MACHINE ACTIONS menu, and select Remove X Machines from this Console from the drop-down menu.
Conclusion
CloudEndure provides a quick and easy way to migrate your on-premises applications and resources to AWS cloud. In this article, we’ve created a CloudEndure project to replicate an on-premises web application. With CloudEndure and AWS Identity and Access Management (IAM), you can host a large number of machines on AWS without having to redo the architecture. Since CloudEndure replicates source machines continuously in an AWS staging area, migration will not cause any downtime or reduced performance of your web application.
- Cloud DNS – A Complete Guide - December 15, 2021
- Google Compute Engine: Features and Advantages - December 14, 2021
- What is Cloud Run? - December 13, 2021
- What is Cloud Load Balancing? A Complete Guide - December 9, 2021
- What is a BigTable? - December 8, 2021
- Docker Image creation – Everything You Should Know! - November 25, 2021
- What is BigQuery? - November 19, 2021
- Docker Architecture in Detail - October 6, 2021