We have launched AWS Certified Solutions Architect Associate certification exam which is the basic level of AWS certifications. As part of training AWS certification topics, we have started publishing important topics that are useful for preparing for the aws certification exams.
In this article, we are writing about AWS Virtual Private Cloud (VPC) in Amazon Web Services (AWS). Here is the snapshot of the exam blueprint.
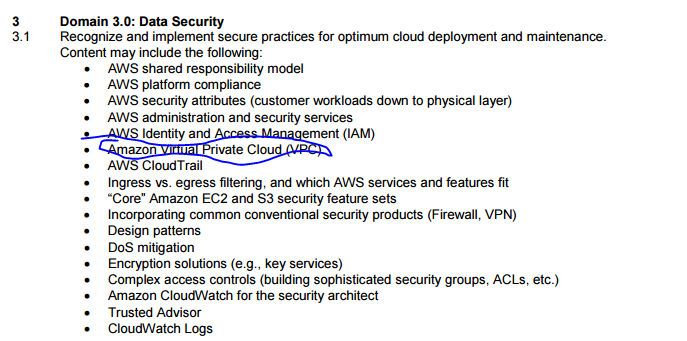
Exam Objective
This topic addresses the Data Security topic as highlighted in the AWS Blueprint for the exam guide. Click here to view it.
This is the backbone of the AWS system. The VPC or the Virtual Private Cloud allows one to have their own dedicated network on the cloud. The VPC is a boundary of AWS resources on the cloud and allows one to isolate their resources from other networks. This is the biggest security boundary that aws provides for their resources on the cloud.
Searching for AWS VPC Interview Questions and Answers? Here’s Top 20 AWS VPC Interview Questions with Detailed Answers.
What is AWS VPC?
As mentioned in the Objective, the VPC is a separate isolated region that is used to host AWS resources.
Below are the various elements to a VPC
- A Virtual Private Cloud – This is the isolated region that consists of a separate IP Range.
- Subnets – This is a segment of the IP Range defined for the VPC in which you can host your resources.
- Internet Gateway – This allows the VPC to communicate with the internet.
- NAT Gateway – This allows private subnets to communicate over the internet via the public subnet.
- Hardware VPN Connection – This allows On-premise environments to communicate with your VPC.
- Virtual Private Gateway – This is used on the Amazon side of a VPN connection.
- Customer Gateway- This is used on the customer side of a VPN connection.
- Router – These are used in aws to connect all the subnets.
- Peering Connection – This can be used to connect one VPC to another.
- VPC endpoint for S3 – Allows the VPC to communicate directly with S3.
- Egress only Internet gateway – A stateful gateway to provide egress only access for IPv6 traffic from the VPC to the Internet
The below diagram from AWS documentation shows a simple example of an AWS VPC. Let’s look at each bit in a little bit more detail.
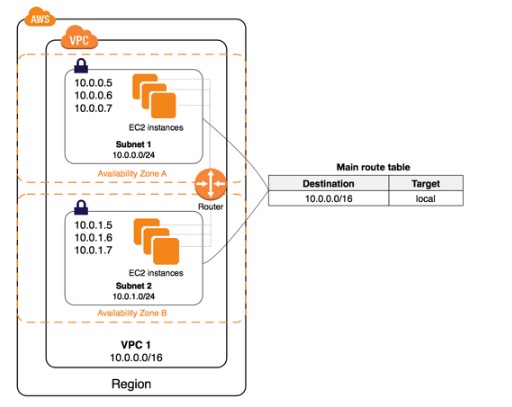
- Each VPC is associated with a network range which is the CIDR range. In the above case the CIDR range is 10.0.0.0/16.
- The VPC has 2 subnets. Each Subnet is a separate network to host the EC2 instances. Each subnet is in a different availability zone.
- Each VPC has a route table that sets rules for how the traffic flows between the subnets. In the above diagram, the route table is designed so that the routes can flow anywhere in the VPC.
How do we set a Virtual Private Cloud (VPC)?
Now let’s look in detail and the steps required to create a VPC. Then we will go through a couple of steps to creating the basic components that make up the VPC.
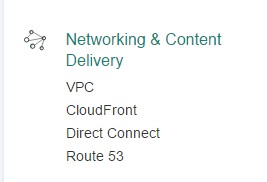
Step 1) Log into your AWS Console. You will see the VPC option under the Networking and Content Delivery section on your dashboard. Click on the VPC option.
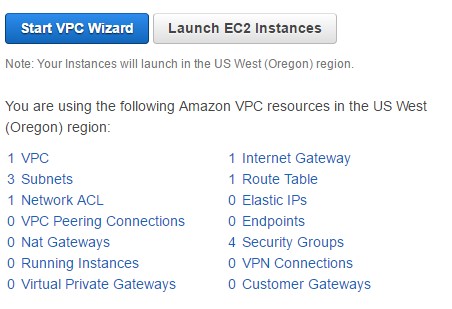
Step 2) You can create a VPC using either the “Start VPC Wizard” or you can create a VPC from scratch by clicking on the VPC link.
Step 3) For now you can choose the option to start the VPC Wizard. You will then be presented with the following screen. There are 4 types of VPC that you can create with a VPC
- You can create a VPC which by default will have an Internet gateway and have a public subnet. So any instance you create in this subnet will automatically be able to connect to the internet.
- Next is the VPC which will have a Public and Private subnet. This is used when you want to host databases in the private subnet. Here you can also configure a NAT instance which will route requests from the private subnet to the internet for certain scenarios.
- Then you can create a VPC with Public and Private Subnets but with a Hardware VPN access to your on-premise network.
- The final option is to create a VPC with a Private subnets but with a Hardware VPN access to your on-premise network.
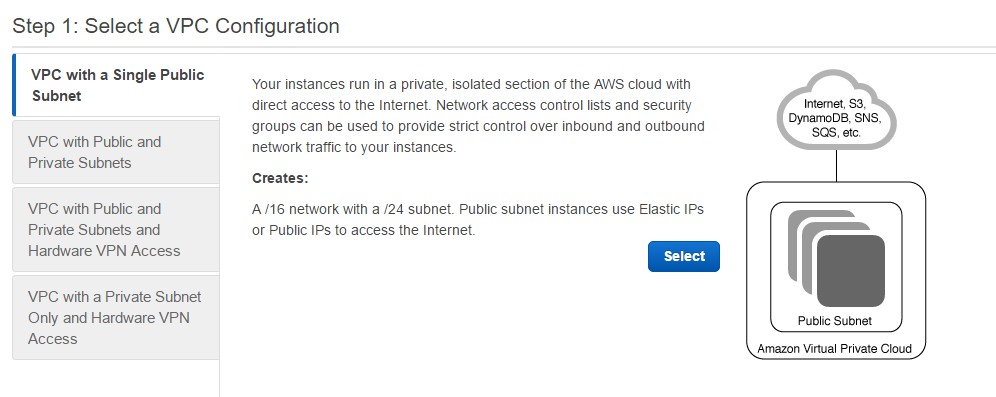
Let’s choose the VPC with a Single Public subnet and proceed ahead.
Step 4) Next is the main configuration of the VPC.
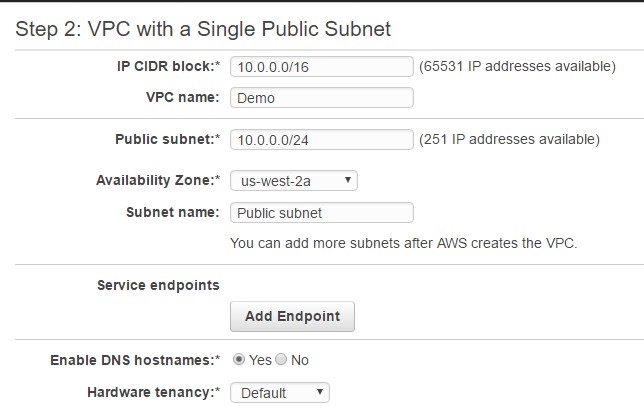
Let’s have a look at the different configurations in this screen
- First is the CIDR block of the VPC. In our case, we are giving it a block of 10.0.0.0/16. It will also show you how many IP Addresses are available in this block.
- You need to provide a name for the VPC.
- Next you need to define the Public subnet. We are giving it a subnet range of 10.0.0.0/24. We can decide what availability zone this subnet will use.
- We can give a name to the subnet.
- We then use the “Enable DNS hostnames”. So every EC2 instance we define in the VPC will get a DNS names entry which can be reachable from the internet.
- If you want to host your VPC on dedicated hardware, you can choose the tenancy option accordingly. But then you will be charged accordingly.
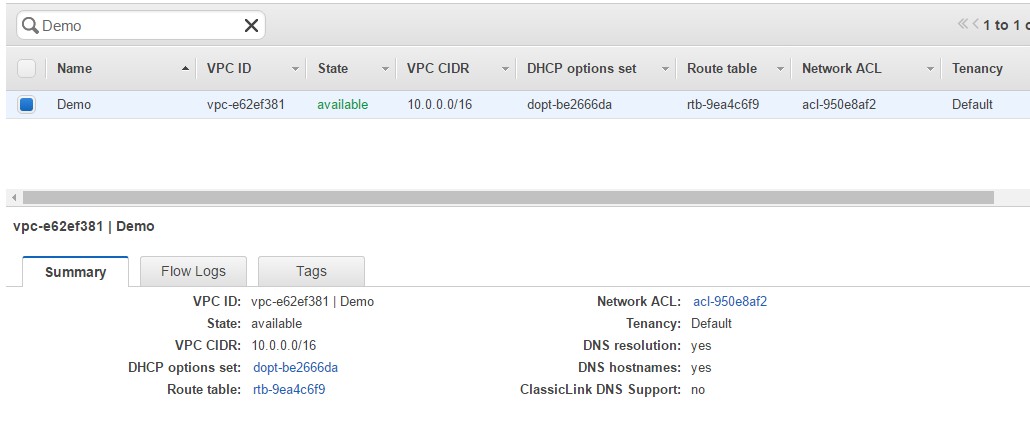
Once the VPC is created, you will get the below successful message

You will then be able to see the VPC in the VPC dashboard.
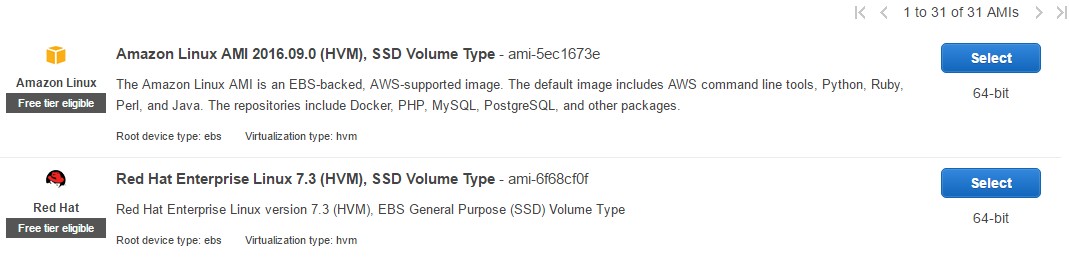
Step 5) Now let’s go through the step of creating an EC2 instance in our new VPC. Go back to your dashboard and choose the EC2 option and launch a new instance. Choose any AMI.
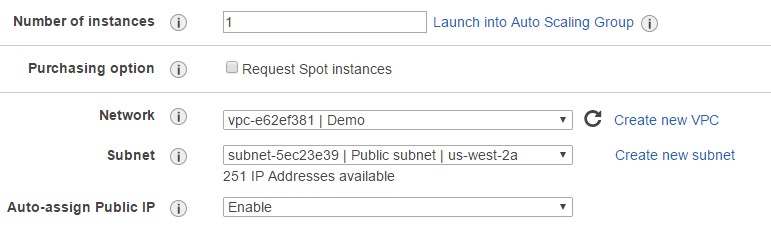
Step 6) Choose any type of instance as required

Now in the next screen notice that you can now choose to create the EC2 instance in the new VPC which was created. You can choose the subnet and also ensure that the “Auto-assign Public IP” is configured as Enable.
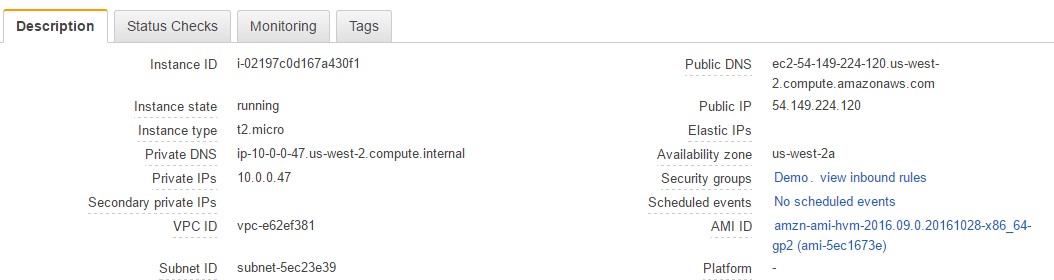
Step 7) Now go through the remaining steps and create your EC2 instance. Once the EC2 instance is launched, go to the details of your new EC2 instance. If you go to the Description Tab of the EC2 instance, you will see that the EC2 instance will have a public IP. It will also have a Public DNS name. So the VPC wizard which was used in the earlier step helped to get all the necessary configurations in place so that EC2 instance would be able to communicate with the internet when it was launched in that subnet.
Final Points to Remember about VPC
- There is no additional charge for creating a VPC. You only get charged for the underlying resources that you host within a VPC.
- Currently, Amazon VPC supports VPCs between /28 (in CIDR notation) and /16 in size for IPv4.
- The IP address range of your VPC should not overlap with the IP address ranges of your existing network.
- One can create 200 subnets per VPC.
- The minimum size of a subnet is a /28 (or 14 IP addresses)
- There are 2 levels of security within the VPC itself
- Security Groups which control the flow of traffic at an instance (EC2) level.
- Network Access Control lists which control the traffic at a subnet level.
- Amazon VPC Flow logs can be used to monitor traffic within a VPC.
- A VPC can span multiple Availability Zones by using multiple subnets.
Practice Questions
It is important to practice more number of questions for preparing for the solutions architect certification exam. We have prepared 300+ high quality questions that covers all the exam objectives and provides explanation for all the option given for the question. This would help you to improve our confidence on the exam before you are taking the real exam.
- 600+ Practice Questions for Solutions Architect Associate Exam
- How to prepare for solutions architect associate exam?
Technical Support
If you are looking for any technical support like more explanation on each questions or clarifications, we have a dedicated support for Amazon Web Services (AWS) to answer all your queries. You can write here with your queries. We would respond to your questions within 12 hours of time.
Good luck for your exam preparation!!
- Top 20 Questions To Prepare For Certified Kubernetes Administrator Exam - August 16, 2024
- 10 AWS Services to Master for the AWS Developer Associate Exam - August 14, 2024
- Exam Tips for AWS Machine Learning Specialty Certification - August 7, 2024
- Best 15+ AWS Developer Associate hands-on labs in 2024 - July 24, 2024
- Containers vs Virtual Machines: Differences You Should Know - June 24, 2024
- Databricks Launched World’s Most Capable Large Language Model (LLM) - April 26, 2024
- What are the storage options available in Microsoft Azure? - March 14, 2024
- User’s Guide to Getting Started with Google Kubernetes Engine - March 1, 2024