In this article, Learn How to Integrate Jenkins with Github. Jenkins is an open-source automation tool that helps in the building, testing, deploying, integration, and delivery of a software product. Using Git Plugin, any source could be easily fetched from the Git repository that is accessible via the Jenkins build node. This is one essential skill assessed in the Jenkins Certification exam.
Git is an open-source version control system and one of the most popular tools used by developers to manage their codes. DevOps engineers with knowledge and experience in handling Jenkins are in high demand. In this article, let us learn Jenkins and GitHub integration.
Prerequisites
Before moving to the steps to integrate Jenkins and GitHub, make sure you meet the following prerequisites.
- Server with Jenkins up and running
- GitHub plugin installed on the Jenkins server
- GitHub Account
Also Read: GitHub vs Jenkins: A Detailed Comparison
Step 1: Create a Jenkins Job
Let’s start by creating a new Jenkins job. Click on the “New Item”, give it a name, pick the “Pipeline” option and click on the OK.

Step 2: Configure GitHub Hook Trigger
On the configuration page, scroll down until the section “Build Triggers” and select the option “GitHub hook trigger for GITScm polling”
Note: We are going to setup this pipeline to trigger whenever a new commits happens on Github repository.

Step 3: Create a GitHub Repository

Step 4: Connect a GitHub Repository
Scroll down to the “Pipeline” section. We will configure Jenkins to use GitHub repository as source. Select “Pipeline Script from SCM” under the definition option.
From SCM dropdown, select “git”.
In the repository URL section, paste the GitHub repository URL which you want to use for this pipeline. In my case, I am using the repository which I have created in the previous step.

Type the Jenkinsfile path and click on save.

Step 5: Adding a WebHook in GitHub
Login to GitHub and go to the repository which you have connected in the previous step.

Click on “WebHooks” and then click on “Add WebHooks”.

In this page, we will configure Jenkins URL so that GitHub will call Jenkins for the actions. In the “Payload URL” section, enter Jenkins server URL which is accessible over the public internet.
In the content type dropdown, select the option “application/json”. Leave the remaining fields as it it click on Add Webhook. You will see a message stating that the Webhook has been created.

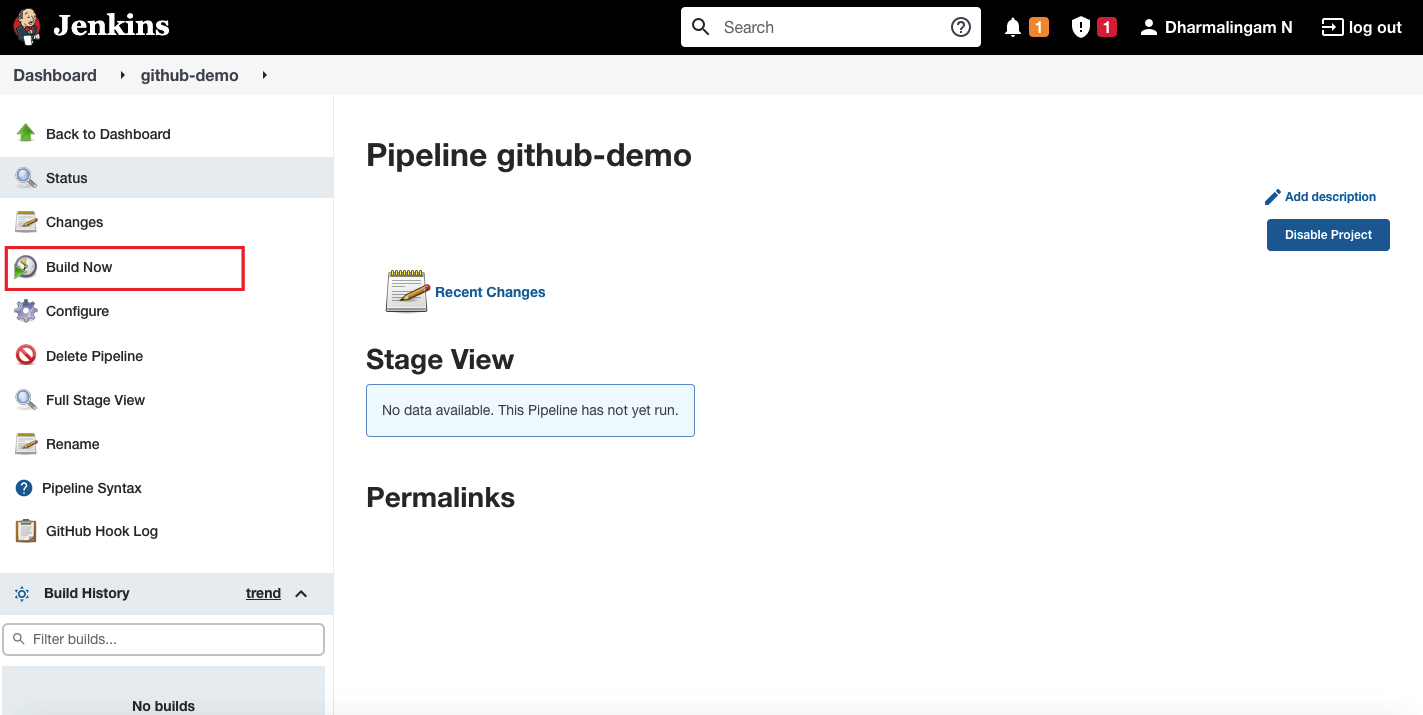
Step 6: Manually Building Jenkins Job
Now go back to the Jenkins dashboard and click on the Job which we have created and then click on “Build Now” from the left.
Step 7: Trigger Build with GitHub Commit
Go to your GitHub repository and add a new commit by making any changes and within few seconds, you can see the build is running on the Jenkins dashboard.
Summary
Hope this Jenkins tutorial was helpful to you and you are able to understand how relevant and crucial GitHub and Jenkins together become. If you are preparing for the Jenkins certification exam, then keep learning for more and deeper understanding of Jenkins!
- Top 10 Highest Paying Cloud Certifications in 2024 - March 1, 2023
- 12 AWS Certifications – Which One Should I Choose? - February 22, 2023
- 11 Kubernetes Security Best Practices you should follow in 2024 - May 30, 2022
- How to run Kubernetes on AWS – A detailed Guide! - May 30, 2022
- Free questions on CompTIA Network+ (N10-008) Certification Exam - April 13, 2022
- 30 Free Questions on Microsoft Azure AI Fundamentals (AI-900) - March 25, 2022
- How to Integrate Jenkins with GitHub? - March 22, 2022
- How to Create CI/CD Pipeline Inside Jenkins ? - March 22, 2022