
Gateway Load Balancer is a powerful tool that allows for efficient load distribution across multiple Virtual Private Clouds (VPCs) and user accounts.
Centralizing your appliance fleet with the help of Gateway Load Balancer streamlines management and ensures consistent security and deployment policies.
To know the basics of Azure load balancer, pursuing AZ-900 Certification can be an ideal choice.
In this hands-on lab tutorial, we will guide you through the process of creating a Gateway Load Balancer using the Azure Portal.
Let’s dive in!
Azure Load Balancer: An Overview
Among the various types of Azure load balancers, Microsoft Azure introduces a portfolio that comprises multiple load balancing and traffic management services. These services can be used alone or in combination, depending on your needs.
The Azure load balancing portfolio includes components such as:
- Traffic Manager
- Application Gateway
- Azure Load Balancer
Now we can delve deeper into the Azure load balancer.
What is an Azure Load Balancer?
An Azure load balancer refers to an ultra-low-latency Open Systems Interconnection (OSI) model Layer 4 inbound and outbound load balancing service designed mainly for the UDP and TCP protocols.
It is built in a way to handle millions of requests per second and it helps to distribute incoming traffic among active VMs to achieve high availability. The Azure elastic load balancer further helps in achieving high availability across the availability zones by making the zone redundant.
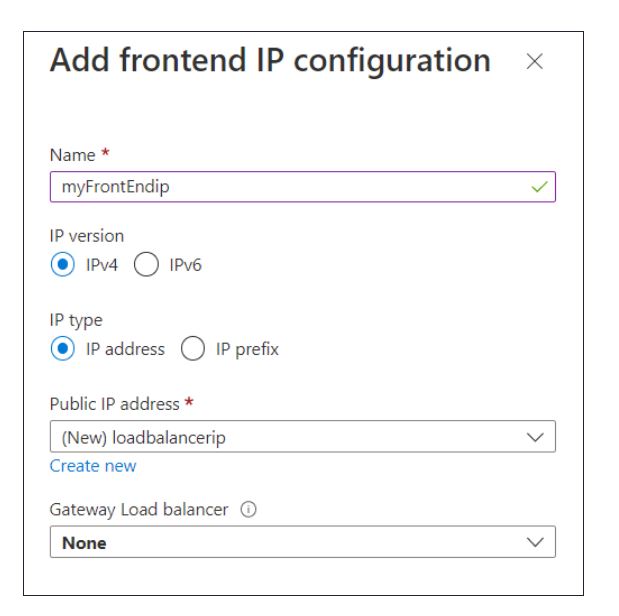
The Azure classic load balancer allows the end users to configure front-end IP to accommodate one or more public IP addresses. The configuration of the Front-end IP makes the applications and Azure WAF load balancer internet more accessible.
Azure Load Balancer uses routing methods such as:
- Geography-based Routing: This method directs application traffic based on the geographic location of the user.
- MultiValue Routing: Users can obtain the IP addresses of several application endpoints through a single DNS response.
- Performance Routing: This approach minimizes latency by directing the requester to the nearest endpoint.
- Priority Routing: Traffic is steered primarily to the main endpoint while keeping backup endpoints in reserve.
- Subnet-based Routing: This method allocates application traffic to endpoints according to the user’s subnet or specific IP address range.
- Weighted Round-robin Routing: Traffic distribution to each endpoint is determined by the respective weight assigned to it.
Also Read: Azure Load Balancer – A Complete Guide
What is Azure Gateway Load Balancer?
Gateway Load Balancer is a specialized offering within Azure’s Load Balancer suite, specifically designed to address high-performance and high-availability requirements, especially in conjunction with third-party Network Virtual Appliances (NVAs).
The Gateway Load Balancer architecture is designed to centralize and streamline the management of appliances, ensuring consistent security and deployment policies across diverse VPCs and user accounts in Azure.
Operating at the network layer, Gateway Load Balancer provides seamless load distribution, optimizing the flow of traffic and enhancing the scalability and reliability of your network architecture.
By utilizing the features of the Gateway Load Balancer, users can effortlessly implement, expand, and oversee NVAs with enhanced efficiency and control.
Why Opt for Azure Load Balancer?
The Standard Load Balancer in Azure empowers users to scale applications and ensure high availability. It supports both inbound and outbound traffic scenarios and boosts impressive performance metrics suitable for millions of TCP and UDP applications.
The Gateway Load Balancer endpoint serves as a centralized access point, efficiently distributing network traffic across multiple Virtual Private Clouds (VPCs) and user accounts in Azure.
Key functionalities and benefits of Azure load balancer include:
- Efficiently balancing internal and external traffic to Azure VMs.
- Enhancing service availability by distributing resources across zones.
- Leveraging health probes for consistent monitoring.
- Utilizing port forwarding for accessing VMs within a virtual network via public IP addresses.
- Gaining insights into service performance and health through comprehensive metrics available in Azure Monitor.
Types of Load Balancers in Azure
Azure offers two primary load balancer types to manage the internet traffic and they are:
- Public Load Balancer: Designed to balance internet traffic directed towards virtual machines and facilitate outbound connections for VMs within the virtual network.
- Internal/Private Load Balancer: Tailored for balancing traffic originating within a virtual network.
Both these load balancer types are available in two pricing tiers:
- Basic Tier: Offers fundamental features with certain limitations, such as a maximum of 300 instances in the backend pool and support for a single availability set.
- Standard Tier: This tier provides enhanced scalability and advanced features. While it comes with associated costs, the Basic tier remains free. Users can scale up to 1000 instances and encompass a diverse range of virtual machines within a single virtual network.
Explore the flexible Gateway Load Balancer pricing options in Azure to find a cost-effective solution that aligns with your network requirements and scales with your business growth.
Azure Load Balancer Features
Here are the distinct features of the Azure load balancer:
- Load balancing: Azure load balancer has a 5-tuple hash and contains the source IP, destination IP, source port, destination port, and protocol. The load balancing role can be configured in a load balancer with the help of the source port and source IP address.
- Outbound connection: All the outbound traffic flows from the private IP address within the virtual network to a public IP address on the web can be converted to the frontend IP of the load balancer.
- Agnostic and transparent: Azure load balancer does not interact with the TCP or UDP protocols directly. Instead, the traffic routing can be done based on the URL or hosting on multiple sites.
- Automatic reconfiguration: Reconfiguration of the load balancer is done automatically and thus scaling up or down of the instances based on the conditions is also made easier with the existence of an automatic configuration feature. So, if an additional VM is added to the backend pool, then reconfiguration of the load balancer will be carried out automatically.
- Health probes: If any failure in the virtual machines of the load balancer is recognized, the health probes in the backend pool stop the routing process to the particular failed VM. It will configure a healthy probe to detect the instance’s health in the backend pool.
- Port forwarding: A load balancer acts as an intermediary between clients and servers, distributing incoming network traffic across a group of backend servers to ensure that no single server is overwhelmed with too much demand. One of the functions of a load balancer is to manage incoming traffic and direct it to the appropriate backend servers.
Steps to create gateway Load balancer using Azure Portal
To set up a gateway load balancer, the initial step involves establishing a lab environment. You can access the Whizlabs hands-on labs by selecting the platform option on the Whizlabs main page and clicking on hands-on labs.
After reaching the labs’ page, utilize the search bar situated at the top of the page and search for how to create a gateway load balancer using the Azure portal.
Now, click the start lab button in the top right of the respective lab page. The cloud environment is setting up and it might take a few seconds.
Now follow the tasks as instructed below to create the Azure Gateway load balancer successfully:
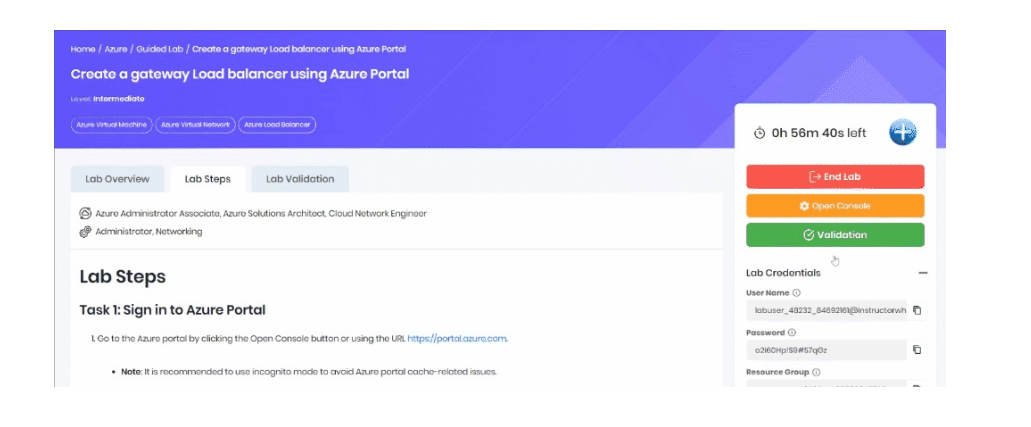
Task 1: Access Azure Portal
Navigate to the Azure portal either by clicking the “Open Console” button or using the link: https://portal.azure.com.
Note: For smoother access, it’s advisable to use the incognito mode to prevent potential cache issues with the Azure portal. If you find yourself logged into another Azure account, ensure you log out and clear any cached data. Once done, sign in using your provided credentials. If login issues persist, consider ending the lab session and restarting it.
Task 2: Setting up a Virtual Network
To support resources within the gateway load balancer’s backend pool, a virtual network is essential. Click on the “Create a Resource” button.
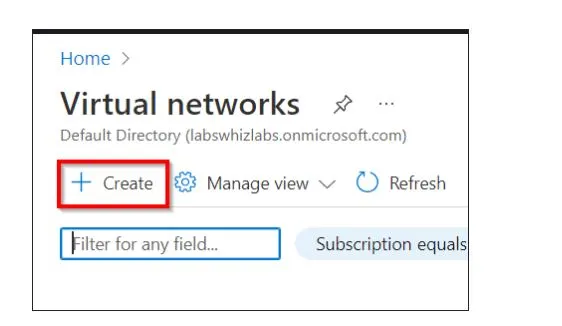
Use the search bar at the top to locate “Virtual network” and select it.
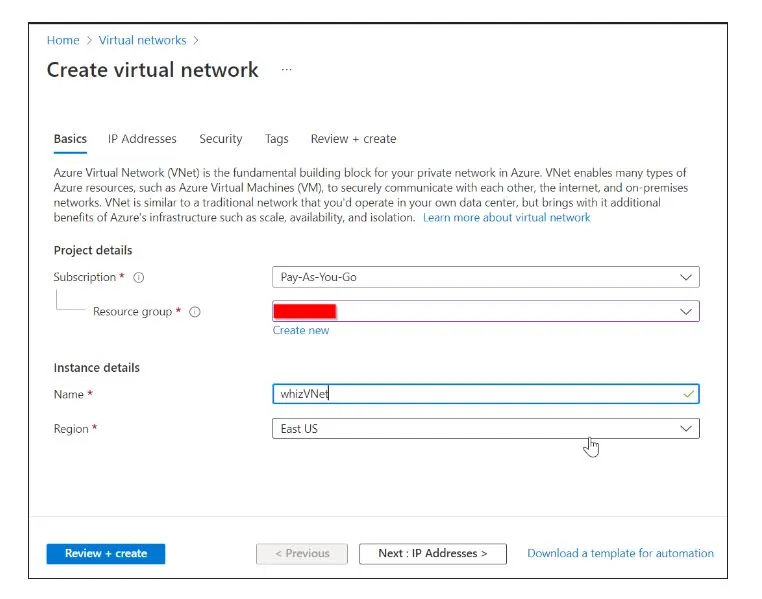
Within the virtual networks section, choose to create a new one. Provide the required details in the “Basics” tab such as Resource Group, Name, and Region.
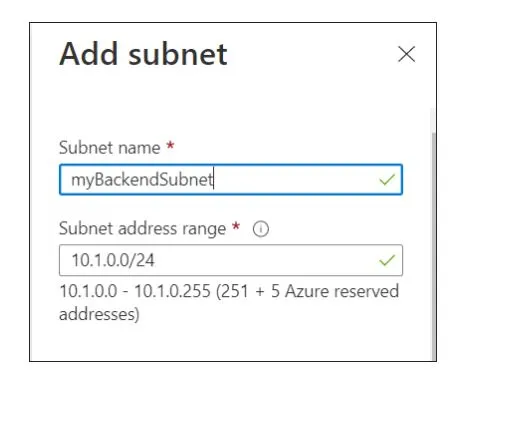
Move to the “IP Addresses” tab and specify the IPv4 address space and subnet details.
Under the “Security” tab, enable the BastionHost and provide the necessary details.
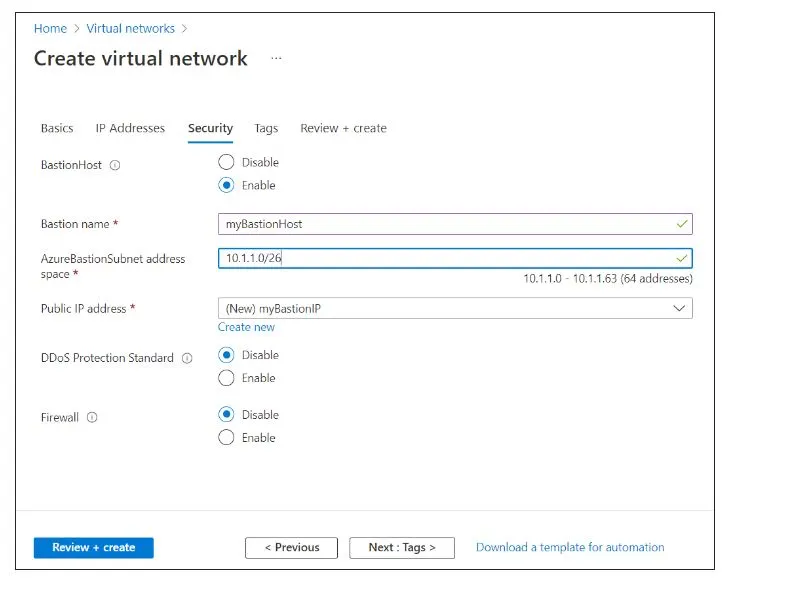
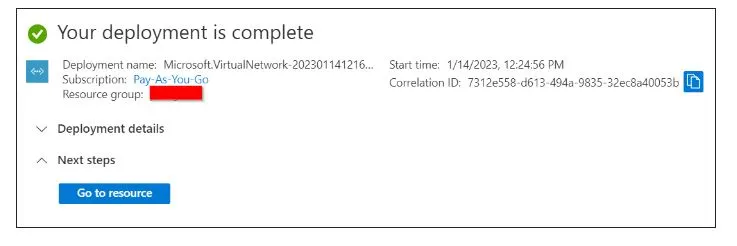
Once all details are entered, proceed to review and finalize the creation by selecting “Create”.
Task 3: Establish a Network Security Group (NSG)
An NSG will be set up to define network traffic rules for the previously established virtual network.
Search for “Network Security” and select “Network security groups”.
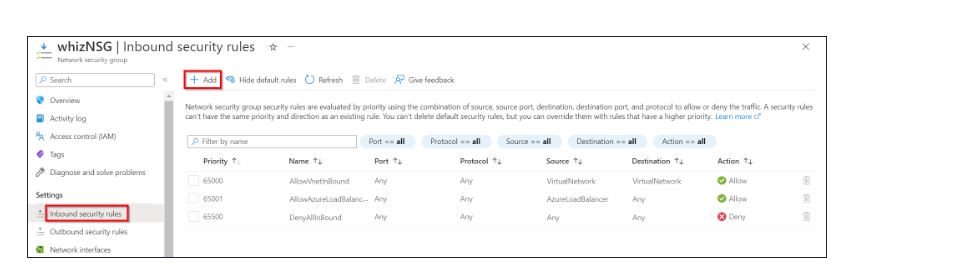
Create a new NSG, providing the required details such as name and region.
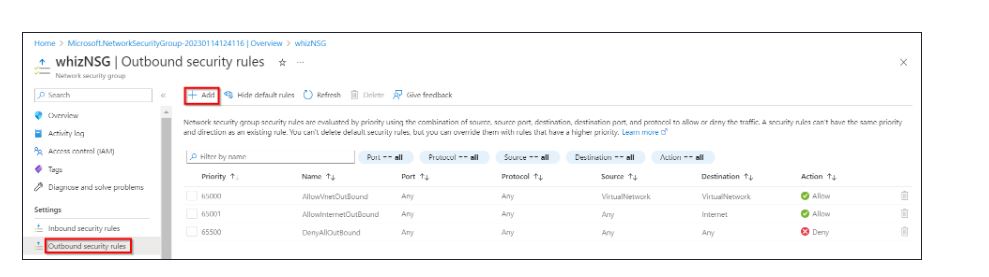
Configure inbound and outbound security rules as specified, ensuring they align with your deployment requirements. Click the Add tab to add Inbound security rules.
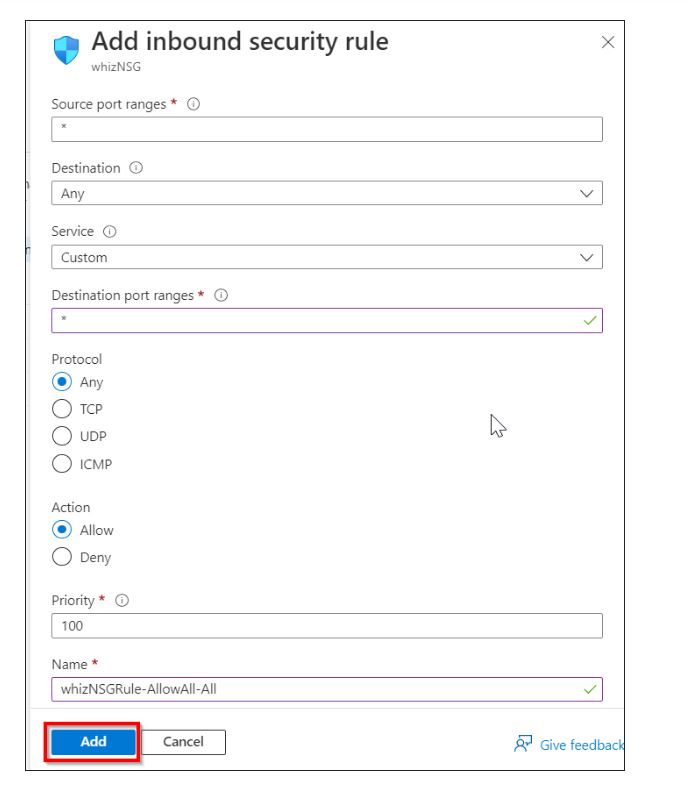
Click on add after entering the details. Now select the Outbound security rules in Settings and Select + Add.
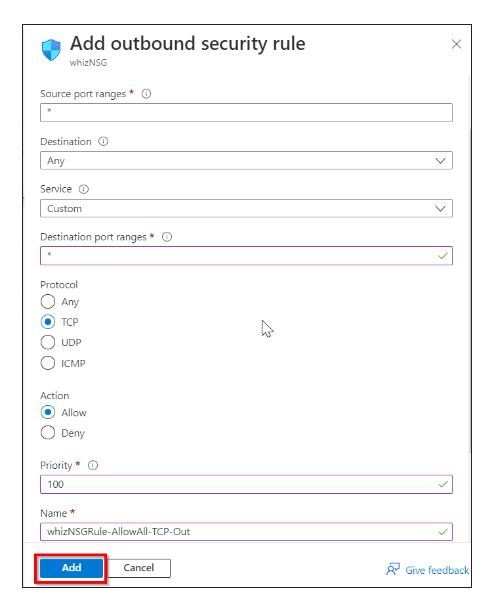
In Add outbound security rule, enter the following information.
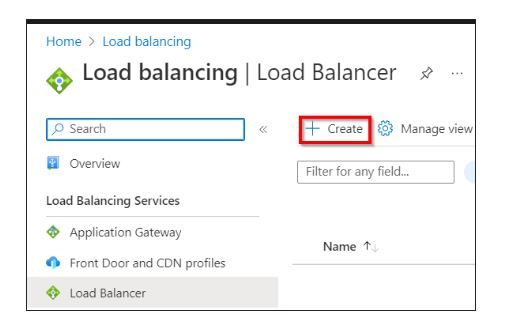
Task 4: Deploy a Standard Public Load Balancer
This step focuses on creating and configuring a standard public load balancer.
Use the portal’s search function to locate “Load Balancer” and select the appropriate option.
Initiate the load balancer creation process by providing necessary details in the “Basics” tab.
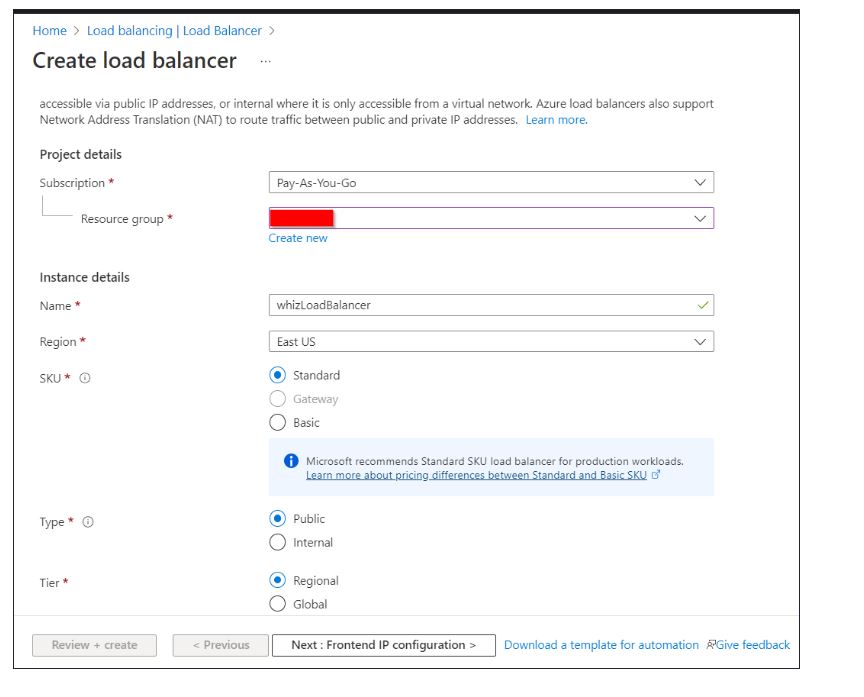
Continue through the configuration steps, defining frontend IP configuration, and other essential settings.
Review the provided information and confirm the load balancer creation.
Task 5: Establish the Gateway Load Balancer
This task guides you through the configuration and deployment of the gateway load balancer.
Start by searching for “Load Balancer” in the portal. Initiate the creation of the load balancer, ensuring the selection of the internal type and gateway SKU.
Now define frontend IP, backend pools, and load balancing rules as instructed.

After confirming the configuration, proceed with the creation.
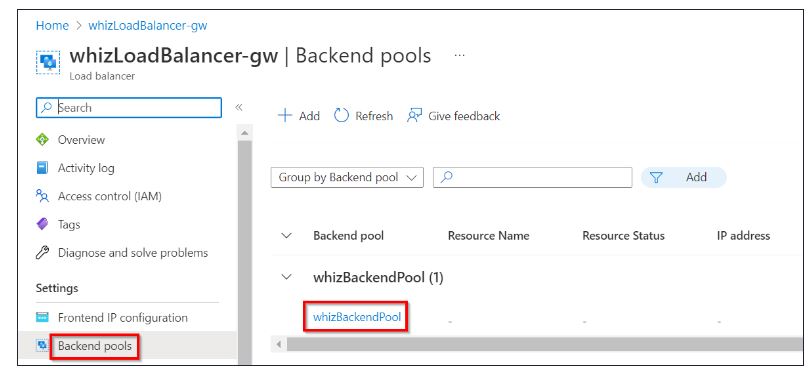
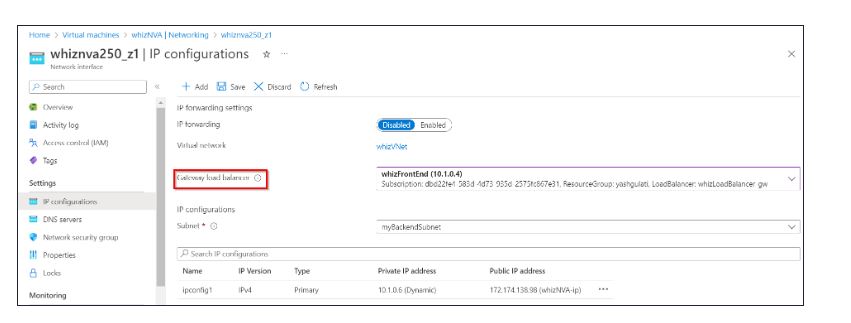
Task 6: Add Network Virtual Appliances (NVA) to the Load Balancer Backend Pool
This step involves integrating the network virtual appliances into the load balancer’s backend pool.

Search and select “Virtual Machines”.

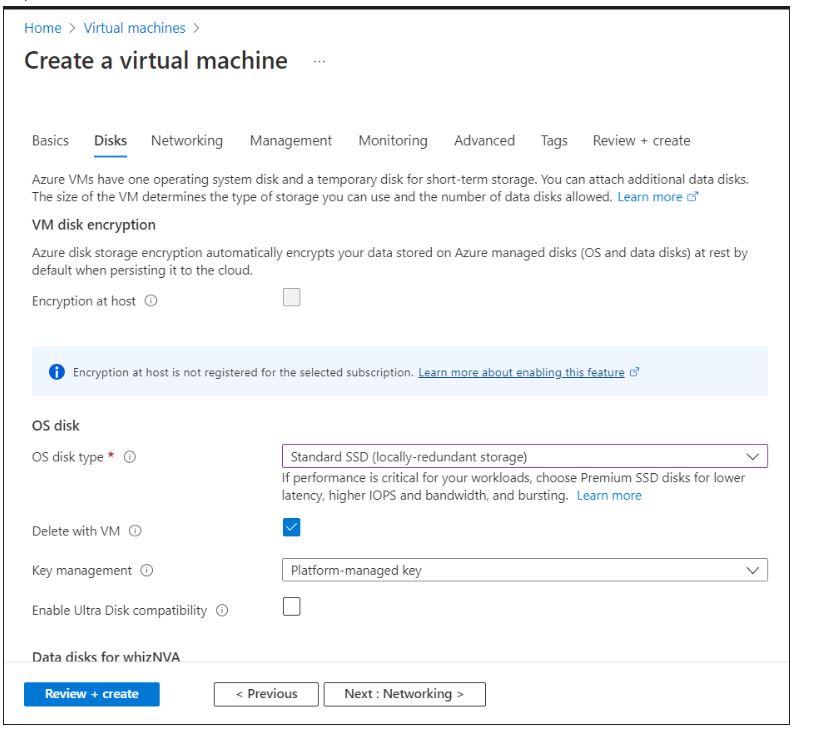
Initiate the creation of an Azure virtual machine, providing necessary specifications.

Once the virtual machine is created, associate it with the load balancer’s backend pool.
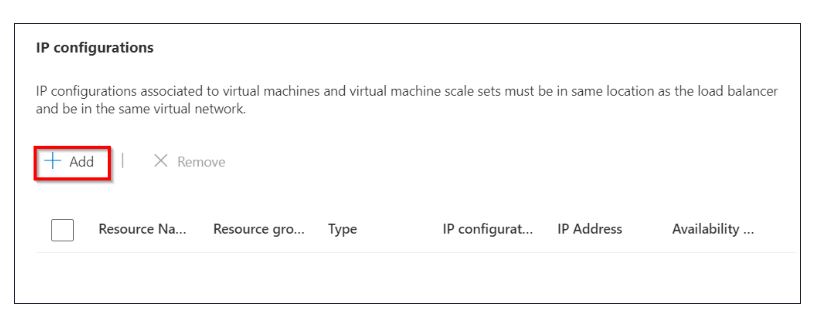

Task 7: Linking the Load Balancer Frontend to the Gateway Load Balancer
Finally, you’ll connect the front end of a standard load balancer to the gateway load balancer.
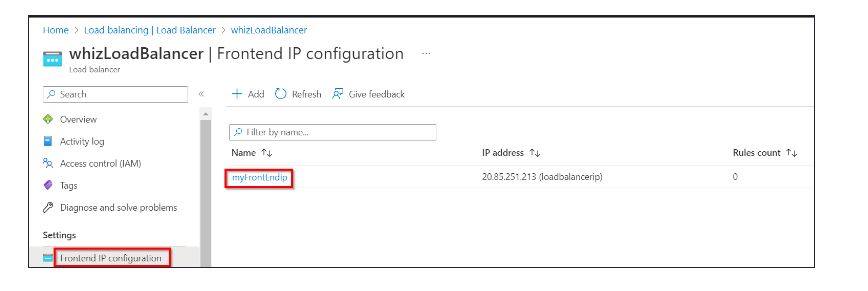
Navigate to the Load Balancers section in the Azure portal.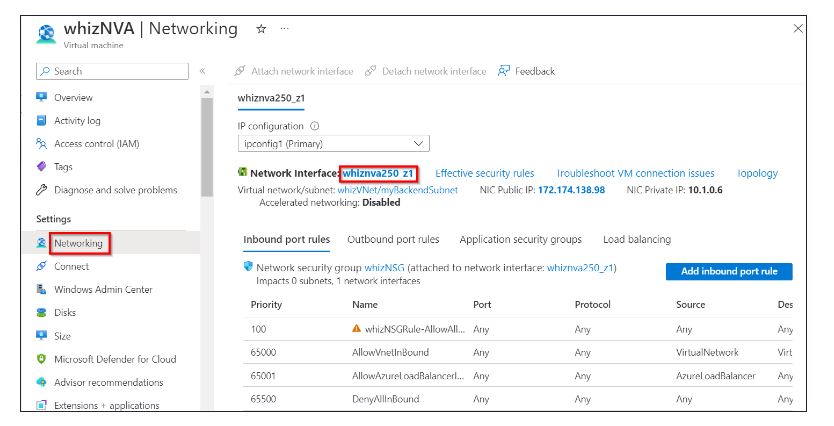
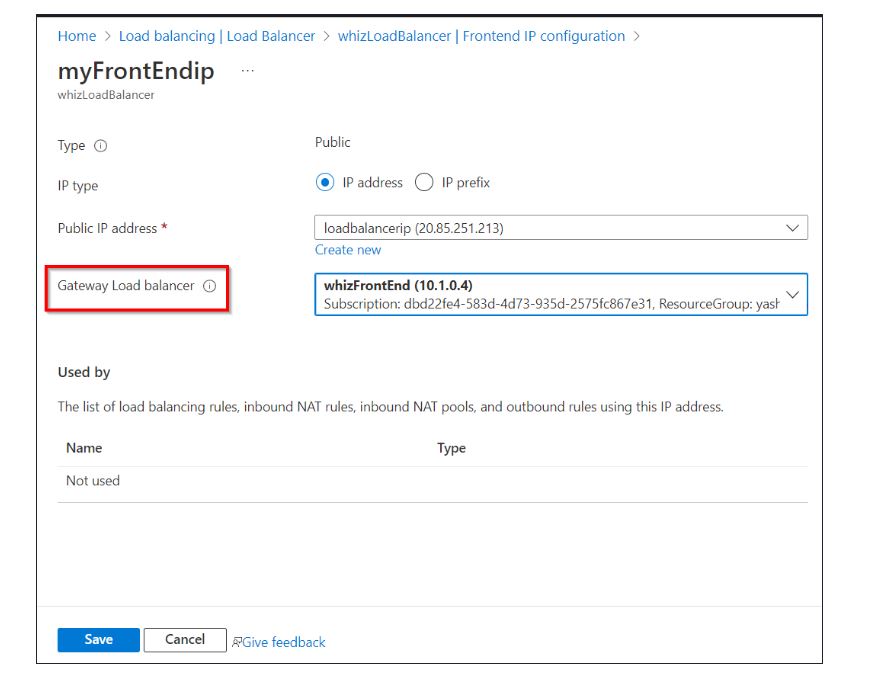
Select the desired load balancer and proceed to link its frontend IP to the gateway load balancer’s frontend.3
Task 8: Verify the Configuration
After completing all the necessary project steps, navigate to the “Validation” section and initiate the validation process by clicking on the designated button. Select the “Validate My Lab” option. Once initiated, you’ll receive a status update titled “Lab Overall Status” that informs you about the successful completion of the project.
Task 9: Removal of Resources
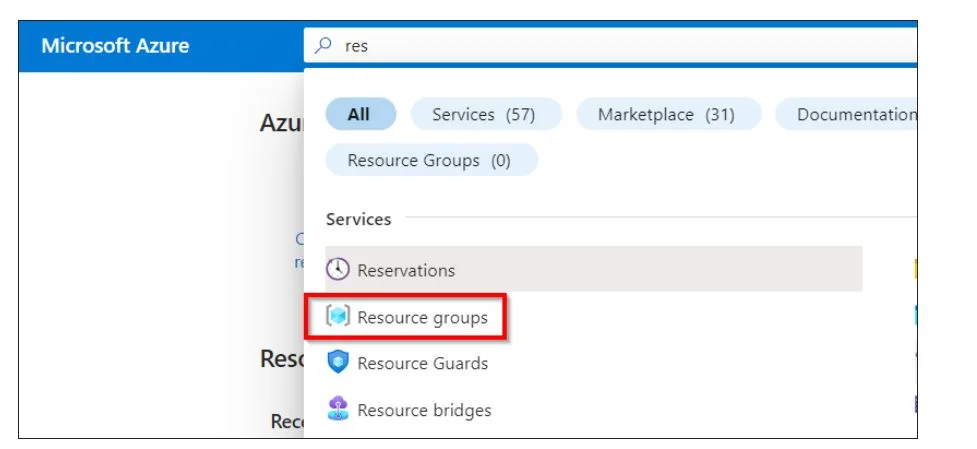
- Use the search bar at the Azure portal’s top to look up “Resource groups” and select the relevant option from the displayed results.
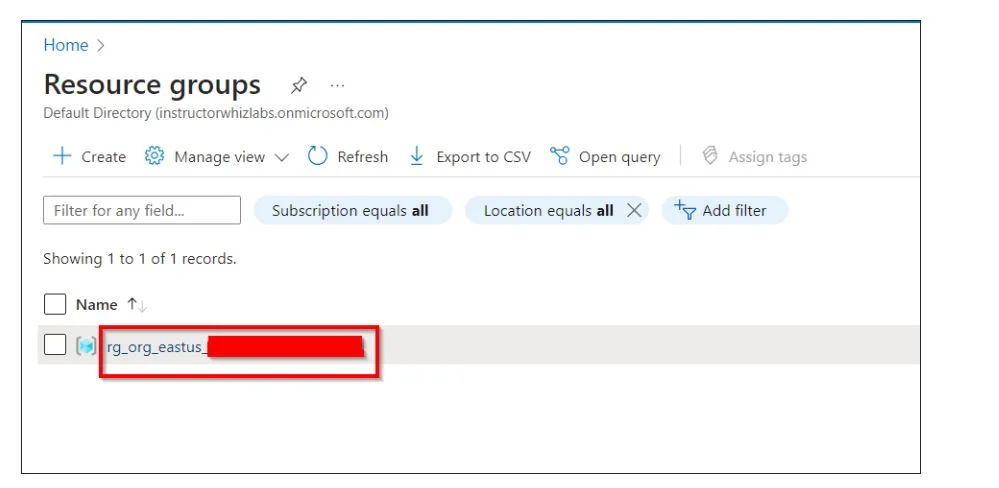
- Click on the specific resource group’s name.
Within the resource group, mark all the resources.
- Proceed to click on the ellipsis (three dots) located on the right side and select the “Delete” option.
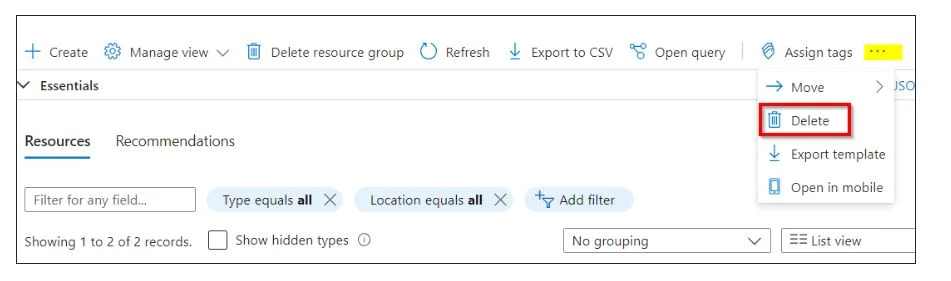
- A confirmation prompt will appear; enter the word “delete” as instructed.
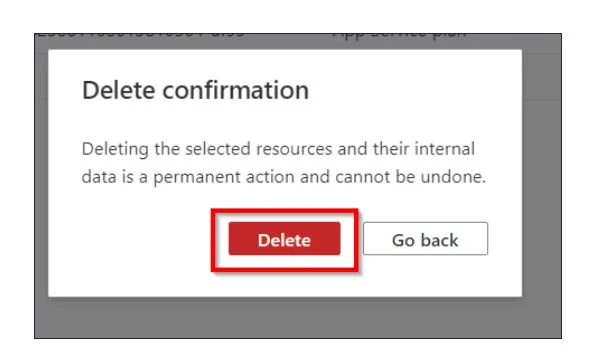
Finally, confirm the deletion action to remove the selected resources.
FAQs
What is the difference between Azure load balancer and Application Gateway?
The distinction between Azure Load Balancer and Application Gateway lies in their operational layers and the routing criteria they consider. Azure Load Balancer functions at the transport layer (OSI layer 4 – TCP and UDP) and directs traffic based on the source IP address and port to a destination IP address and port.
In contrast, Azure Application Gateway operates at the application layer (OSI layer 7 – HTTP/HTTPS) and you can make routing decisions based on additional attributes of an HTTP request, such as URL path or host headers.
Therefore, traditional load balancers focus on network traffic distribution, while Application Gateway specializes in making nuanced routing decisions based on characteristics specific to the application layer.
What are the benefits of Gateway Load Balancer?
Gateway Load Balancer offers the advantage of centralizing your appliance fleet by operating across multiple VPCs and user accounts. This centralization simplifies appliance management, leading to consistent enforcement of security and deployment policies. Additionally, it reduces the likelihood of operator errors, as there are fewer places to manage appliances.
What are the types of load balancers available in Azure?
There are three types of load balancers in Microsoft Azure. They are – Azure Load Balancer, Internal Load Balancer (ILB), and Traffic Manager.
What is Azure NAT Gateway?
Azure NAT Gateway is a fully managed and highly resilient Network Address Translation (NAT) service in the Azure cloud environment. It functions by offering outbound connectivity to the internet through the deployment of a dedicated NAT gateway resource.
Conclusion
By following these steps, you’ve gained valuable insights into leveraging Gateway Load Balancer for optimizing load distribution and centralizing your appliance fleet in Azure.
As you continue to explore and experiment with Azure services, this newfound knowledge will contribute to your proficiency in building robust and scalable network architectures
We encourage you to explore further, experiment with different configurations, and apply these learnings to real-world scenarios with our Azure sandboxes.
- AWS Security Specialists: Essential in Modern Cybersecurity - August 16, 2024
- Cloud Developer Tools Showdown: AWS vs Azure vs GCP - August 14, 2024
- Master AWS Lambda and API Gateway for Application Development - August 6, 2024
- Benefits of AWS Developer Associate Certification which Can Boost Your Career - July 24, 2024
- Preparation Guide on Datadog Fundamentals Certification - July 17, 2024
- What is DLP in Power Automate? - June 5, 2024
- Top Data Engineering Certifications in 2024 - May 30, 2024
- How Difficult is Google Cloud DevOps Engineer Certification? - May 29, 2024