
An Azure Network Security Group (NSG) serves as a major component of Azure’s security fabric. With the help of NSG, you can filter the traffic to and from the Azure resources within a Virtual Network (VNet).
For those preparing for the AZ-104 certification exam, understanding Azure Network Security Groups is essential, as it’s a key aspect of managing Azure resources securely.
This blog post explores about Azure Network Security Groups, Azure Network Security Group Rules, how Network Security Group works, Azure Network Security Group use cases, how to create Network Security Groups, and how they can improve Azure security in real-time via our hands-on lab settings.
Let’s dive in!
Azure Network Security Groups: An Overview
Azure Network Security Groups (NSGs) are essential for managing the network traffic in virtual networks within the Azure ecosystem.
It withholds a certain set of rules to allow or deny the network traffic based upon the specified conditions, such as source and destination IP addresses, ports, and protocols.
Security rules that permit or prohibit network traffic to and from various Azure resource types are contained in a network security group. For every rule, you can set the protocol, port, source, and destination.
Azure Network Security Group rules can vary from zero to many depending on the constraints of an Azure subscription.
Also Read: Free Microsoft Azure Administrator AZ-104 Exam Questions
Azure Network Security Group Rules
- Permit Vnet InBound: This rule permits unrestricted communication between all hosts (including subnets) inside the virtual network.
- Permit Azure LoadBalancer InBound: This rule enables traffic to be sent between your virtual machine and an Azure load balancer.
- Deny All InBound: It is the reject-all rule, which shields the virtual machine (VM) from harmful access by default to block all traffic coming in to the VM that originates outside the Azure Vnet.
How does Azure Network Security work?
Azure Network Security Group (NSG) from Microsoft is an ideal choice for protecting virtual networks.
Network administrators can easily arrange, filter, guide, and control various network traffic flows by using this application.
- You can set up multiple incoming and outgoing rules to allow or deny specific types of traffic while creating Azure Network security groups.
- You must create and set up each rule individually if you wish to use Azure Network Security Groups.
An Azure virtual network may contain resources from several Azure services. Every virtual network subnet and network connection in a virtual machine can have zero or one network security group setup. A single network security group can have any number of subnets and network connections connected to it.
You can set up whatever rules you want, such as whether or not the traffic passing through the network is safe and should be allowed, depending on the situation.
Network Security Groups (NSGs) operate by comparing network traffic to a set of rules that you have established. These guidelines specify whether traffic should be allowed or prohibited by the program.
Here’s a rundown of how this operates.
- Rule Creation: In the NSG, you can design and establish rules that indicate which traffic parameters are allowed or prohibited.
- Priority Assignment: A priority is given to every rule. NSGs process rules from the lowest number (highest priority) to the highest number in descending order of priority.
- Traffic Analysis: NSGs compare incoming and outgoing traffic to the established rules as it tries to access or depart a resource.
- Action Enforcement: An action (allow or deny) is enforced if the traffic pattern corresponds to a regulation.
Additionally, Azure network security groups include default security rules that give your network a rudimentary level of protection. These defaults function at a lower priority than custom rules, even though you cannot remove them. This enables you to override the settings when needed using your preferences.
How to create Azure network security groups?
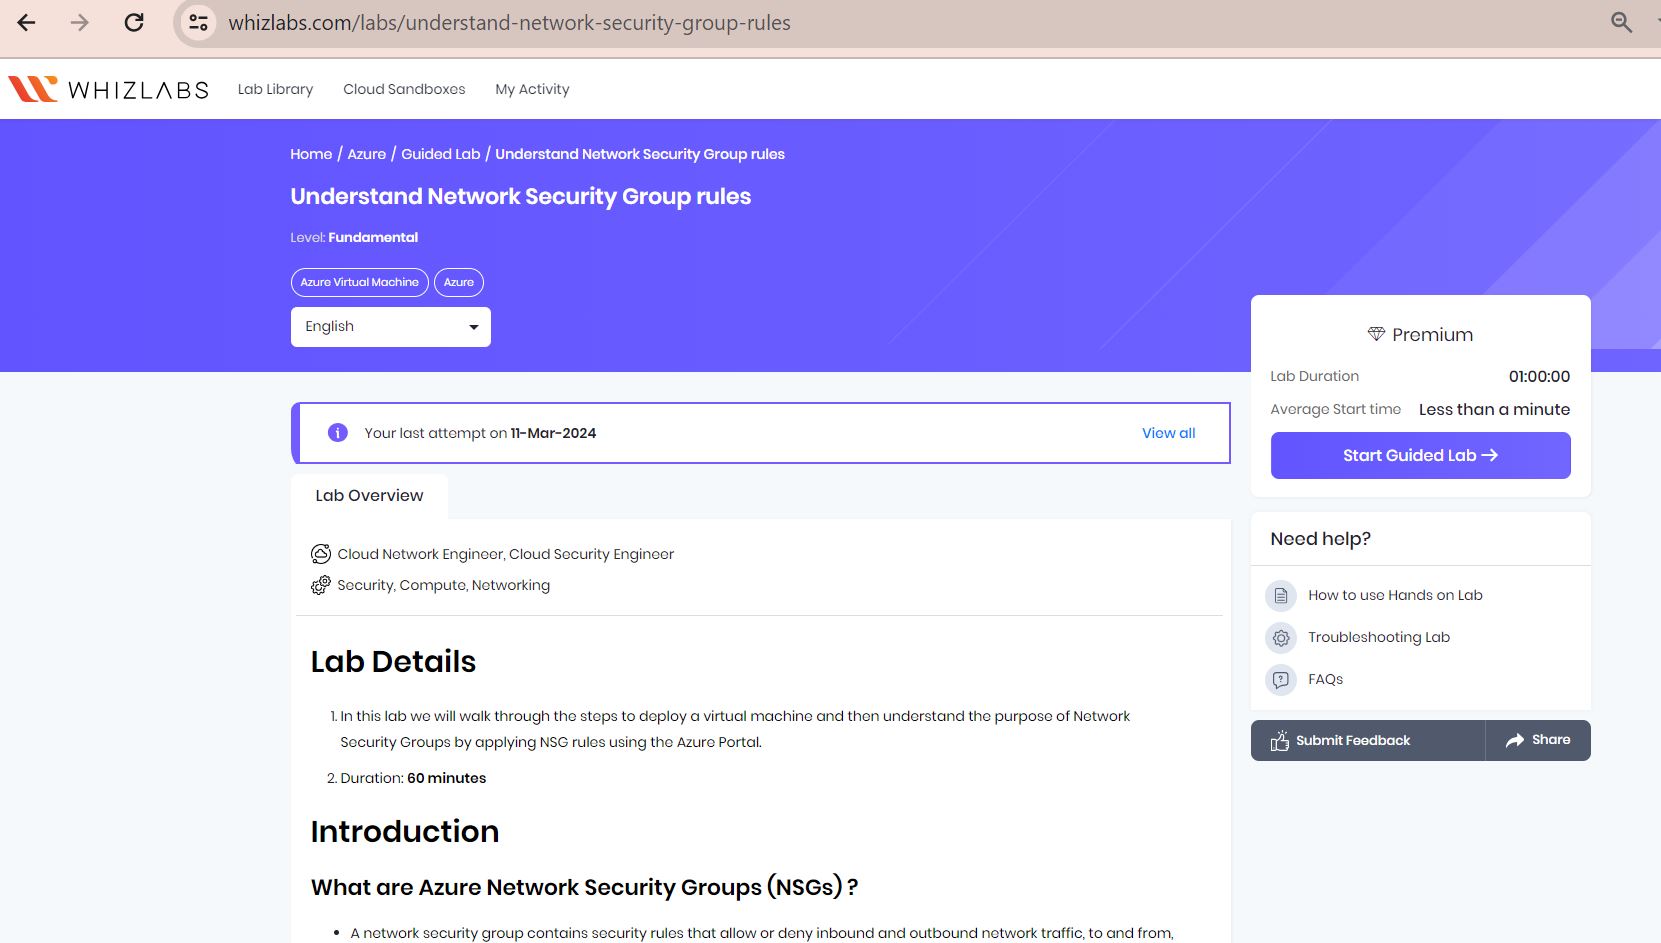
As an initial step, access the Whizlabs hands-on labs page and type Network security group in the search bar.
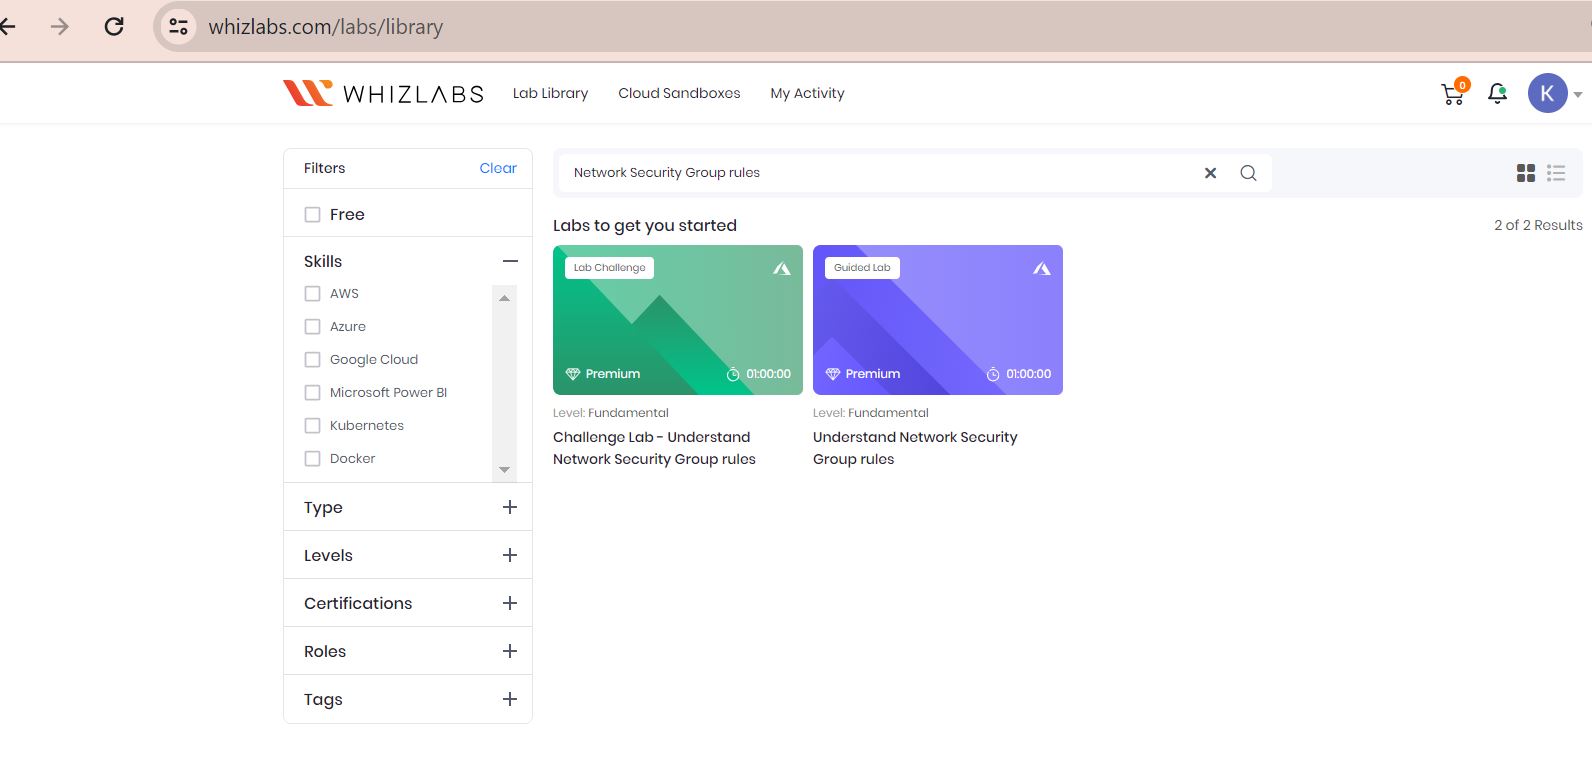
Now choose the guided labs, click on start lab and follow lab instructions.
Task 1: Sign in to Azure Portal
- Access the Azure portal by clicking the Open Console button or navigating to https://portal.azure.com.
- It’s advised to use incognito mode to prevent potential Azure portal cache issues.
- If automatically logged into another Azure account, log out and clear the cache.
- Sign in using the provided username and password.
- If login issues persist, select End Lab and restart the lab.
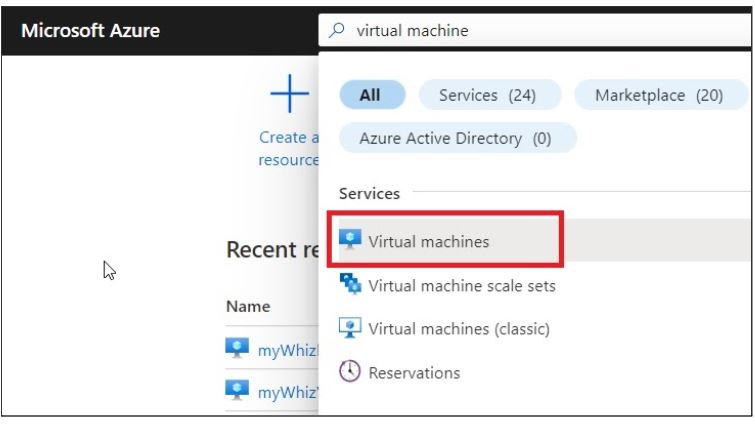
Task 2: Create a virtual machine
In the search box at the top of the Azure portal, enter Virtual machine. Select Virtual machines from the search results.
In the Virtual Machines section, select + Create > Azure virtual machine.

In the “Create a Virtual Machine” tab, input or choose the specified values in the “Basics” tab.
Input Resource group details, Administrator Account details, and Inbound Port rules as shown below:
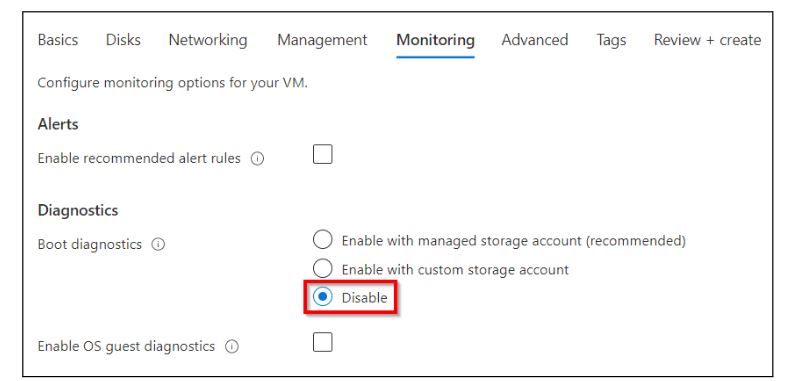
Leave the defaults on the Networking and Management tabs, go to the Monitoring tab, and Disable the Boot diagnostics.
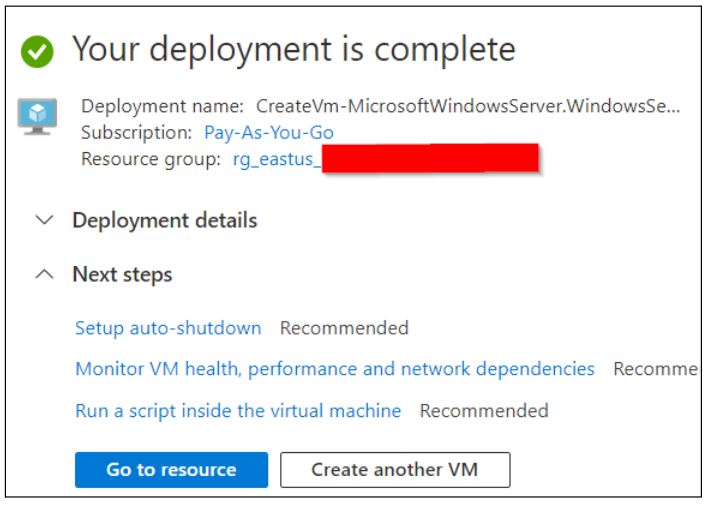
Click on the “Review + Create” button located at the bottom of the page, and then proceed to click on “Create.” After a few minutes, your VM will be deployed.
Task 3: Allow RDP traffic via NSG rules
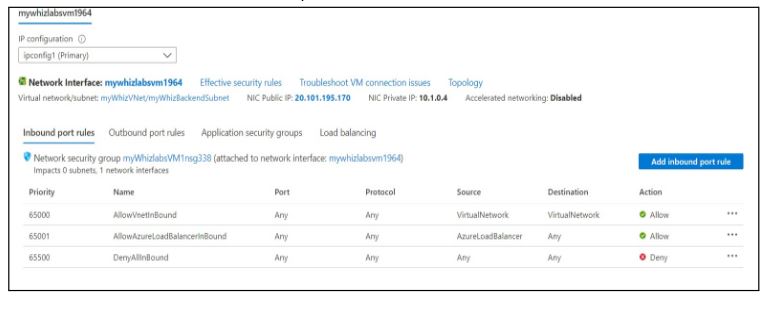
In the search box located at the top of the Azure portal page, type “Virtual machine.” Choose “Virtual Machines” from the search results. Select the virtual machine you created, named “myWhizlabsVM1.”
Navigate to the “Networking” section in the left menu on the Overview page of your VM. Here, you will find information about the network interface, including the public and private IP addresses, as well as the inbound and outbound port rules.
Click on Add inbound port rule and enter or select the following information:
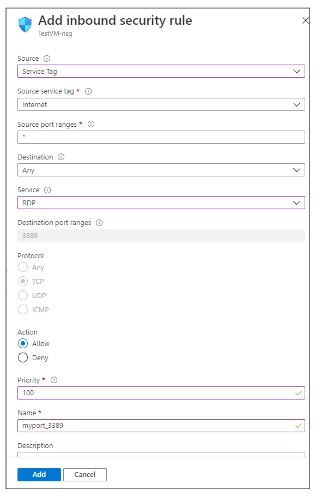
Click on the Add button. Now, the security rule will be created which will ensure that we can connect on port 3389 to the virtual machine.

To initiate a connection to the virtual machine, navigate to the “Overview” section and click on the “Connect > RDP” button on the overview page. Next, select the “Download RDP file” option.
Open the downloaded RDP file, and you will be prompted to enter the username and password for the Remote Desktop Connection.
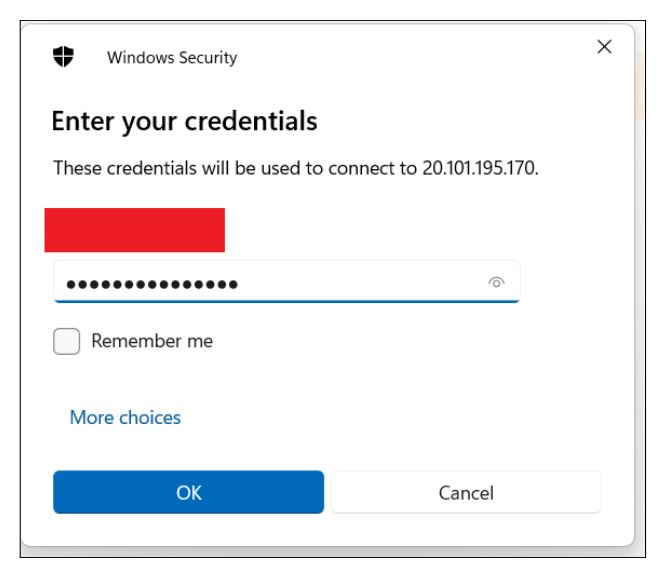
Click OK. You will now be connected to your Virtual machine.
Task 4: Allow HTTP traffic via NSG rules
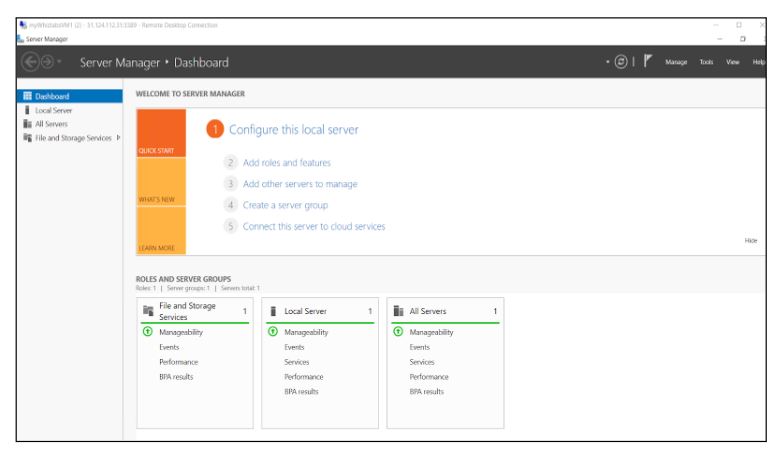
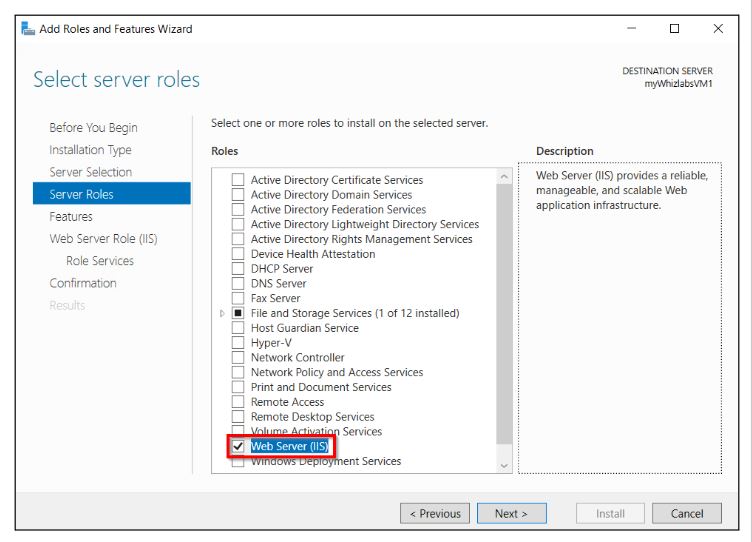
On the Windows virtual machine, launch the Server Manager, and select “Add Roles and Features.” Now, proceed to install a web server on this specific machine by adding a network security group rule. This rule will permit traffic to enter the virtual machine on Port 80, enabling access to the web server.
Click on Next until you get an option to select Web Server (IIS). Then, again click on Next until you get an option to install.
- Select “Install.” After the installation is finished, click on “Close.”
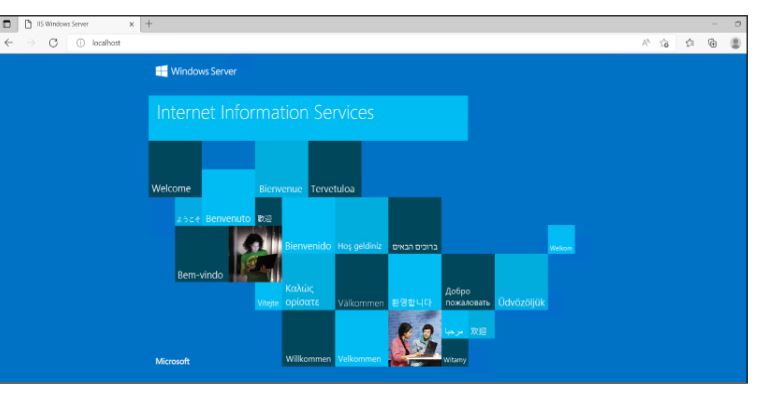
- Open the Microsoft Edge web browser on the Windows VM and enter “http://localhost/” in the search bar to verify that Internet Information Services (IIS) is successfully installed on the machine.
Now, return to the Azure portal. In the Networking section of the virtual machine “myWhizlabsVM1”, select Add inbound port rule and enter or select the following information.
Click on the Add button. Now, the security rule will be created.

In the networking section, you will find the public IP address. Copy the public IP.

Now, paste the public IP on your web browser. You will see the page displaying Internet Information Services.
Do you know?
Azure Network Security Group (NSG) rules enable you to manage incoming and outgoing traffic to virtual machines. These rules are assessed in the specified order, and the first rule that matches the traffic is applied. This implies that if a rule either permits or denies a connection, subsequent rules are not considered for that particular traffic.
Task 5: Validation test
After finishing the lab steps, select the Validation button or navigate to the Lab Validation section. Click on the “Validate My Lab” button. You will receive the “Lab Overall Status,” indicating whether or not you have completed the lab. The sample output will provide details about the validation results.
Task 6: Deleting the resources
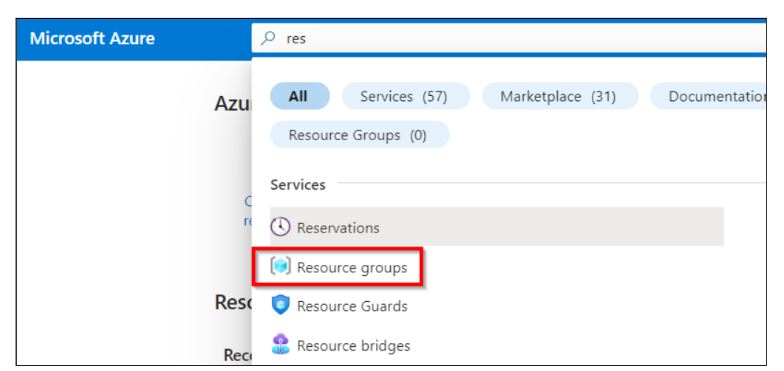
In the search box at the top of the Azure portal, enter the Resource Groups. Select Resource groups from the results.
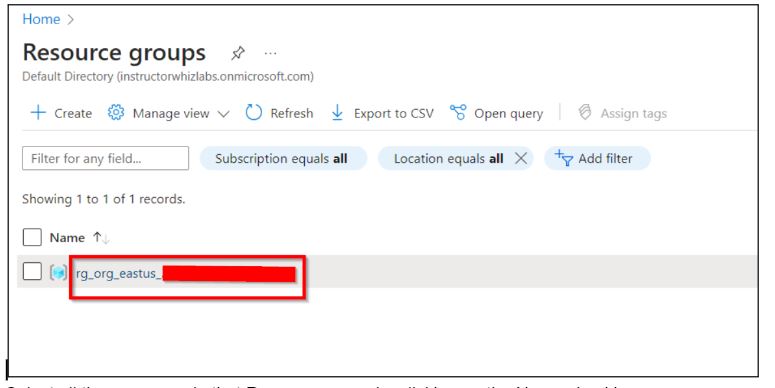
Click on the name of the resource group.
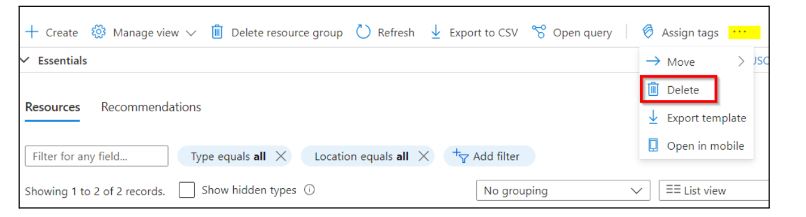
Select all the resources in that Resource group by clicking on the Name checkbox.
Click three dots on the right and click Delete.
Now type Delete to confirm deletion.
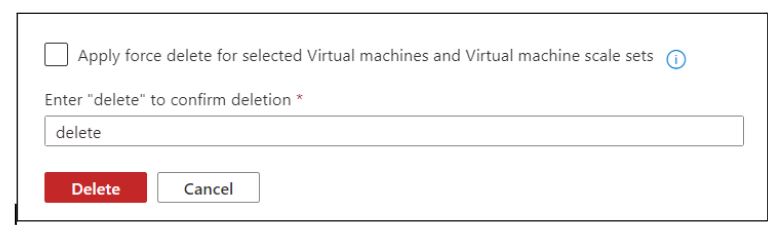
Confirm Deletion.
Azure NSG Best Practices
It can be difficult to operate with numerous NSGs, particularly if you have to comprehend the rules that are in place while your network traffic is controlled by two or more NSGs. However, you can manage Azure Network security groups more skillfully if you adhere to a few recommended practices.
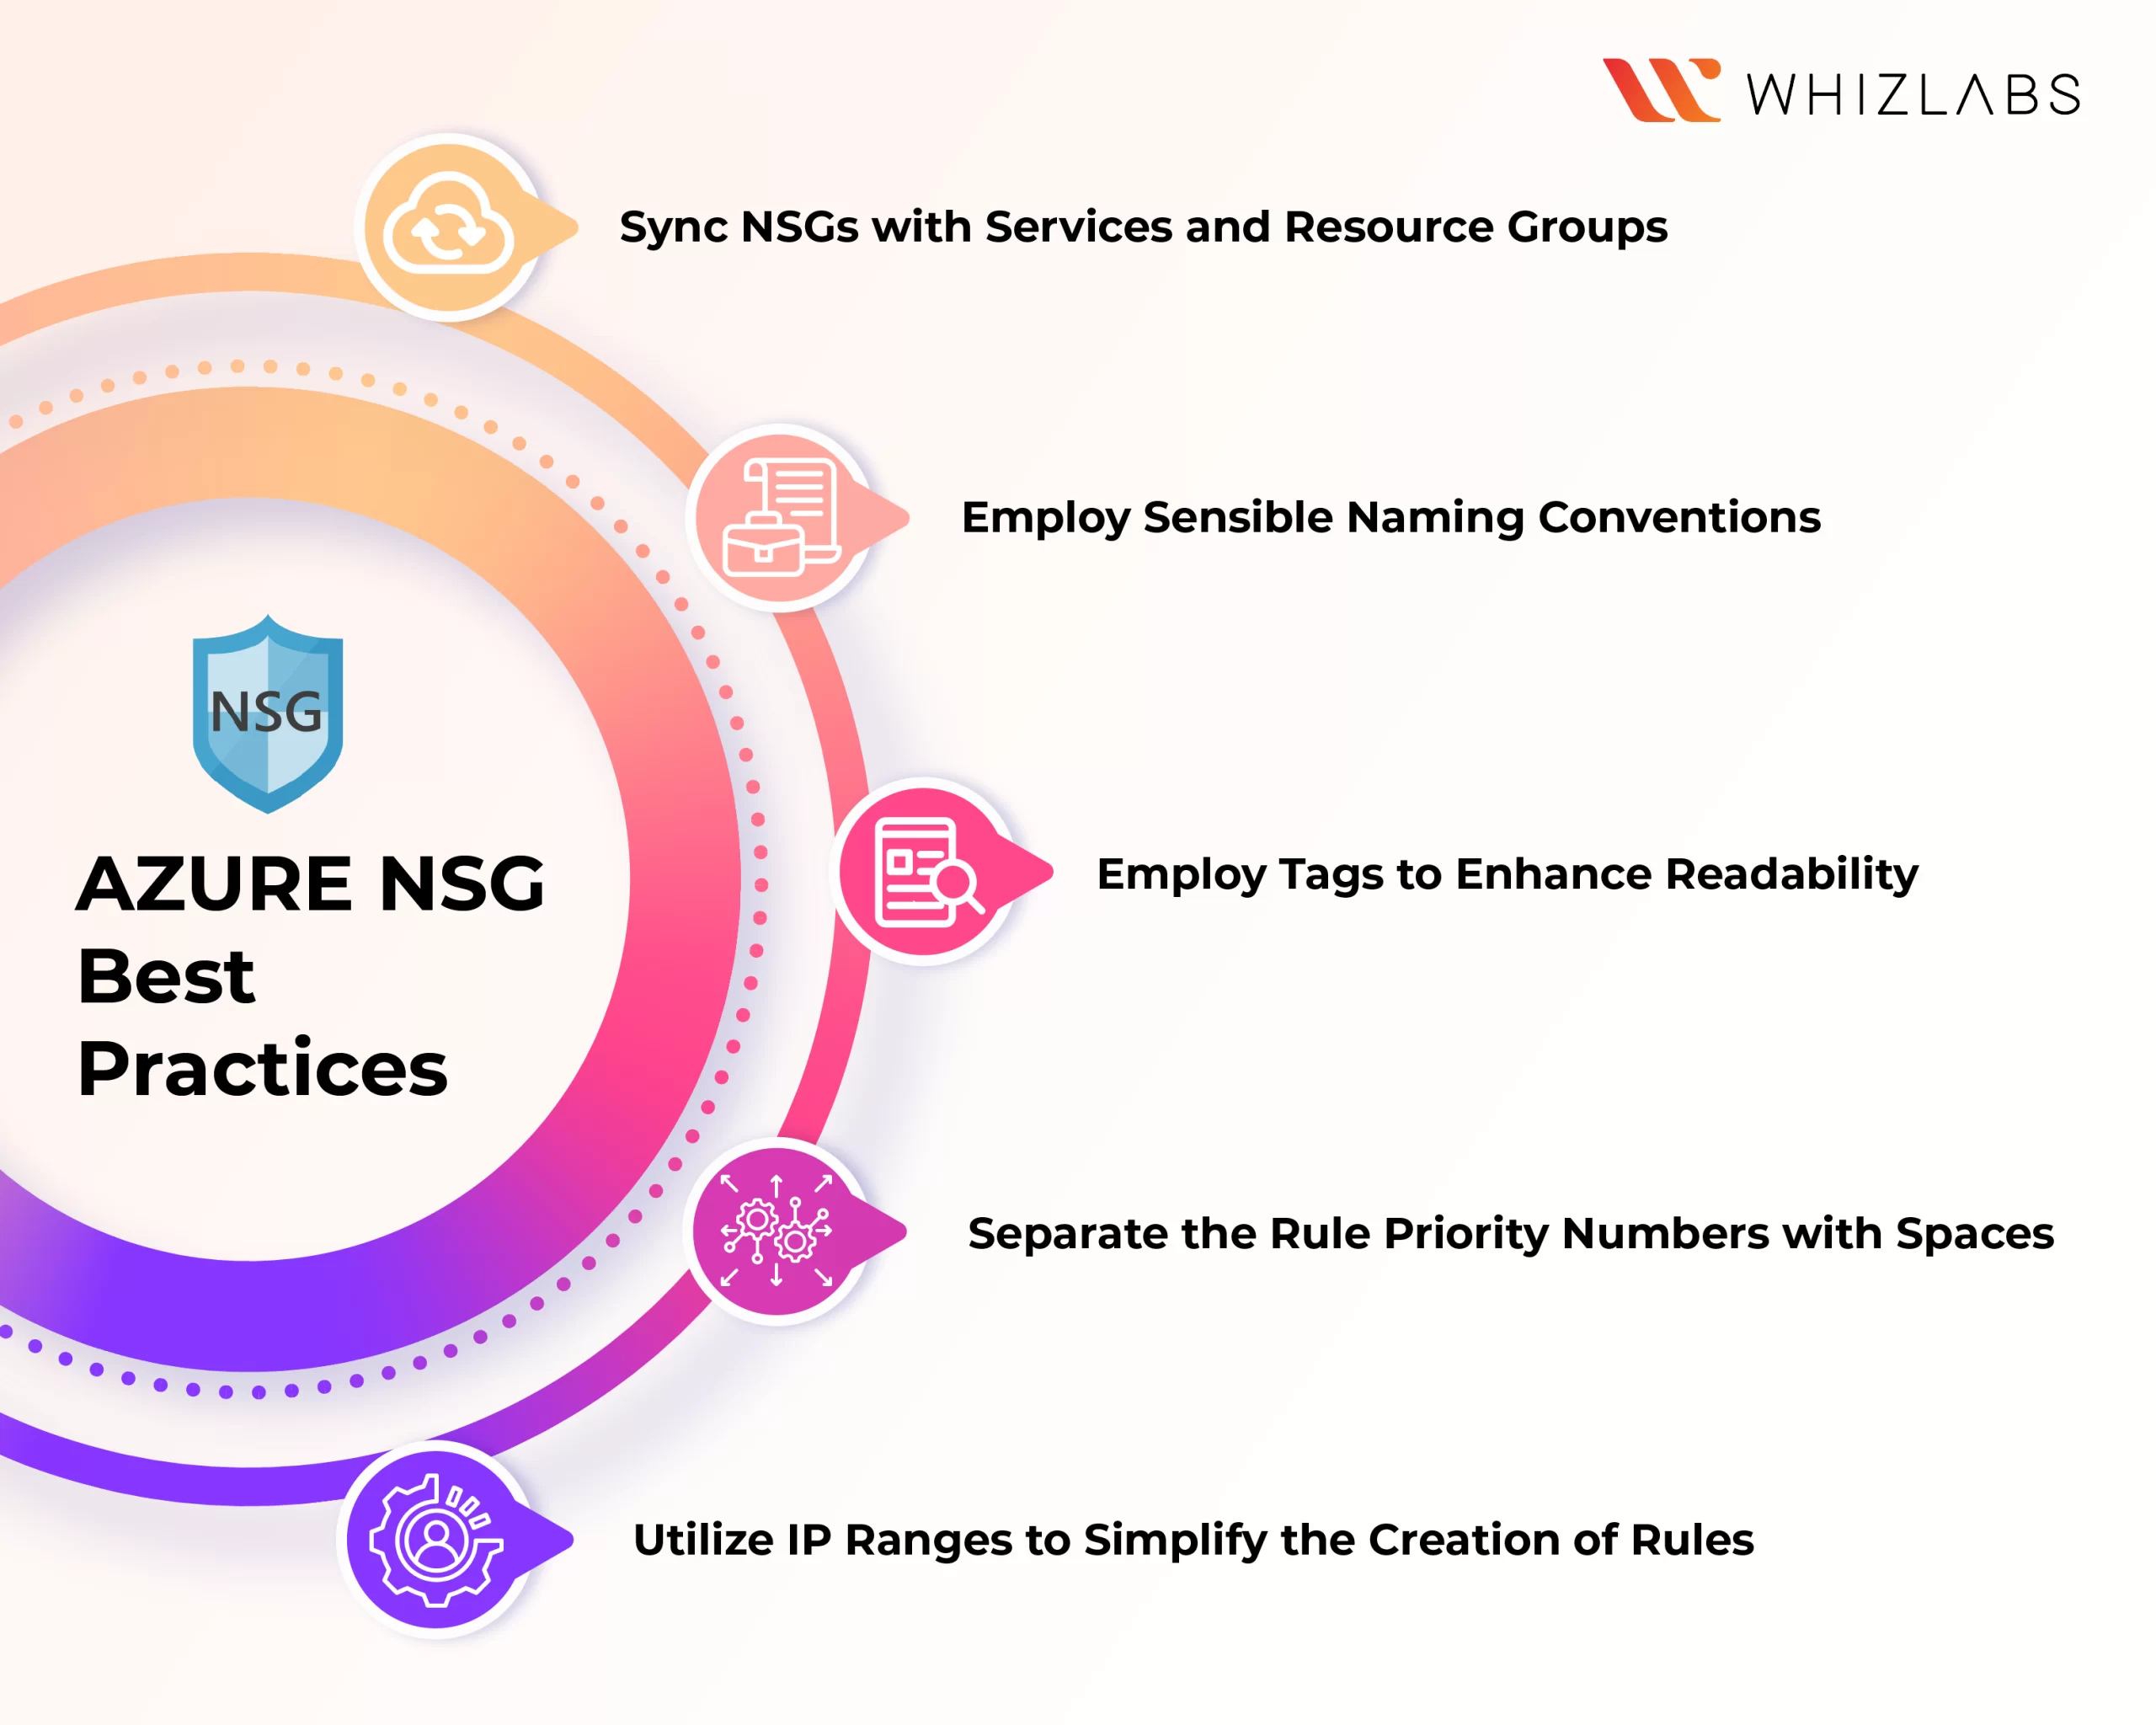
Sync NSGs with Services and Resource Groups
Not all Azure resources hosted on virtual networks require you to configure an NSG. You could simply manage all of your rules on the VNet or subnet level, according to your use case. On the other hand, maintainability must be considered.
For example, since you do not have to take into account any other NSG rules, handling all of the access rules in just one NSG can appear easier.
On the other hand, as you scale, managing hundreds of allow and deny parameters might become challenging for an NSG with up to 1,000 rules. This intricacy may therefore result in errors and misconfigurations.
Similar to any other technological implementation, the strategy and the structure must coincide. Be careful to consider your NSG rules’ maintainability when you design your Azure security plan.
Employ sensible naming conventions
Azure offers you a great deal of resource naming flexibility. The amount of work required to maintain your Azure setup will go down if you name your Azure Network security groups in a way that gives the reader sufficient context.
For instance, it is much simpler for support to pinpoint an NSG named NSG-SRV-WEB-01 than it is to recognize it as NSG01 if you would like to activate an NSG for a virtual machine (VM) called SRV-WEB-01.
Utilize IP Ranges to Simplify the Creation of Rules
With Azure NSGs, you can input a range or only one IP address and port. Use ranges rather than individual addresses whenever possible to reduce the amount of rules you have to write and maintain. However, using one IP address and port is advised if you need to limit access to a specific resource.
Separate the Rule Priority Numbers with Spaces
As previously said, rules are processed by Azure NSGs according to priority, with lesser numbers being processed first. As a result, while drafting rules, include sufficient room between your top choices when you need to draft a rule that needs to be processed before one that comes before it.
Employ Tags to Enhance Readability
Use virtual network service tags when you need to manage several objects. A collection of IP address prefixes associated with a specific Azure service are represented by these Azure resources.
For instance, “VirtualNetwork” denotes the full range of VNet addresses, and “Internet” denotes all publicly routable external IP addresses. It is therefore easier to interpret your NSG rules if you use the tags in the source and destination parameters.
FAQs
Is Azure NSG stateful or stateless?
An Azure NSG is a stateful packet filtering firewall, and it helps you to manage the access based on a 5-tuple approach.
What is the limit of the Azure network security groups?
A standard Azure subscription can indeed have up to 5,000 Network Security Groups (NSGs), and each NSG can have 1,000 rules(maximum).
How much do Azure network security groups cost?
Network Security Group usage is complimentary, but regular charges for data ingress and egress are applicable.
Conclusion
Hope this blog provides a comprehensive guide on creating an Azure Network Security Group.
- Study Guide DP-600 : Implementing Analytics Solutions Using Microsoft Fabric Certification Exam - June 14, 2024
- Top 15 Azure Data Factory Interview Questions & Answers - June 5, 2024
- Top Data Science Interview Questions and Answers (2024) - May 30, 2024
- What is a Kubernetes Cluster? - May 22, 2024
- What are the Roles and Responsibilities of an AWS Sysops Administrator? - March 28, 2024
- How to Create Azure Network Security Groups? - March 15, 2024
- What is the difference between Cloud Dataproc and Cloud Dataflow? - March 13, 2024
- What are the benefits of having an AWS SysOps Administrator certification? - March 1, 2024