In the landscape of cloud computing, security is of great concern for both small enterprises and large organizations.
AWS Identity and Access Management stands as a pillar and plays a pivotal role by ensuring that enterprises and organizations carry out their daily activities in the cloud environment and always remain secure.
In this blog article, we will discuss IAM’s key features and provide a hands-on demo of creating an IAM user, and let the user assume a role.
Stay tuned!
Understanding AWS IAM
AWS identity and access management (IAM) is a service that helps us to securely control access to AWS resources. This is the way that we can authenticate and be authorized to access AWS services. We use the IAM service to control who is authenticated (signed in) and authorized (given permission) to perform any API action on AWS resources.
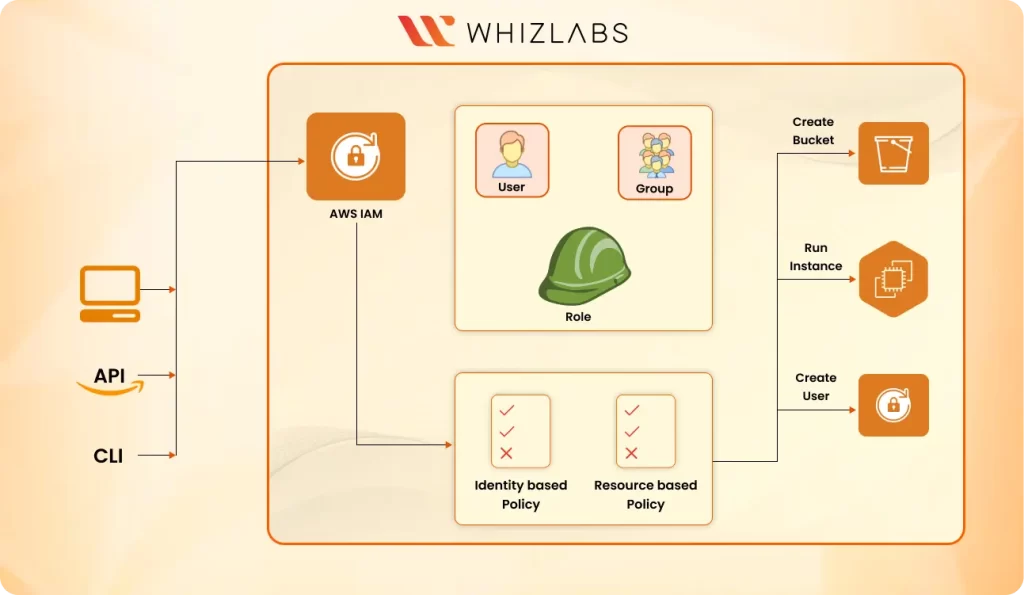
Key Components of AWS Identity and Access Management
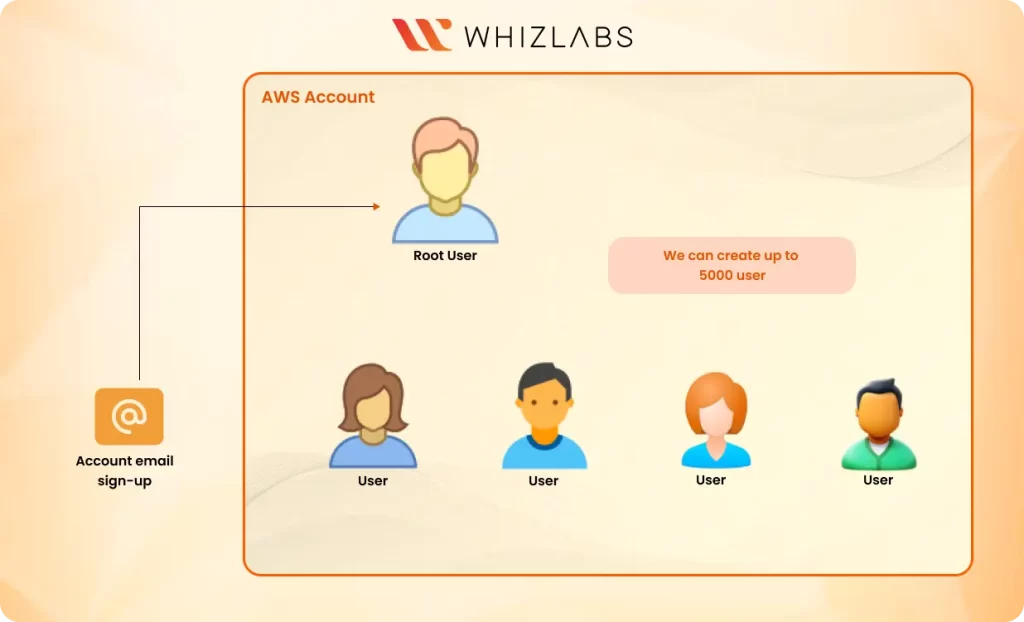
User: these are identities in the service. they present individuals and entities that interact with the AWS services. IAM allows us to create and manage users, assign unique credentials such as passwords and enables us to define permissions through policies.
An IAM root user is the first user you create when you first sign in to your AWS account with your email address and your credit card. The root user has full control of your AWS resources and can perform any action.
It is always best practice to avoid using the root user for your daily operations, but instead, create an IAM user and assign administrative privileges. It is also a best practice to provide a second-factor authentication for the root user account.
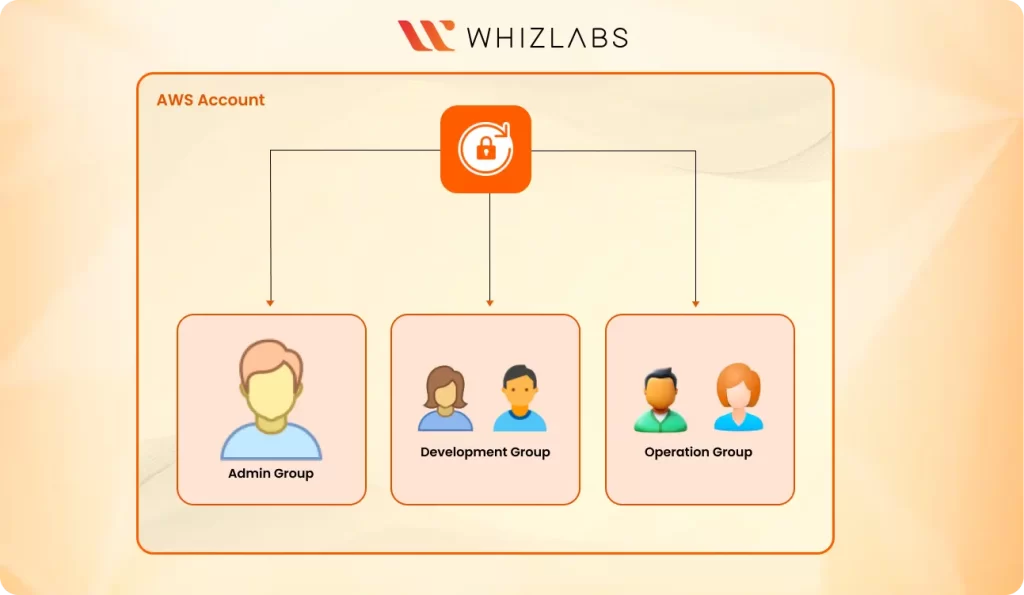
Groups : A group is a way of organizing users. It contains users with similar permissions and job requirements. The main function of a group is not just to organize users but instead to manage permissions for each user individually, we simply assign permission to the group. this simplifies access control and ensures consistency across all users with similar job roles. A user can be a member of up to ten groups.
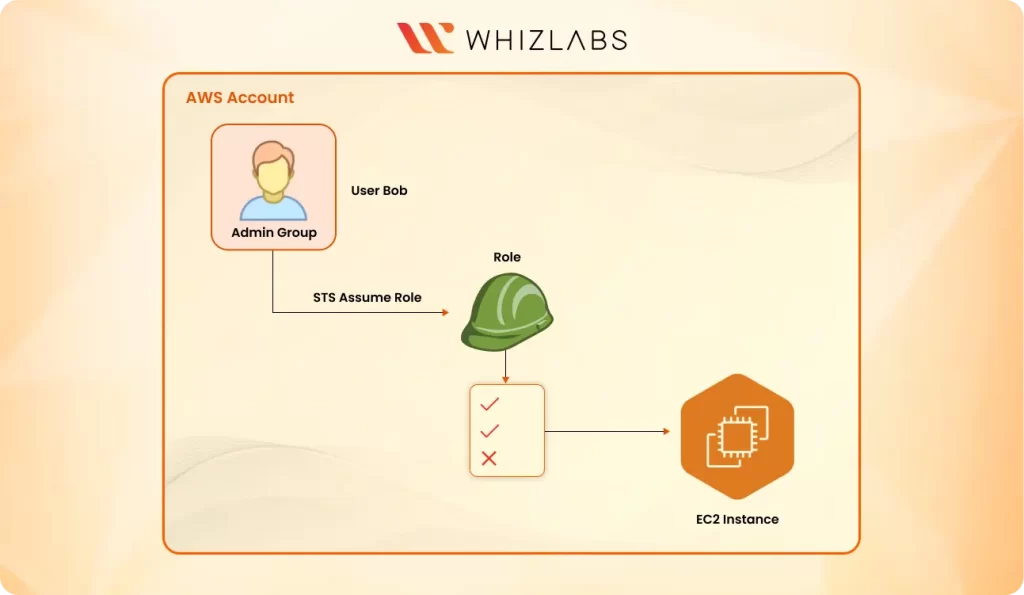
Roles: Roles are another very important part of IAM used to delegate permissions to AWS entities that are not users. Roles are temporary credentials and can be assumed by users, or other AWS services based on defined policies. An IAM role shares similarities with an IAM user as both are AWS identities with permission policies dictating their actions within the AWS environment.
Policies: These are JSON documents that define permissions to be performed on an AWS resource. Policies can be attached to users, groups, roles, or even AWS resources to specify what actions users or other entities can perform on these AWS resources.
We have Identity-based policies that are attached to AWS entities like IAM. These policies define what actions these entities can perform on AWS resources.
We also have resource-based policies. These policies are embedded directly into AWS resources and define what actions can be performed on these resources. If an IAM user has an allow effect to operate on an AWS resource and the resource policy has a deny effect to the specific user, that user will not be able to perform that operation on the AWS resource.
Also Read : How to Use IAM for Securing the Access to AWS Resources?
With the small overview, let’s now get to some hands-on exercises.
We are going to create an IAM user and add the user to a group with no permission to ensure the user has no authorization to perform any action on AWS. We will then create an I AM role and let the user assume the role and gain temporary credentials to perform actions on specified AWS resources.
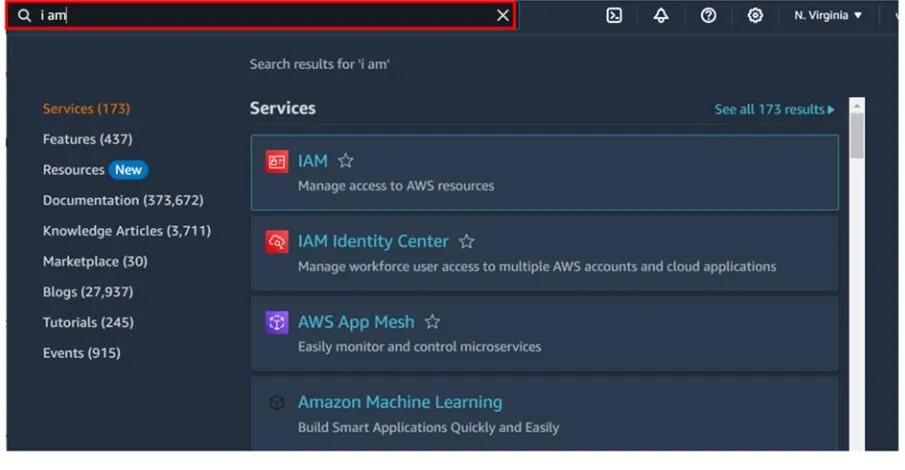
Log in to the console https://aws.amazon.com/console/ as an I am a user with administrative privileges. Then in the search box, type IAM and select it under services.
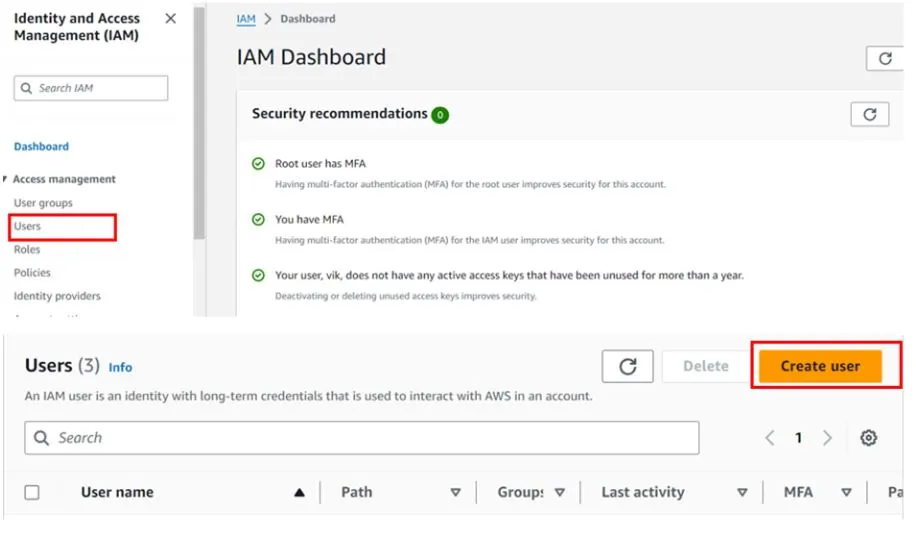
In the IAM console on the left side of the navigation pane, select users then click Create User.
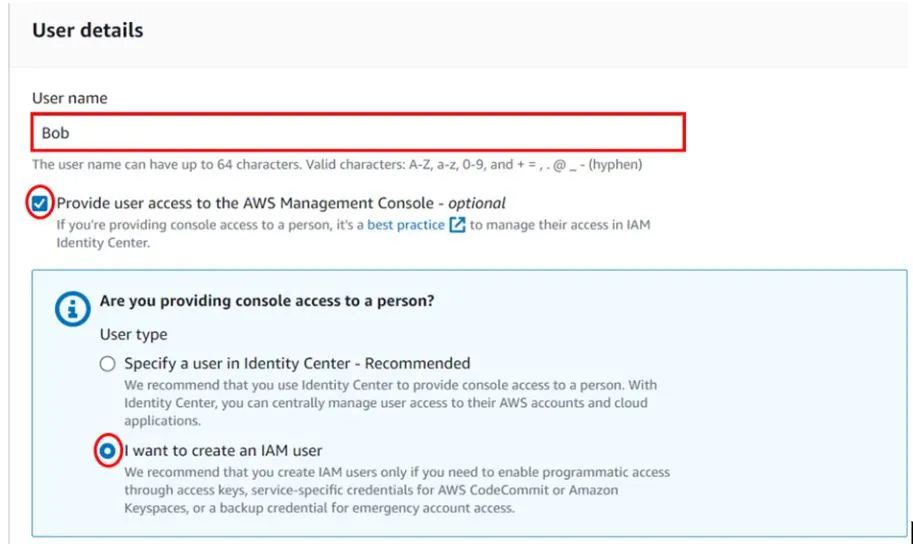
In the create user dashboard under user details, give your user a name, I will call my user Bob. We will provide this user with management console access so check the box on Provide user access to the AWS Management Console. We are creating an IAM user so click the radio button on I want to create an IAM user. Scroll down.
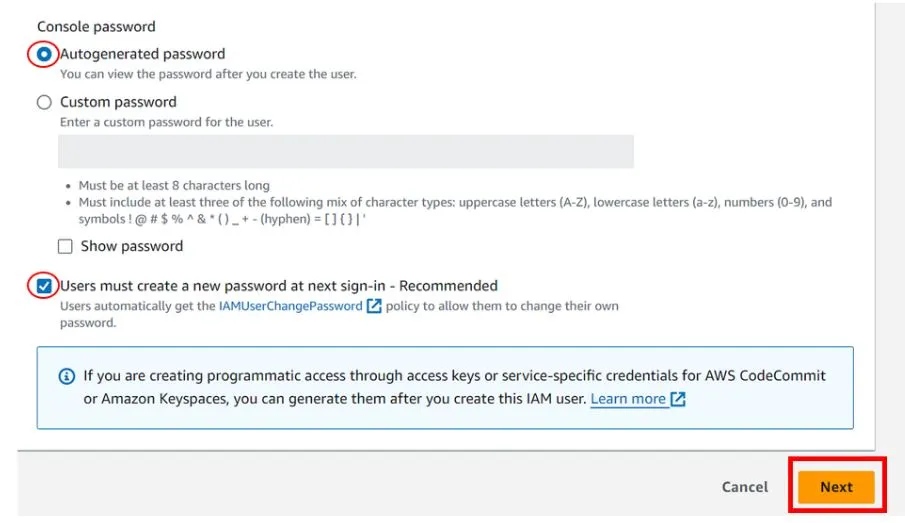
Under the console password, you can select autogenerate. Then click the button on Users must create a new password at the next sign-in this is recommended. Click next.
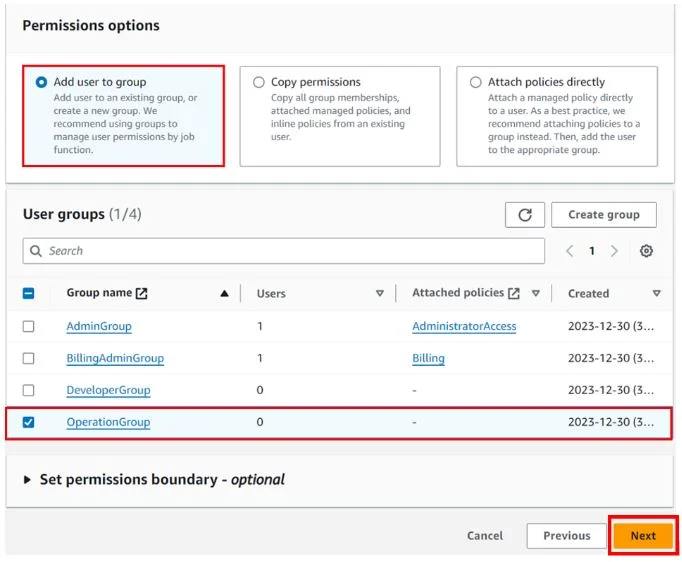
At this point, you can ensure this user has no permission, and click add user to group. Previously had created a group called the operations group and attached no policies to the group.
As you can see.

If you don’t have a group, you can go ahead and create one or just click next.
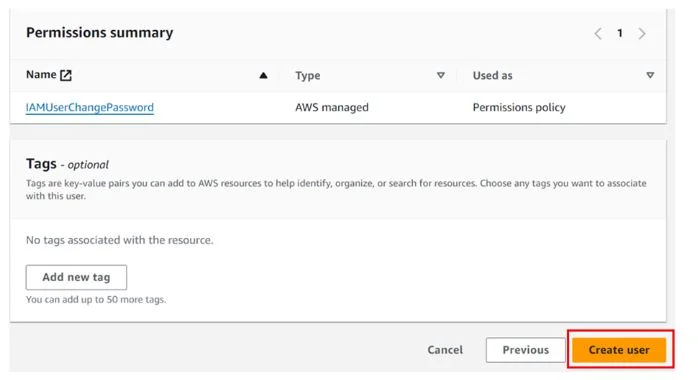
Now review leave tags as optional then click create user.
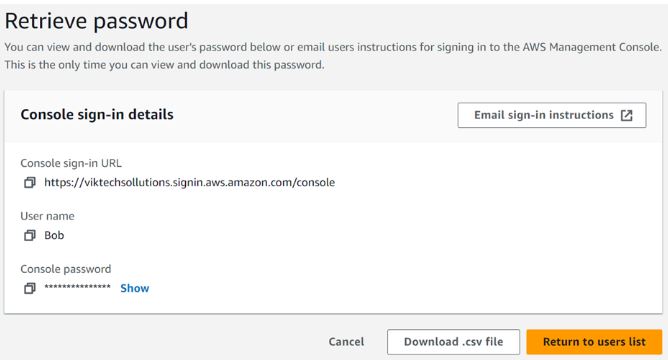
User creation is successful.
Retrieve the login credentials and log in as the new user.
Signing in as the new user Bob in a new browser window. Remember we gave the user permission to change his password during the first login attempt.
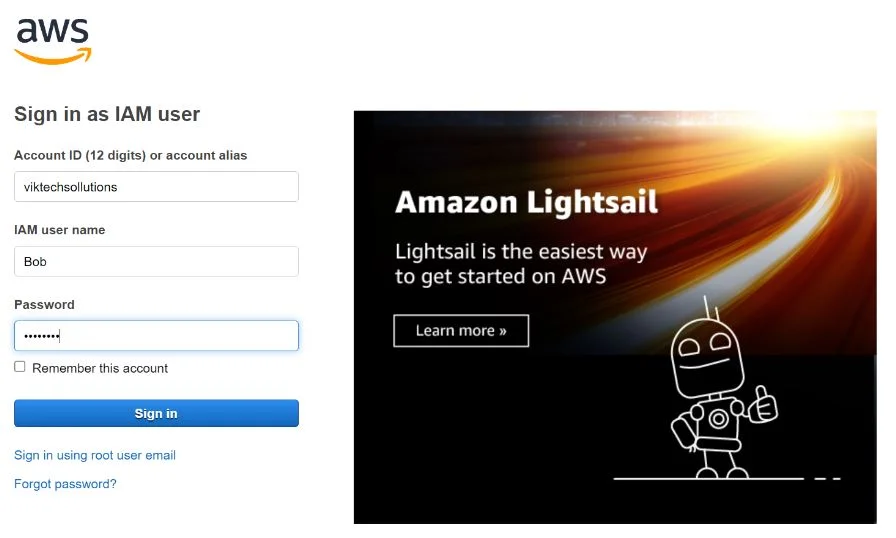
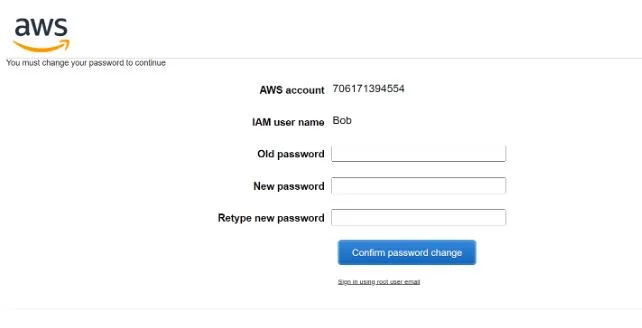
On clicking sign in. User Bob is prompted with the console page of you must change your password before you continue. Follow the instructions. Copy the old password you copied from the console while creating the user then assign Bob a new password. Remember this is the only permission Bob can perform.
After following the login for our new user Bob, we are now in the console as user Bob as you can see.
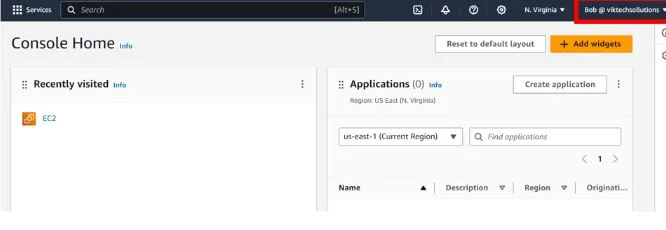
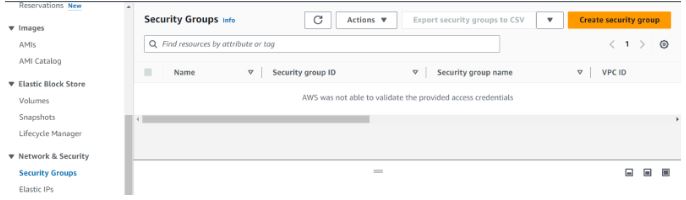
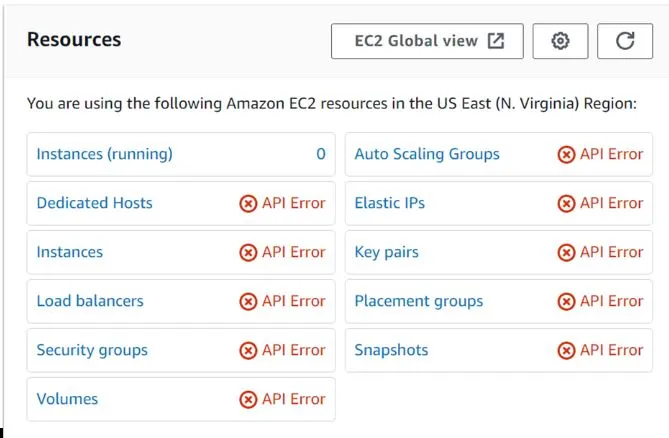
Remember we didn’t assign any permission to this user and his operations group. When Bob tries to access the EC2 console, he gets API errors meaning access is denied.

Logged in as user Bob click security groups in the left navigation pane of the EC2 console. We can see we can’t access security groups since credentials could not be validated.
We will create a role for full access to EC2 and Bob will now log in and do anything in the EC2 console.
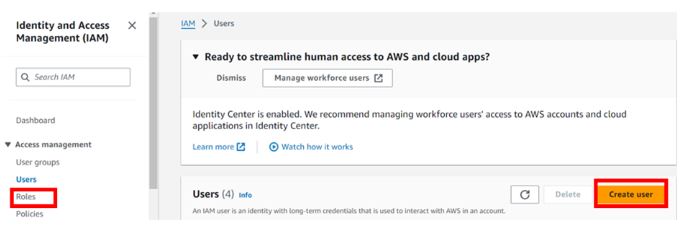
Log back in as an Admin user, in the IAM console click roles. Then click Create Role.
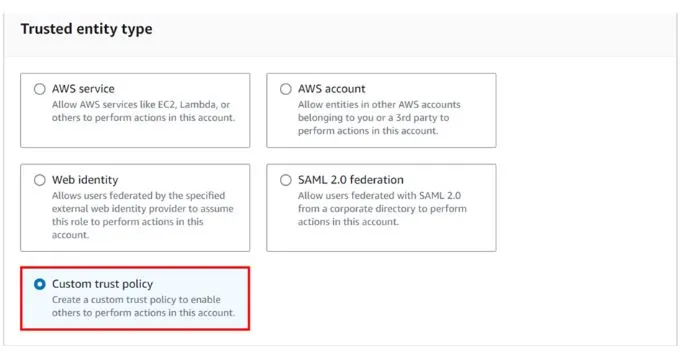
In the create role dashboard under trusted entity select custom trust policy.
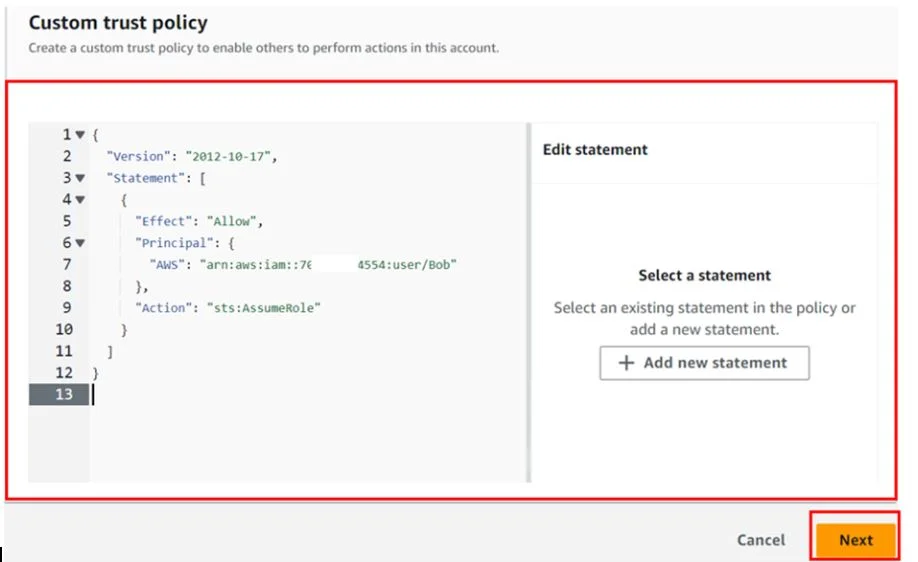
Then scroll down in the policy editor, and paste in this code. Remember to change the ARN of your user then click next.
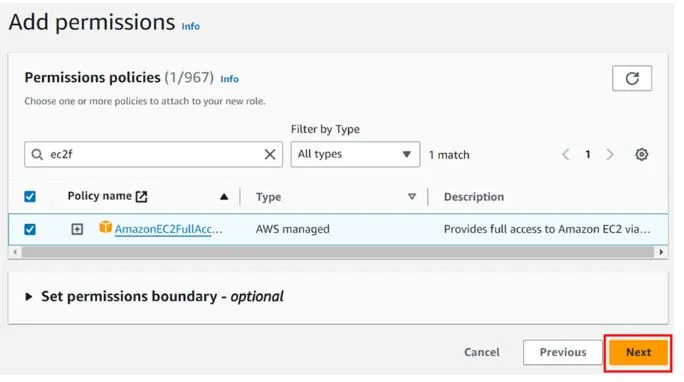
Then under add permission select EC2 full access then click next.
In the role details under role name, give your role a name. Then leave the description as optional.
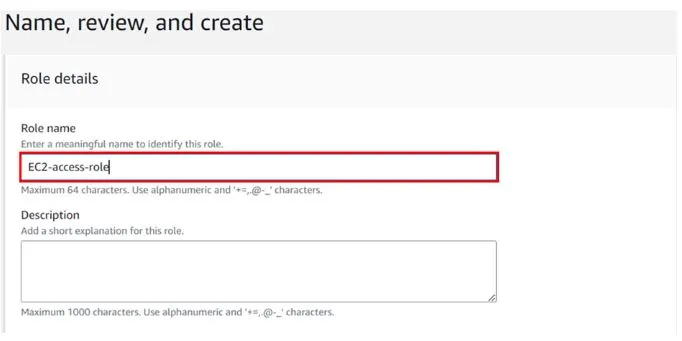
Review, scroll down, leave tags as optional then click Create role.
Our role has been created and you can click on view role to view it.
Now having created this role, we will make Bob assume this role and get the I am permission’s to be able to work in the EC2 console.
To assume a role, we need the AWS account number and the name of the role. So, copy your AWS account number and the role name to your clipboard.
Now logged in back as Bob, go to the top-hand right coner then select the drop-down button as shown below.
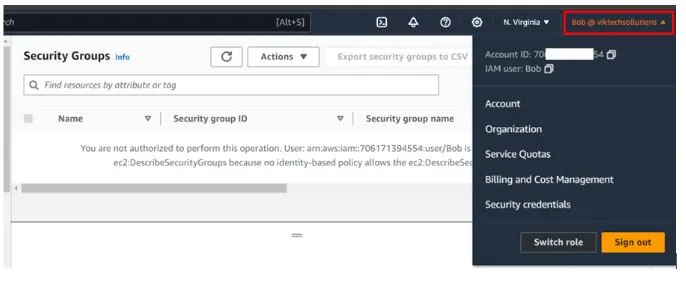
Then close to the sign-out choose switch role.
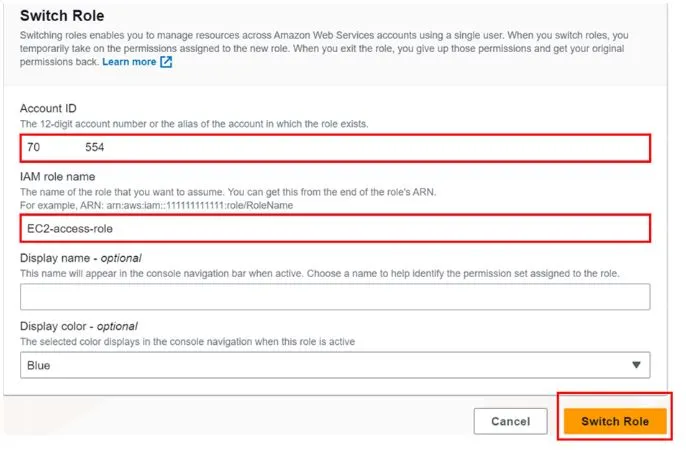
You will be brought to the switch role dashboard, remember I told you to copy your account ID and role name to your clipboard, so paste them in the required fields below. Display name and display color are optional. Click switch role.
As we can see at the top right corner, we have now switched roles and no longer logged in as Bob but logged in as EC2-access-role.

Now still logged in as Bob, we can now do whatever we want with the EC2 console.
So now let’s try to open the EC2 console if we will still get the API errors.
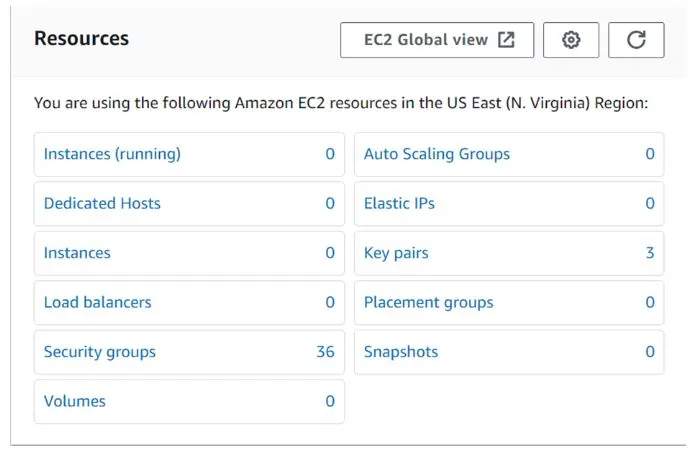
There we go, all the API errors have gone and Bob can go ahead to check security groups and even launch an EC2 instance.
So, we get that once you assume a role, you have all the permission assigned to that role. We can always switch back to our previous state.
To switch back let’s go again and select the drop-down button at the top right corner then just click switch back role as shown below.
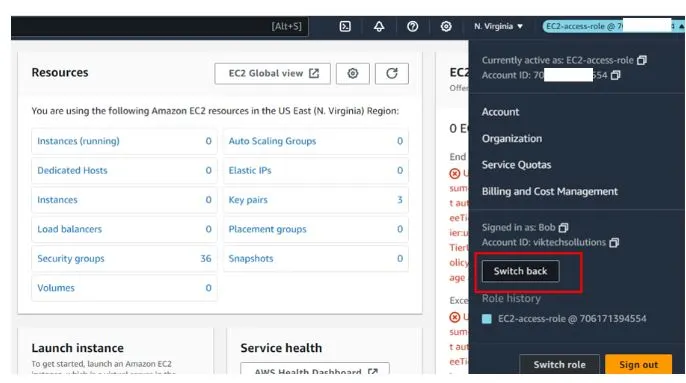
By switching back, our user Bob has gone back to his original state where he had no permissions and we can now see all the API errors are back.
So that’s it. Clean up. This brings us to the end of this blog article.
Conclusion
Hope this blog covers the leveraging AWS Identity and Access Management (IAM) which is essential for maximizing cloud security. By optimizing IAM policies and permissions, we can enhance control and authorization, ensuring that only authorized entities access AWS resources.
By leveraging AWS IAM best practices, organizations, can maximize security and achieve compliance in the cloud landscape.
Thanks for reading and stay tuned for more!
If you have any questions concerning this article, please don’t hesitate to reach out to us.
Thank you!
- Exam Tips for AWS Data Engineer Associate Certification - April 19, 2024
- Maximizing Cloud Security with AWS Identity and Access Management - April 18, 2024
- A Deep Dive into Google Cloud Database Options - April 16, 2024
- GCP Cloud Engineer vs GCP Cloud Architect: What’s the Difference? - March 22, 2024
- 7 Ways to Double Your Cloud Solutions Architect Role Salary in 12 Months - March 7, 2024
- Job and Career Path for Google Cloud Certified Professional Cloud Architects - March 6, 2024
- How to turn on intelligent Threat Detection using Amazon GuardDuty - March 5, 2024
- How to create and configure an Amazon EC2 Auto Scaling using the AWS Management Console - March 4, 2024